Gourmet Beef Burgers

by Susan Smith in , ,


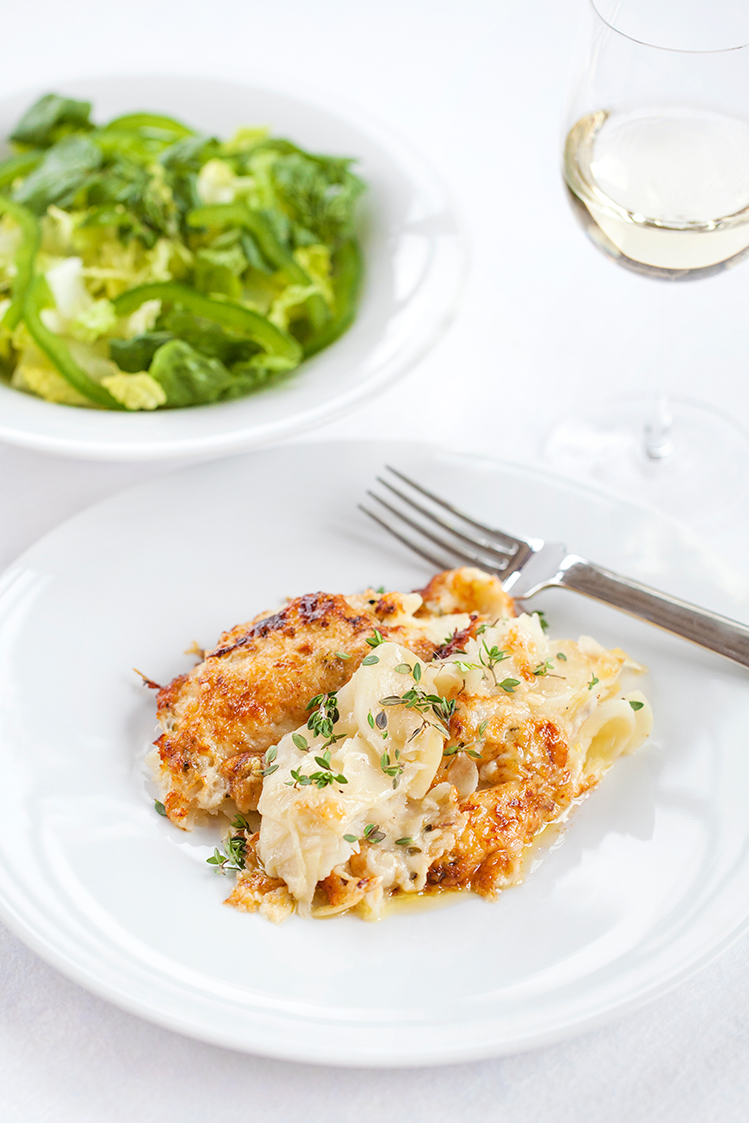
Almost every evening after dinner, we go for a three mile walk around the outskirts of the village where we live. Aside from helping us to attain a self-imposed daily fitness goal of at least 10,000 steps, it’s a wonderful opportunity to say ‘hello' to numerous four-legged friends that we regularly meet and greet along the way. Amongst them, four horses, some special canine characters - Star, George, Rosie, Eric, Oscar and Alfie to name but a few - grazing sheep, the llamas that live with the sheep to protect them from foxes, and numerous cats who, when they see Sarah approach, literally run over to her to be fussed and stroked. There’s a suggestion of Walt Disney about our walks…save for a couple of spoilers.

The first is that one of ‘our’ horses is old, alone and extremely dirty. Her mucky face, constantly weeping eyes and un-groomed body attracts hoards of flies that readily exploit her poor condition and clearly irritate her beyond measure. She is my favourite. A gentle soul who, when called, snorts, nickers and blows us greetings as she slowly and tentatively makes her way from the farthest end of her field to receive the healthy snack of organic apples and carrots that awaits her. Until last week, we thought she was incapable of moving any faster, but then she surprised us. One evening after she’d been fed, she lay down on the ground in front of us and did what can only be described as a ‘victory roll’ of appreciation. The next day, as we walked away, she came with us - galloping at full speed alongside the hedge separating her field from the lane where we were continuing our walk. Truly heart-warming! It’s clear to us that almost all animals love and want to be loved.

The second is the bullocks that used to stand cheek-to-jowl in the adjacent over-crowded shed to watch our nightly horse feeding ritual almost certainly craved some loving act of kindness. Sadly, it wasn’t ours to give. These permanently confined sentient beings were kept for months on end, unable to move freely and without access to fresh grass even at the height of last summer’s heatwave. We always stopped to talk to them and, looking into their soulful eyes, their boredom and neglect was almost tangible. They’re gone now…we presume raised for beef and slaughtered. Although more fortunate than factory-farmed animals, the unnatural way these animals were forced to live is a moral mistake that leaves us with very little appetite for meat.

For the sake of Sushi the cat, whose health naturally depends on meat and fish, I’ve had to come to terms with the fact that all animals survive and thrive by the seemingly barbaric act of killing other animals lower down in the food chain. Twice, through dietary interventions I’ve brought her back from the brink of “incurable” conditions that, in the vet’s opinion, warranted euthanasia. If food is medicine, chicken bone broth appears to be an elixir for health and longevity. Feeding it to Sushi every day for the past two years has seemingly transformed her back to ‘kittenhood’…or so you’d think, if you met her. Her coat is shiny, her appetite hearty and her energy levels amazing. Stands to reason, whatever she’s having, we all need some of it!

The Primal food laws are: Eat whole, real foods, avoid unnecessary carbs and don’t fear fat and animal protein. We prefer to eat a primarily plant-based diet but Sushi’s remarkable recovery has persuaded me to make my peace with eating more animal protein. As well as a regular supply of chicken bone broth for Sushi and ourselves, I also cook a couple of meals a week that centre around organic, grass-fed red meat (primarily for its iron and vitamin B12 content), free-range organic chicken or sustainably-caught wild fish (for Omega 3 fatty acids). Animal products are only as nutritious as the food they are fed on and the care they get while being raised so it behoves health-conscious, compassionate cooks to put their money where their mouth is and support organic farming. Buying organic food is not expensive when you factor in the extra cost, time and dedication that organic farmers expend in producing nutritionally dense meat, milk, eggs and cheese from animals that are raised in a natural environment with full consideration for their welfare.

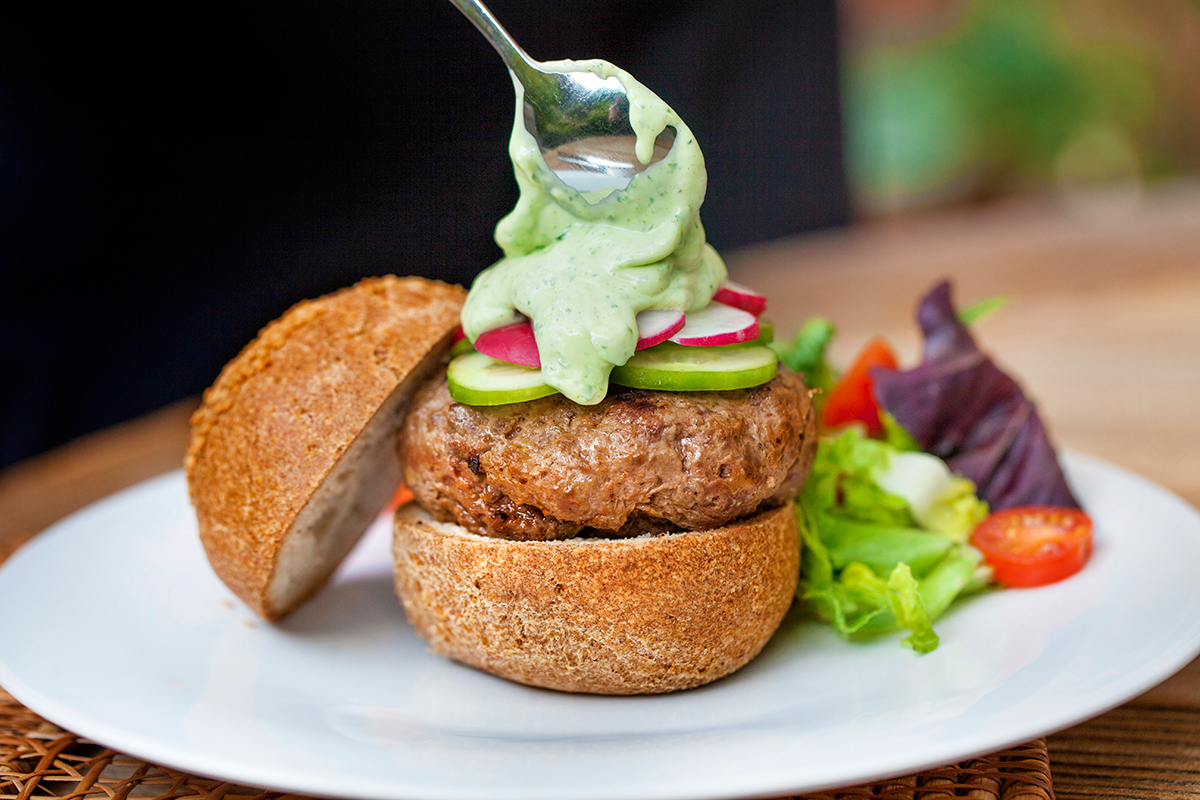
Today’s post for Gourmet Beef Burgers is a celebration of ‘Organic September’. The award-winning recipe for the ready-made beef burgers isn’t mine but it does provide the perfect opportunity for a well-deserved shout out for both Brown Cow Organics and Abel & Cole

For convenience, I buy Brown Cow’s Guernsey beef burgers from Abel & Cole. Unfortunately, when they arrive vacuum-packed they look more like beef ‘splats’ than the gourmet burgers featured on Brown Cow Organic’s website! First impressions count, so the first job is to quickly re-shape them. Note: Any gourmet burger worth its salt must have depth to it to fully appreciate its juicy succulence when cooked and should only be defined “gourmet” if it requires ludicrous amounts of paper towel or napkins to eat it!

For maximum gustatory pleasure, the toasted keto bread rolls and homemade basil mayonnaise are mandatory. Not a problem since both are best made in advance. To finish, just whiz a large handful of fresh basil leaves into homemade mayonnaise a couple of hours before serving and toast the halved bread rolls in a dry griddle pan at the same time you’re cooking the burgers.

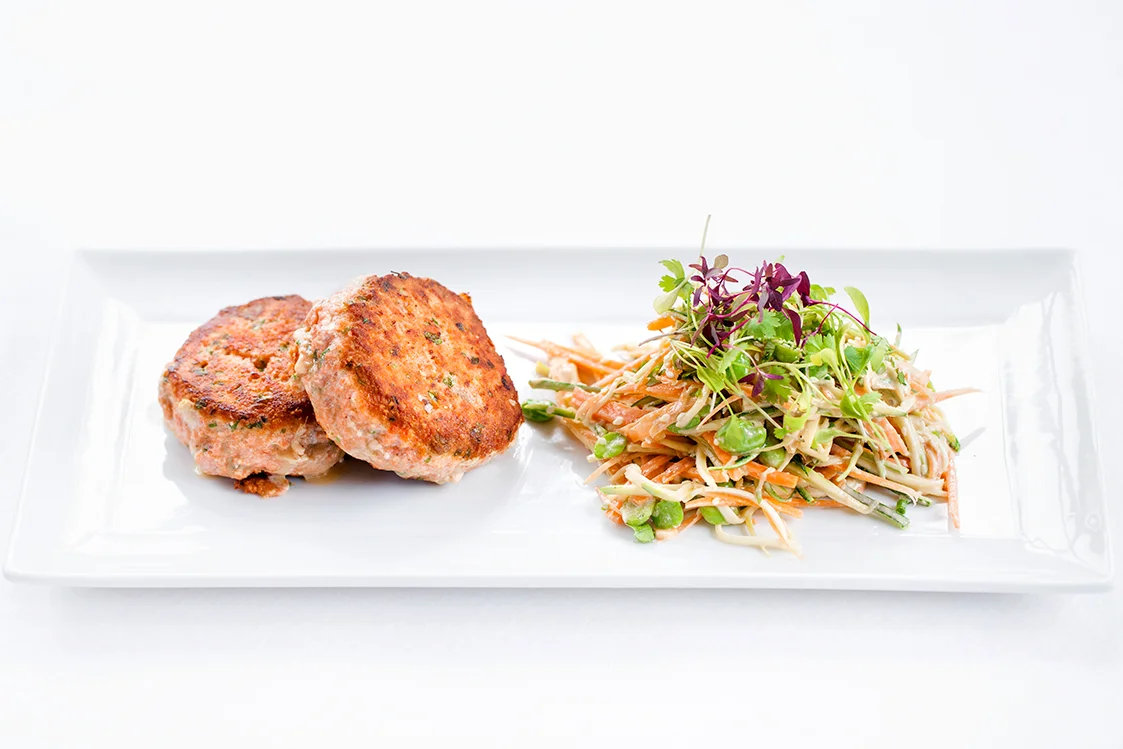
After selecting your preferred salad accompaniments, e.g. lettuce, watercress, rocket, slices of tomato, radish, avocado or cucumber, you’re ready to do an ‘assembly job’. I like to stack the ingredients ‘sky high’ - to the extent that it usually requires a bamboo skewer to hold everything together. Making them visually enticing is the primary objective, not ease of eating! Only Sarah ever manages to work her way through an entire burger whilst holding it in her hand. But even if you can hold it together, there’s no chance of being la-di-dah when tucking-in to one of these bad boys! 

Fast, fun food doesn’t have to be ultra processed junk. Very satisfyingly (to me at least), these keto-friendly Gourmet Beef Burgers are light years away from a ‘Big Mac’ or the ironically named ‘Happy Meal’ for kids. There’s nothing ‘happy’ about filling a child’s belly with beef from cows raised on GM crops. Or encouraging them to eat a disturbingly sweet-tasting burger bun made from damaging-to-human-health ingredients such as high fructose corn syrup and/or sugar, bleached wheat flour (genetically modified to withstand being sprayed with Glyphosate - a herbicide proven to cause cancer), toxic soybean and canola oils (also genetically modified). Or turning a blind eye to the pro-inflammatory effects of the polyunsaturated vegetable oil that Mackie D’s use to cook their fries. What you need to know is that MD’s fries aren’t just potato, salt and oil as you might imagine, but are manufactured with seventeen other “shocking” ingredients. Still “lovin it?” I thinketh not!

Whereas, Sarah recently found herself spontaneously retching at the mere smell of a McDonalds (quite rightly!), she would tell you that these Gourmet Beef Burgers are one of “the best meals ever!” Serve them at an informal gathering of friends or family, perhaps with some low-carb ice cream for dessert, and I doubt you’ll hear any dissenting voices drowning out enthusiastic grunts of approval.

Sarah’s photos are probably the best way to show you how to make these Gourmet Beef Burgers. Have fun!

grass fed organic burgers.jpg

Gourmet Beef Burgers (serves 4)

Ingredients

2 packs (2x 180g) Brown Cow Organics Guernsey Beef Burgers

2 tbsp organic, grass-fed gheefor frying 

4 keto bread rolls

Ingredients - to serve

Salad e.g. lettuce, cucumber, tomatoes, radish, avocado, watercress, rocket etc. 

4 heaped tbsp organic mayonnaise (preferably homemade - see Notes below)

10 g fresh organic basil leaves

Plus,

4 mini bamboo skewers - optional

Instructions

Pre-make the keto bread rolls and 3-minute mayo up to 24 hours in advance.

Several hours before you intend to eat, re-shape the ready-prepared portions of beef into burgers about 3.5” in diameter and x 0.75” deep. Cover and refrigerate until half an hour before you want cook them. Then take them out of the refrigerator and let them sit at room temperature.

Whilst the burgers are ‘coming to’ prepare the salad ingredients, cover and set aside.

Using a hand-held stick blender, combine the fresh basil leaves and mayonnaise together until smooth and green. Set aside and keep cool.

Melt the ghee in a large frying pan over a high heat. Meanwhile, halve the bread rolls and place them cut side down into a dry frying or griddle pan set over a medium-hot heat.

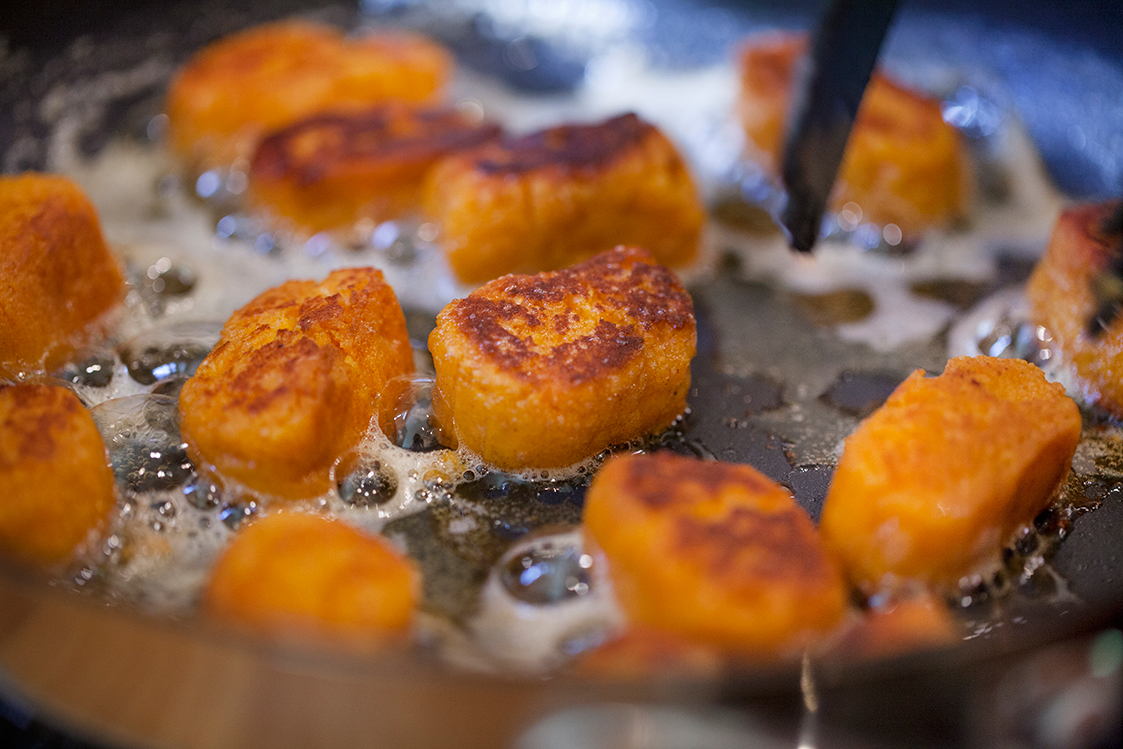
When the ghee is fully melted and sizzling, place the burgers into the pan and fry for 4 minutes. Carefully turn with the aid of a spatula and cook the other side for another 4 minutes.

From time to time, check the keto bread rolls. There’s no need to turn them over - you just want them hot and toasty.

organic burger recipe.jpg

Once the beef burgers have been fried on both sides for an initial 4 minutes, flip them over again and cook the first side for further 2-4 minutes. Flip again to cook the other side for 2-4 minutes more. N.B. Total cooking time is 12-16 minutes, depending on whether you want your burgers to be slightly pink in the middle or completely cooked through. If in doubt, use a sharp knife to cut into one to check that it’s done to your liking.

Place the bottom halves of the toasted bread rolls on to 4 warm serving plates. Build as much height as you can by layering the salad on top of the beef burger. Finish with a large dollop of basil mayonnaise before pressing the other half of the bread rolls firmly down on top.

Pass the problem of imminent collapse over to your guests by skewering the burgers together from top to bottom with mini bamboo skewers.

Serve with plenty of paper napkins and don’t mind messy eating!

Notes

I’ve updated and improved Primal Plate’s original 3-Minute Mayonnaise recipe by changing-up the oils and altering their amounts. The rest of the ingredients and instructions remain the same. Here’s the revised recipe (with changes in bold):

3-Minute Macadamia Nut Oil Mayonnaise

Ingredients

2 organic eggs 

2½ tbsp organic lemon juice, freshly squeezed

1 tsp organic Dijon mustard

½ tsp sea salt or Himalayan Pink salt

a good grinding of organic pepper 

1-2 drops organic liquid stevia

200 ml cold-press macadamia nut oil

50 ml organic cold-pressed olive oil

Instructions

Place all the ingredients into a tall, narrow container in the order listed above.

Using a hand-held stick blender, blend everything together until it emulsifies into a pale, creamy mayonnaise. Takes about 30 seconds!

Taste and add a little more lemon juice, sea salt and freshly ground pepper, if liked.

Transfer to a glass container and seal with an airtight lid. Use within 5 days.

grass fed organic burger.jpg


Fat 14g  Protein 41g Carbohydrate 0g - per Guernsey Beef Burger

Fat 21g  Protein 13g Carbohydrate 3g - per keto bread roll

Fat 30g Protein 2g Carbohydrate 0g - per serving of Basil Mayonnaise


Cheddar & Feta Frittata

by Susan Smith in , ,


I should be old enough to know better, but after weeks of ignoring nagging voices telling me Primal Plate must be “GDPR-ready” before 25 May 2018, I finally succumbed to the general confusion by sending out an email to all our blog subscribers, which essentially promised to unsubscribe them by default! Oh, how I despise bureaucracy. Does anyone else recall the ridiculous, government-led Y2K millennium bug scaremongering that told us to prepare for the worst? It was all for naught. And what about the TPS (telephone preference service) that supposedly allows residential phone users to register their wish to opt-out of receiving cold calls? In the nineteen years since we signed up it hasn’t made a jot of difference to the number of nuisance calls we receive. Whilst I agree it’s a good thing to have control over who holds my personal information and for what purpose, I think the hoo-ha and perceived threat of this latest EU legislation is just another sledge hammer to crack a nut. The fact is that data protection enforcement has been extremely lax to date and although, in theory, fines of £500k can be imposed on anyone found flouting the law, I‘m willing to bet no-one will be around to successfully police it. Rant over. If you’re reading this blog, I’m happy you’re still with us and my apologies for last week’s needless attempts to put right your current subscription status, which was never wrong to begin with.

If fathoming out GDPR cost me two days of my life this week, yesterday was a complete wipe-out. I was quietly doing my usual morning face-cleansing ritual in front of my magnifying mirror when to my horror, I sat and watched my right eye - as if in slow motion - fill up with blood! No warning, no obvious reason, no pain, no loss of vision but hell’s teeth, it was frightening! Feeling too faint and too scared to go online to investigate, I was left in a state of shock. Was my brain seeping blood? Was I about to have a stroke? Was my bloodied eye permanently damaged? I had never seen or heard of anyone suffering a trauma as unexpected and dramatic-looking before, so when my husband told me I’d had a subconjunctival haemorrhage and it was completely benign, I was both thankful and relieved. Nevertheless, I took it as a warning to slow down and rest. As someone who can accurately be described as health obsessed, it’s humbling to know I’m not always on point.  I share my experience with you because I believe that stress was the most likely cause of my eye ‘pop’. It’s a reminder that the true “price of anything is the amount of life you exchange for it” (saith Henry David Thoreau). From now on I will be more selective!

In the spirit of ‘rest and restore’, I’ve turned to Sabrina Ghayour’s book entitled Feast for today’s recipe for Cheddar & Feta Frittata. A frittata is such a cheap, quick and easy, low-carb, keto meal to prepare and you can use almost any combination of seasonal vegetables with the eggs and cheese and have dinner on the table within half an hour. If I’m feeling really lazy, I don’t even bother with a salad accompaniment. I segment the sizzling frittata still in its pan and simply serve wedges of it with a glass of wine. There are lots of different frittata combos that we enjoy - leeks and blue cheese is another winner - but for now this Cheddar & Feta Frittata with peppers, fresh herbs and chilli should get you into the frittata groove.

spanish omelette.jpg

Cheddar & Feta Frittata (serves 4)

Ingredients

1 tbsp organic ghee organic olive oil or macadamia nut oil

1 organic red pepper

1 organic green pepper

4 organic spring onions, cut into very thin slices from root to tip

200g organic feta cheese, roughly crumbled into 1 cm chunks

100g organic strong Cheddar cheese, grated

4 organic dried chillies, crushed in a pestle and mortar (or organic chilli flakes - milder than whole bird eye chillies - to taste)

10g fresh organic dill, finely chopped

10g fresh organic coriander, finely chopped

8 large organic eggs

Himalayan pink salt or Celtic sea salt, to taste

Freshly ground organic black pepper, to taste

Instructions

Wash the peppers, halve lengthwise and remove the stems, seeds and membranes, then cut into 1 cm strips and finally into 1cm dice.

Place the ghee (or oil) into a large, non-stick ovenproof frying pan and set over a medium-high heat. 

spanish omelette prep1.jpg

When the oil is hot, add the peppers and stir fry for 2-3 minutes until softened, but not coloured. Set aside to cool.

Meanwhile crack the eggs into a medium-large bowl and beat together well. Mix in the spring onions, feta, Cheddar, crushed chilli/chilli flakes, dill and coriander.

Add the cooked and cooled pepper pieces to the eggs and mix again.

spanish omelette prep.jpg

Set the frying pan back over a medium heat - add a little more ghee/oil if you think it needs it. 

When the pan is hot, tip the egg mixture into the pan, spreading the contents out evenly with a wooden spoon. 

Cover the pan with a lid or stainless steel splatter guard and leave the frittata to cook on the top of the stove for 6-8 minutes or until the edges have set.  

Meanwhile, preheat the grill to High.

Remove the pan lid and place the frittata under the hot grill. Cook until golden brown and sizzling hot.

Check to see that the eggs are cooked through by inserting a knife into the centre of the frittata. If they’re still runny, put back under the grill for 1-2 minutes more until they’ve firmed up completely.

Slice and serve straight from the pan.

spanish omelette serving .jpg

Notes:

You will see from the photos that I ring the changes with whatever vegetables I have to hand. I’ve added lightly steamed rainbow chard to one of the frittatas and lightly steamed English asparagus to another. I could equally be tempted to throw in a couple of handfuls of baby spinach. The more green veggies the better, just don’t overcook them before adding to the eggs.

Leftovers are great served at room temperature.

Fat 36g Protein 31g Carbohydrates 3g - per serving

spanish omelette serving.jpg

Celeriac Terrine With Red Pepper Sauce

by Susan Smith in , , ,


I was slowly but surely getting through the training programme to become a qualified health coach until I was recently stopped in my tracks. Last week I received an email announcing “numerous coursework and program updates” that were being rolled out now and later this year. Gees! They don’t mean maybe. The volume of coursework has increased by a hefty 60% and I can’t now move on through the 16 original lessons and exams unless I first go back and then sequentially complete each of the new business building tasks interspersed between them. It’s not easy being forced to switch between academia and creative writing on demand - I simply don’t have the time or headspace for both - and last week’s task, which was to write ‘my story’, overwhelmed me. Firstly, who cares what trials and tribulations I’ve suffered? Secondly, it seems if anyone does, it’s me! I found wading through the timeline of my life and reliving the experience extremely upsetting. So today, I’m taking some welcome time out to write this blog. For sanity’s sake, I have to loosen my grip on my study work and let go of my original intention to be an accredited health coach before the end of the year. After all, there are so many other things I have to do. 

Without the support of my husband, who steps into the domestic breach every time he finds me glued to my computer, I would have given up completely. Economy of effort is where it’s at and Celeriac Terrine With Red Pepper Sauce is one of those meals that John can prepare single-handedly so that we’re still well fed even when I’m overly committed to tasks beyond the kitchen table. Celeriac Terrine With Red Pepper Sauce makes an impressive vegetarian meal for six people. Since there are only three of us to feed, that means enough leftovers to slice-up cold several days later, which you can then generously top with more cheese before reheating in the oven for 15 minutes and gently warming through the leftover red pepper sauce on the hob. Alternatively, the terrine eats equally well cold with homemade mayonnaise and salad leaves, preceded by a delicious creamy, hot tomato and red pepper soup that’s simply thrown together in minutes by combining the leftover red pepper sauce with a bottle of Abel & Coles cherry tomato passata and a generous dollop of double cream. Voilà, two nutritious, keto-inspired meals for the price of one! 

celeriac terrine recipe.jpg

Celeriac, otherwise known as celery root, is a bit of a culinary life saver when you’re living a low-carb lifestyle. Although a root vegetable, celeriac isn’t nearly as starchy as potatoes (potatoes contain over twice as many net carbohydrates) so it’s really useful for making mash, chips, gratins and soups - watercress soup thickened with celeriac instead of potato is even better. High in dietary fibre and loaded with vitamins and minerals for maintaining good health, this recipe totally transforms celeriac from its reputation as the gnarly hobbit of the vegetable world into a very elegant looking, make-ahead main course for entertaining, or a much more appetisingly colourful, meat-free alternative to a family roast.

celeriac organic vegetable.jpg

A long-standing favourite of ours, this recipe is taken from the Winter section of Rose Elliot’s book ‘Vegetarian Four Seasons’. However, while I can still buy organic celeriac in May, I make no apology for enjoying it in Spring! It’s simply delicious food, whenever!

Celeriac Terrine With Red Pepper Sauce (Serves 6)

Ingredients - for the celeriac terrine

700g organic celeriac

25g organic butter

125g organic strong Cheddar cheese, grated

25g freshly grated organic Parmesan or organic vegetarian Parmesan-style cheese 

4 tbsp snipped organic chives

3 organic eggs

Himalayan pink salt or Celtic sea salt

Freshly ground organic black pepper

Organic cherry tomatoes and fresh chives - to garnish 


Ingredients - for the red pepper sauce

2 tbsp organic olive oil or macadamia nut oil

2 organic onions, finely sliced

2 organic red peppers

150ml vegetable stock

Himalayan pink salt or Celtic sea salt

Freshly ground organic black pepper

15g cold organic unsalted butter, cut into small pieces

celeriac terrine.jpg

Instructions

Pre-heat the oven to 160℃ / 325 ℉ / Gas mark 3

Grease and line a 450g / 1lb loaf tin with a piece of non-stick parchment paper to cover the base and extend up the short sides. Grease again.

Boil a kettle of freshly filtered water.

Peel the celeriac and cut into even-sized 2cm chunks.

Pour the boiling water from the kettle into the base of a steamer. Place the celeriac into the top of the steamer and cook for about 12-15 minutes, or until the celeriac is tender.

Lift the celeriac out of the steamer and drain well before tipping into a bowl - the water in the bottom of the steamer makes wonderful stock.

Add the butter to the celeriac and mash, but don’t puree because some texture is good in this dish. Mix in the grated Cheddar and Parmesan cheeses, the chives, eggs and salt and pepper to taste.

Spoon the mixture into the prepared tin and level the top. Bake for about 50 minutes or until the terrine feels firm to the touch, is golden-brown and a skewer inserted in the middle comes out clean.

While the terrine is baking make the red pepper sauce. Heat the oil in a large saucepan, put in the onions and cook over a gentle heat with the pan lid on for about 10 minutes until the onions are softened but not browned.

Meanwhile, wash the peppers and cut into rough pieces - there’s no need to remove the seeds because the sauce will be strained.

Add the peppers to the onions, cover the pan again and cook gently for a further 5 minutes.

Pour in the stock. Cover and simmer for about 10 minutes or until the peppers are tender.

Liquidise the sauce, strain into a clean saucepan and season to taste.

When the terrine is cooked, remove from the oven and allow to stand for 5 minutes or so before slipping a knife around the edges to loosen, then turn it out onto a warm plate.

Garnish the terrine with halved cherry tomatoes, sprigs of parsley and small strips of chives.

Just before serving, bring the pepper sauce to the boil. Take off the heat and whisk in the cold butter, a little at a time, to make the sauce glossy. 

Serve the sauce with the terrine and some lightly cooked broccoli or other green vegetables. 


Fat 22g Protein 14g Carbohydrate 11g - per serving

celeriac terrine pepper sauce.jpg

Squashy Bottom Soup Bowls

by Susan Smith in


Not wishing to be lazy, there are times when I catch sight of a recipe that seems to sell itself far better than I could. Maybe I’ll still adjust the ingredients and instructions a little bit but when I think I’ve found a ‘gem’ such as Riverford Organic’s Squashy Bottom Soup Bowls, what’s the point? This is how Riverford describe their recipe: 

“This easy-to-make squash soup doesn't even require any bowls – just eat it straight out of the shell, saving on the washing up and adding to the entertainment. This is a great, child-pleasing dish for Halloween.”

squash recipe.jpg

For the past two months my life situation has been extremely demanding so as far as this blog is concerned, I missed the boat for Halloween and Guy Fawkes Night too. Nevertheless, it did seem to be the perfect meal to cook for my family on 31st October whilst I was in the midst of frantically helping Mirror Imaging to pull together a high-class catwalk and prosecco party for brides-to-be. On the face of it, these Squashy Bottom Soup Bowls seemed to be a  simple, speedy, autumnal treat that I was well up for making and sharing on Primal Plate’s blog without further input from me.

But not so fast. The devil is in the details and I rarely get away scot-free when writing up recipes for Primal Plate. Fifteen minutes into scraping out the pulp and seeds of my bonbon squashes “with a spoon” and still only halfway through the task in hand, I was thinking most of Primal Plate recipes are a lot easier to make than this! In reality, you need a pointy-ended, immovable (non-swivel) vegetable peeler, as well as a spoon, to neatly gouge out their innards. Also, a very sturdy, sharp knife to slice the tops off these tough-skinned babies - oh, and preferably a man with sufficient arm power to do the job! 

When I finally got my squashes looking like perfectly formed soup bowls I discovered that the amount of double cream stated in the original recipe was far too much. Not that I think restraint is necessarily a virtue when it comes to eating healthy dietary fat, it’s simply that cutesy, individual portion-sized squashes don’t have a big enough ‘bowl’ space inside them to hold 200ml of cream apiece. A half to two-thirds of the that amount of cream is about right. Also, I prefer to strip the thyme leaves off their stems before burying them in the cream and cheese filling prior to cooking. Spooning woody bits straight into your mouth at the table is a bit of a spoiler. Whole sprigs of fresh thyme are best saved for prettying up Squashy Bottom Soup Bowls immediately before serving. 

In the end it’s worth the effort for something so novel and delicious to eat. For me, scraping the rich, honey-flavoured, deep orange roasted flesh of the squash into hot, cheesy cream has all the satisfaction and pleasure of diving into a large baked potato with lashings of butter and cheese or perhaps a self-contained cheese fondue with no requirement for crusty bread. 

Although winter squash could not be described as very low-carb, it is one of the most nutritious and healthiest vegetables you can eat. With a rich array of vitamins, minerals and antioxidants as well as significant amounts of digestive fibre, it’s surprisingly filling, far better for you and much less carb heavy than fattening potato or bread. That said, if you’re trying to get into nutritional ketosis, you may want to give this recipe a miss until you’ve achieved your goal. The fewer carbohydrates you eat, the bigger the effects on weight and blood sugar will be, so I recommend you follow a strict low-carb diet (“keto" diet) until you’re happy with your weight and health. Thereafter, you can be more liberal and are free to enjoy Squashy Bottom Soup Bowls as keto-friendly comfort food during the colder months that lie ahead.   

squash soup bowl.jpg

Squashy Bottom Soup Bowls (serves 4)

Ingredients

4 small round squash e.g. bonbon, onion or kabocha (no more than 800-1000 grams unprepared weight is about right even if you’re hungry!)

200g Gruyère or similar i.e. mature vegetarian Cheddar, finely grated

200g organic Parmesan or vegetarian parmesan-style cheese, finely grated

A few gratings of organic nutmeg

2 tbsp fresh organic thyme leaves

500ml organic double cream

Organic sea salt & freshly ground black pepper

4 thyme sprigs to decorate - optional


Instructions

Preheat oven to 190°C / 375℉ / Gas 5.

If any of the squash don’t sit upright on a flat surface, cautiously trim a tiny sliver off the bottom so that they do. N.B. Be very careful not to cut into the surrounding flesh as any holes in the bottom of the squash will allow the cream and cheese filling to seep out.  

Slice the top inch or so from the squash, keep to one side as this will serve as your lid. Scrape out the pulp and seeds using a non-swivel vegetable peeler and spoon; you should be left with a hollow bowl.

Place the squash in a baking dish. Divide the cheese between the 4 squash, add a grating of nutmeg and the thyme leaves. Pour in the cream to come two-thirds of the way up the cavity.

squashy bottom soup bowls.jpg

Season with generous turns of black pepper and a cautious amount of salt, keeping in mind the saltiness of the cheeses.    

Pop the lid on and bake for 1 hour until tender. 

When cooked, remove the lids and add a fresh thyme sprig to each squash before jauntily placing their tops at an angle alongside to serve.

Eat by scraping the soft flesh into the hot cream. Delish!


Notes:

Do not overcook the squash. If they’re left in the oven too long their skins can burst.


Fat 81g Protein 34g Carbohydrate 22g

onion squash.jpg

Courgette & Blue Stilton Gratin

by Susan Smith in ,


Our lives are pretty hectic nowadays, so recently my focus has been on creating healthy meals that can quickly be pulled together after work. Although other commitments mean I’ve not been able to post as many recipes on this blog as I’d like, the beat goes on. You’d have to come to my home on a weekday to see that even when I barely have time to sneeze, I have dozens of fast and easy recipes (still yet to share) for nutritious meals that are easily prepared and cooked within an hour.

This past week I’ve been helping Sarah with Mirror Imaging meetings, collaborating on a designer catwalk and prosecco party for what promises to be the East Midland’s wedding event of the year, cooking real food every day (even if it’s just soup and sandwiches), creating new recipes, writing my blog, playing catch-up with my finances (not least with tenants threatening non payment of rent!) and spending many hours online researching yet another kitty-related health scare when my cat Sushi, now in her eighteenth year, stopped eating for 5 days. Turns out, she was suffering with a troublesome tooth. This is the fourth time in the past 2 years that our feisty feline has been spared the doom and gloom of a more serious prognosis and my heartfelt thanks goes to her brilliant, kind-hearted vet, who deftly removed the damn thing with minimum fuss and distress to both Sushi and I. When cats of more than 10 years old get ill, the spectre of chronic kidney disease (CKD) seems to continually rear its ugly head, so the offending tooth was pulled out without anaesthetic or pain relief. Sushi and I were very brave! 

Because our puss-cat has always been afforded the status of a family member (in my view, you should never keep a pet if s/he isn’t) her needs are our highest priority. Caring for her when she’s in crisis takes a lot of time and loving dedication. It’s when you’re multi-tasking and knackered that easy-to-prepare food, which comforts and revives is a godsend. Courgette & Blue Stilton Gratin does the job perfectly. Simply serve with lightly dressed salad leaves for minimum effort.

Although this gratin does require a little forethought prior to making - you need to degorge the courgettes (sprinkle with salt to draw out their water content) for at least half-an-hour before assembling the dish - it’s a simple and quick meal for busy people to cook at the end of a working day. Unfortunately, you can’t skip the salting process because if you do, you’ll end up with curdled custard sat in a pool of excess liquid. Just breathe and pour yourself a glass of wine while you wait. Or do what I do when I’m working away from home…call your partner and ask them to do this part of the food prep ahead of time. If he remembers to open a bottle of red wine to let it breathe so I’m handed a glass the minute I walk through the door, it’s all good. It then only takes 10 minutes to assemble the dish and get it in the oven.

Cream, eggs and tangy blue cheese topped with crunchy toasted pecans is a luxurious, vegetarian, ketogenic meal that reminds me of Christmas. An all-in-one dish to include in your healthy eating repertoire at any time of the year - high in healthy grass-fed cream, butter and cheese makes food taste better and you feel more satisfied - it’s a shopper’s delight in the countdown to Christmas. It’s also an indulgent, low-carb, vegetarian main course to serve with traditional festive accompaniments for those of us that don’t want, or would like to take a break from, all the meaty fare on offer at Christmas.

Thankfully, 'meat-free' no longer applies to Sushi. With painful tooth extracted, she’ll be looking forward to chowing down on turkey!

courgette stilton bake.jpg

Courgette & Blue Stilton Gratin (Serves 3)

Ingredients

3 medium-large (approx 600g) organic courgettes

Pure Himalayan fine salt

200g organic blue stilton cheese

2 tbsp organic fresh thyme leaves

3 large organic eggs

300ml organic double cream 

Pinch of organic nutmeg, freshly grated 

Organic black pepper, freshly ground

50g organic pecan nuts, roughly chopped

ingredients.jpg

Instructions

Wash, trim and dry the courgettes. Using a sharp knife or mandolin, slice the courgettes diagonally into 6-8 mm thick ovals. Season with salt and leave them in a sieve or colander set over a bowl, to remove excess water (i.e. degorge) for 30 minutes to 1 hour.

Whilst the courgettes are degorging, cut the Stilton cheese into small cubes. Set aside. Put the thyme leaves and chopped pecans into two separate bowls.

Place the eggs, double cream, grated nutmeg and pepper into a large jug and lightly whisk until combined. You can add a pinch of salt, but season cautiously because the cheese will already be quite salty.

Pre-heat the oven to 200℃ / 400℉ / Gas mark 6

Dry the courgette slices thoroughly between two clean tea towels and/or dab them dry with paper kitchen roll.

Lay one-third of the courgette slices evenly in the base of an ovenproof (gratin) dish. Add one-third of the cheese, dotting it around the dish. Sprinkle over half the thyme leaves. 

step by step recipe.jpg

Repeat with a second layer of courgette slices, cheese and thyme leaves, then finish with a third layer of courgettes and finally the remaining cheese.

Give the egg mixture a quick stir and pour evenly into the dish. Scatter over the chopped pecans.

Cook in the oven for 35 minutes until the egg custard is set. 

Remove from the oven and let the gratin stand for 5 minutes before serving.


Fat 96g Protein 30g Carbohydrate 7g

primal recipes.jpg

Wild Salmon & Tomato Curry

by Susan Smith in ,


In 2010 we started on a project to completely refurbish our three-storey Edwardian property, one room at a time. It’s a massive commitment that we’re still only halfway through. The first job was to change the boiler for more energy efficient heating. The second was to install a luxury bathroom complete with crystal chandelier, elegant, Italian stone basins and matching solid ‘egg shell’ bath for the ultimate, ‘pamper-me’ experience.

Talk about best laid plans! Fuelled by junk food and numerous sugar-laden beverages, I’m convinced that the modern workman's lack of care or effort is most likely a dietary affliction! Pleasure in my newly refurbished bathroom lasted for less than a year. Thereafter, the grouting in the shower cubicle fell out and the free-standing floor bath tap broke, meaning I could neither use the shower for risk of it leaking, nor take a bath. Soon after, everything else went kaput. The bidet tap corroded and the mastic sealant around all the waste outlets turned a nasty, dark-golden-urine colour. Unbeknownst to us, the original skirting had been surreptitiously stripped out and replaced with MDF - a well known bathroom ‘clanger’ because when MDF is subjected to moisture it will swell and bow, which it did. As for the central heating system, the plumber told me that at least one radiator in the house, which happened to be the one in our sitting-room and the main one in the new bathroom, needed to stay partially cold for the rest of the system to work and “not to worry”, this was absolutely normal! When the expansion tank in the airing cupboard fell off the wall I knew for sure we were in trouble. The one thing I do have to put my hand up to is the dreadful choice of ‘eco-friendly’ cork floor tiles, which quickly faded and started to lift along their edges, albeit that the sub-floor wasn’t properly levelled to begin with.  

I now view most tradespeople with deep distrust! Occasionally, I get really lucky (thanks Callum at Ceramicals for doing such a brilliant tiling job) but all too often my worst fears are realised. It took 6 years for me to bite the bullet and get the central heating fixed. It’s still working, so two weeks ago I dared myself to have the entire bathroom and upstairs toilet ripped out so we could re-tile the floors and replace all the broken bits. The noise and upheaval was enough to make me have kittens! The floor now looks stunning but when the plumber from hell finally finished reconnecting the sanitary ware - never agree to pay a man by the hour when he can talk for England! - and the mains water was turned back on, water poured forth from the toilet and bath, flooding my newly tiled floor. Estimated to be a 4 day job, it took 12 days of pandemonium before I finally got my bathroom and loo back in service…umm, sort of! Neither room has a door - you try sitting on the loo in full view of the stairs and landing - the bath is still unusable, the new bidet tap lever won’t budge and one washbasin waste isn’t watertight. Essentially, it’s back to the drawing board; the onus resting on me to find another plumber who doesn’t have an attitude problem. 

If I’m going to cook and blog my way through times like these it had better be something quick, simple and nutritious. Hugh Fearnley-Whittingstall’s book River Cottage Light & Easy came to my rescue yet again with a recipe for fish and tomato curry. With a couple of minor adjustments - wild salmon holds together better than white fish fillets and I’ve added some fresh chilli too - it became Wild Salmon & Tomato Curry.

Making fish curry may sound like an undertaking but when the spicy tomato sauce is this easy to make and the fish cooks in a matter of minutes, it is the perfect ‘Friday night is curry night’ antidote to a particularly stressful week. Served with spicy cauliflower ‘rice’ or charred broccoli and a very good bottle of red wine it can make life seem worth living even when the sword of Damocles hangs over me for telling the now enraged plumbing misogynist that I won’t be paying his bill in full! 

salmon curry gluten free recipe.jpg

Wild Salmon & Tomato Curry (Serves 3-4)

Ingredients

25g organic coconut oil

1 large organic onion (or 2 medium ones), finely sliced

2” piece of organic fresh ginger, peeled and finely grated (yields about 2 teaspoons)

1 organic chilli, finely chopped

1 tbsp organic curry powder

1 cinnamon stick

300ml organic tomato passata

200ml organic full fat coconut milk

Pink Himalayan salt (fine crystals)

Organic black pepper, freshly ground

2 drops organic liquid stevia

500g wild keta salmon fillets, skinned (see Notes below)

Juice of half a large organic lime

To finish:

Fresh organic coriander leaves

Organic black onion (kalonji) seeds

Organic Greek yogurt - optional

primal paleo recipes.jpg
salmon curry paleo recipe.jpg

Instructions

Heat the coconut oil in a large, deep sauté pan over a medium-low heat.

Add the onion to the pan and cook, stirring regularly for 10 minutes.

Add the ginger and chilli and cook for a further minute. Now add the curry powder and cinnamon stick and fry for another minute or two.

Stir in the tomato passata and coconut milk, then add the stevia and season to taste with salt and black pepper.

Stir well and simmer, stirring from time to time, for about 10 minutes until rich and well blended. 

Meanwhile, skin the salmon fillets and cut them into large pieces, about 4cm square.

Add the salmon to the sauce, bring back to a very gentle simmer and cook for 4-6 minutes until the fish is just cooked through, stirring very carefully a couple of times. N.B. Don’t break up the fish pieces if you can help it. 

Finally, stir in the lime juice, then taste and add more salt and pepper if needed.

Serve straight away with cauliflower ‘rice’ or a green vegetable. Finish with fresh coriander and black onion seeds scattered on top of the curry and pass around a bowl of Greek yogurt to accompany, if you like.

salmon curry low carb high fat recipes.jpg

Notes

Because I usually cook for three people, I find just 2 packs of Waitrose's Wild Keta Alaskan Salmon will suffice. This allows for about 5 large pieces of salmon per person. If you’re cooking for four, I’d purchase 3 packs and possibly save some of it to feed to my cat Sushi! 

Not all reviews for Wild Keta Salmon are good. Perhaps its rather unappetising sounding Alaskan name “Chum salmon” or “Dog salmon” doesn’t do it any favours. Nevertheless, I’ve found keta salmon to be a firm, high quality salmon that I actually prefer for this recipe. When it comes to choosing salmon, it’s a case of horses for courses, albeit I always select wild Alaskan fish, never farmed. Wild Alaskan Sockeye Salmon has bright orange-red flesh - perfect for impressive dinner party presentations - which is oilier, stronger tasting and richer in healthy Omega 3s than its pink fleshed, Wild Keta Salmon counterpart. Sockeye salmon holds up really well to grilling. However, I’ve chosen MSC certified Alaskan keta salmon for this recipe because it’s cheaper than sockeye and I actually prefer its lighter colour, flavour and softer texture in this curry.


Fat 34g Protein 27g Carbohydrate 11g - per serving of curry (4 people)

Fat 45g Protein 35g    Carbohydrate 14g - per serving of curry (3 people)

Fat 2g Protein 1g Carbohydrate 1g - per 25g serving of Greek yogurt


Courgette Leek Mushroom & Pine Kernel Lasagna

by Susan Smith in ,


Fancy some Italianesque indulgence that comforts and fills you up like a proper, creamy pasta dish does but without any pasta, grains or cheese? Look no further. You wouldn’t know that this very clever Courgette Leek Mushroom & Pine Kernel Lasagna wasn’t the real deal unless I told you so.

Many people reject the hoo-ha of subscribing to a home-cooked, organic, low-carb diet and thereby default to eating agrichemical-ridden fruit, vegetables, grains, sugar, factory farmed animal-centric aberrations and other bona fide junk because they simply can’t be arsed. What’s worse is these same people attack my dietary preferences and erroneously label me the “weirdo”. They have no idea how liberating it is to eat plentifully for pleasure without getting fat and sick. I wish I could persuade them…  

A LCHF diet combined with exercise and intermittent fasting turns back the clock on most aspects of ageing, including an ever expanding waistline that comes from eating high carbohydrate, sugary, processed and/or low-fat diet foods. Excess body fat tends to creep up on you exponentially in middle-age, which is also the time you’re likely to find that your knees have finally given up on trying to help you outrun your fork. Kate Moss was slated for saying so, but “nothing tastes as good as skinny feels” has more than a grain of truth in it, especially when counting chemicals not calories is the priority. A low carb diet needs to be high in fat to fuel your energy needs and because fat tastes so good - think fat bombs - there’s none of the dietary deprivation associated with calorie counting.  

Based on the latest, scientifically proven nutritional principles, Primal Plate recipes are a wonderful, practical guide to eating for health. Admittedly, organic ingredients do cost more but if you want to be on the right side of healthy and you’re on a budget the advice is: Cook from scratch, eat less meat, buy seasonal, grow your own and know the ‘Dirty Dozen’ and ‘Clean Fifteen’

In my experience, whether you’re vegetarian, vegan or primal, there are socially negative consequences for being selective about your food and drink. You may have to sacrifice eating out at what used to be your favourite restaurants and come to terms with being a Billy no mates. No matter, when it comes to making intelligent food choices, the law of consequences will demonstrate soon enough that the proof of the pudding was in the eating.  There’s no time like the present to choose healthy!

Meanwhile, as today’s recipe for Courgette Leek Mushroom & Pine Kernel Lasagna shows, if you can’t beat ‘em you can at least give the impression of joining them. This is food to share when you’re not hanging out with like-minded low-carbers (aside from my immediate family, did I ever?). A hearty, savoury pasta dish layered up with a classic creamy bechamel sauce is, according to the masses, the epitome of relaxed party food so this gorgeous lasagna that I’ve adapted from a Jackie Le Tissier recipe in Food Combining For Vegetarians, easily slips under the radar.

Served with a generous glass of red wine and a crisp, garden-fresh salad, this amazebells grain-free and meat-free lasagna creates a warm and friendly Italian vibe that invites you to sit back and watch the most intransigent dining companion make the unconscious but very healthy transition from high carbohydrates to high fat, without being any the wiser. High five me!

I think it’s the perfect recipe to bring family and friends together for a relaxed, non-segregated meal. Now that’s what I call community spirit!

Courgette Leek Mushroom & Pine Kernel Lasagna (Serves 4)

Ingredients 

2 tbsp organic cold-pressed virgin olive oil

450g organic leeks, very finely chopped

250g organic mushrooms, very finely chopped

250g organic mushrooms, finely sliced

40g organic pine kernels

3 tbsp fresh organic marjoram leaves, finely chopped (if you can’t find marjoram use 2 tbsp oregano leaves instead)

1 tbsp organic tamari soy sauce

¼ tsp freshly grated organic nutmeg

sea salt and black pepper

2 large organic courgettes (or 3 medium plump ones), ends cut off and sliced lengthways into 3mm slices (best done on a mandolin) 

Topping

4 tbsp pine kernels 


Ingredients - for the pine kernel sauce

40g organic grass-fed butter

100g organic ground almonds

150ml organic double cream 

450ml freshly filtered water

100g organic pine kernels

sea salt and black pepper


Instructions

Pre-heat the oven to 200℃ / 400℉ / Gas mark 6

Heat the oil in a large sauté pan and cook the leeks covered over a medium-low heat for 10 minutes.

Add the sliced and chopped mushrooms, the pine kernels, tamari and marjoram and cook uncovered over a medium-high heat for a further 5-6 minutes, or until the liquid released by the mushrooms has evaporated. 

Remove the pan from the heat and season with the nutmeg, sea salt and black pepper. Set aside whilst you prepare the pine kernel sauce.

To make the pine kernel sauce: Dilute the cream with the filtered water by mixing the two together in a glass measuring jug. 

Melt the butter in a large saucepan over a medium heat and then stir in the ground almonds to make a ‘roux’.

Gradually add half the diluted cream to the roux, stirring constantly as you go until the mixture comes together and is free of lumps. Tip the mixture into a blender, then add the rest of the diluted cream and the pine kernels and whizz everything together until you have a smooth, creamy white sauce.

Tip the contents of the blender back into the saucepan, return the pan to the heat and bring to a gentle boil stirring continuously until the sauce thickens - this may take a while. If the sauce seems too thick, add an extra tablespoon of filtered water to thin it out slightly.

Remove the pan from the heat and season with salt and black pepper.

To assemble the lasagna: Place a layer of the mushroom, leek and pine nut mixture in the base of a deep, square or rectangular oven-proof dish. Top with a layer of courgette slices to cover completely, and then add a little of the sauce.

Repeat these layers twice more, leaving enough sauce to finish with a thick layer. 

Sprinkle the surface with 4 tbsps of pine kernels.

Bake for 40 minutes until golden brown and tender. 

Bring the dish to the table and serve with a crisp green and/or tomato and basil salad.

Notes 

If you’d like the lasagna to be more browned on top, you can finish the dish under the grill. N.B. You’ll need to watch it like a hawk as pine nuts swiftly turn from golden brown to scorched under direct heat. 

If you have a Vitamix or similar high powered machine, you can thicken the sauce in the blender by letting the machine continue to run for an extra 3-4 minutes or so i.e. you can omit transferring the sauce back into a saucepan to thicken it. The reason I choose to transfer the sauce mixture back in to a saucepan and thicken it by hand is because it’s less time consuming than trying to get all the finished sauce from around the base and blades of a Vitamix container!   


72g fat 20g protein 15g carbohydrate - per serving


Braised Thai Style Vegetables with Golden Cashews

by Susan Smith in


Today’s recipe is a light but very satisfying, spicy, Thai-inspired ‘vegfest’ for Valeos i.e. those people who want to avoid meat and make vegetables the mainstay of their Primal/Paleo diet. To be honest, if you’re opposed to eating eggs and dairy too, it’s probably not possible to make up for the nutritional deficit you’ll suffer if you try to combine veganism with a Primal lifestyle. Nonetheless, most of the vegetarians and vegans that I’ve known would fare much better health-wise if they lived up to their namesake by actually eating far more plants and much less pasta! 

In my view, it is perfectly feasible, nay advisable, for everyone to go grain-free. Grains contain anti-nutrients such as phytic acid (prevents the absorption of minerals), enzyme inhibitors (inhibits digestibility), lectins (compromises our gut and disrupts the immune system) and gluten (causes gut inflammation and increased intestinal permeability a.k.a. “leaky gut”). Conversely, organically grown potatoes, purple and orange sweet potatoes, jerusalem artichokes, taro, tiger nuts, bananas, apples, pears and berries can provide all the carbohydrates, minerals, protein, fibre and vitamins, without the unpleasant and dangerous side effects of grains. In a nutshell, strict vegans/vegetarians should be eating real, nutrient-dense vegetables and fruits and, if they insist on eating grains, they should make sure they’re sprouted, both to increase their nutrient content and to decrease their anti-nutrient effects.

Meanwhile for those of us that favour vegetarian, or at least believe less meat is more when embracing Primal dietary principles, Braised Thai Style Vegetables with Golden Cashews is a delicious way to eat at least four portions of vegetables in one go. In fact, we became so enthused about eating the colours of the rainbow in a single bowl of goodness that we created the photo backdrop to match!

You can mix and match this recipe with any seasonal vegetables you fancy, just make sure that all the vegetables are chopped or sliced to roughly the same size to ensure even cooking. 

Braised Thai Style Vegetables with Golden Cashews (Serves 4)

100g raw, organic cashews

2 tbsp organic coconut oil

1 organic onion, finely chopped

4 organic shallots, thinly sliced

2 stalks fresh lemongrass, finely chopped (see note below for how to prepare lemongrass)

2 kaffir lime leaves, fresh or dried - optional

450g organic carrots, peeled 

1 x organic red pepper, deseeded and sliced into long strips

2 x 400ml tins organic full-fat coconut milk

3 tbsp tamari

2 tbsp Thai red curry paste (see Notes below)

2 tsp organic cumin seeds

1-2 drops organic liquid stevia - optional

Sea salt and freshly ground organic black pepper

225g small florets of organic cauliflower

225g organic frozen petits pois, defrosted

200g organic asparagus (or 4 large handfuls of organic baby spinach leaves - or both)

2 tbsp organic lime juice

Small bunch of fresh, organic coriander, roughly chopped

Instructions

Boil a kettle of water.

Heat a medium non-stick frying pan and add the raw cashews, stirring from time to time until they are golden brown - they burn very easily so keep a watchful eye on them. Once brown, transfer to a plate and set aside. 

Cut the carrots on the diagonal into ¼ inch slices. Prepare the asparagus by bending the spears until they snap at their natural breaking point, then throw away the woody ends. For a more attractive finish, you can pare away the outer skin from the bottom third of the spears with a vegetable peeler.

Heat the coconut oil in a large wok or deep sauté pan, add the onions and shallot to the pan, then cover with the pan lid and cook for 5 minutes to soften without colouring. 

Remove the pan lid, then add the lemon grass and kaffir lime leaves. Stir-fry for 2 minutes. 

Add the sliced carrots and red pepper strips to the pan and stir-fry for a further 3 minutes.

Add the curry paste, coconut milk, tamari and cumin seeds, gently stirring everything together until evenly incorporated. Taste and season to taste with salt, pepper and a drop or two of liquid stevia if you think it needs it. Cover and simmer for 5 minutes,

Meanwhile, tip the boiling water from the kettle into the bottom of a steamer. Put the cauliflower florets and asparagus in the top of the steamer. Cover and blanch the vegetables for just 1-2 minutes, then quickly remove them from the steamer into a metal sieve. Briefly run under a cold tap to ‘set’ the bright green colour of the asparagus and to stop the cooking process. Drain well, then cut the asparagus spears in half. 

Add the drained cauliflower, asparagus and defrosted petits pois to the rest of the braised vegetables. Cook for 1-2 minutes more before stirring in the spinach and cooking just long enough to allow the spinach leaves to wilt down - only takes 30 seconds or so. Take the pan off the heat and add the lime juice. Check the seasoning and adjust to taste if necessary.

Ladle the vegetables with the sauce into four pre-warmed serving bowls, making sure the different vegetables are divided evenly between the diners. Finally, sprinkle over the toasted cashews and chopped coriander and serve immediately.

Notes

To prepare lemongrass, begin by treating it pretty much like you would a spring onion. First, remove the root and top, then peel away a couple of the fibrous outer layers until you reach the smooth, pale green centre. Next, smash the lemongrass stalk with a rolling pin - this breaks down the fibres to release more of its fragrant oil - then using a very sharp knife, finely slice across.

Geo Organics ready-to-use Red Thai Curry Paste contains cornstarch, a grain best avoided. To make your own vegetarian Red Thai Curry Paste, try this Riverford Organics recipe - although I’d leave out the sugar and replace it with a teaspoon of organic honey, maple syrup or a drop or two of organic liquid stevia. 


Carbohydrate 35g Protein 15g - per serving


Spinach, Cherry Tomato & Avocado Salad with Spicy Sicilian Almonds

by Susan Smith in , , ,


Having initially accepted the challenge of featuring delicious, primarily vegetarian, Primal/Paleo recipes on Primal Plate’s blog, I now find myself obsessed with the idea of going one step further. Accordingly, it’s my intention to include many more vegan recipes that can be enjoyed as part of a Primal lifestyle. I’m excited at the prospect. With summer almost upon us, light and easy is the order of the day and it feels entirely appropriate for our meals not to be so dairy dependant. Vegan food eaten in this context, means moving away from Primal and more towards the Paleo diet, which excludes milk, butter, cheese, crème fraîche, cream, ice cream and yogurt.

I am too much of a hedonist to go the whole hog (strictly speaking, Paleo peeps don’t even drink red wine for heaven’s sake!), but I do want to consciously use dairy products less often. Sarah has coined a new phrase for what’s turning out to be a delicious voyage of discovery. She calls it ”Valeo”, which in my view perfectly sums up the logic of eating more healthily without exploiting animals. If there’s one thing that miffs me about the Primal/Paleo diet, it’s the emphasis on eating animal protein.  

Yesterday we enjoyed a valeo meal of soup and salad…a Roasted Beet Borscht with Horseradish Cream (recipe coming soon) and this amazingly tasty, healthful Spinach, Cherry Tomato and Avocado Salad. Vivid colours and packed with goodness, eating valeo is light years away from the high-carb pasta, rice, bread, potato and legumes that most vegetarians and vegans rely on. 

As I’m a complete novice entering the world of veganism, I’m sailing in relatively unchartered waters. Therefore, I make no apology for seeking out the best vegan recipes from other authors that obviously don’t contain meat, fish, eggs or dairy as well as all the Primal ‘no-no' foods such as grains, potatoes, legumes, processed soy and fats etc. It’s a tall order! Nevertheless, this Spinach, Cherry Tomato and Avocado Salad with Spicy Sicilian Almonds, which I’ve borrowed from Annie Bell’s book Gorgeous Greens, immediately hit the culinary jackpot by ticking all the aforementioned boxes. Sod’s law that it’s been Primal Plate’s most popular posting on Instagram to date! 

Clearly this is not just a dish for Paleos or Vegans but also for meat-free Mondays, dairy free dieters and anyone that finds themselves somewhere in-between (me!). Full of punchy flavours, this hearty salad is a wake-up call for the senses that can be on the table in less than 30 minutes.  

Spinach, Cherry Tomato & Avocado Salad with Spicy Sicilian Almonds (serves 4)

Ingredients - for the nuts

100g organic whole, blanched (skinned) almonds

1 tbsp organic extra virgin olive oil

1 tsp organic Tamari

1 tsp, organic fresh thyme leaves

¼-½ tsp organic chilli pepper 


Ingredients - for the salad

2 organic avocados

125g organic baby spinach leaves, or torn young spinach leaves

2 tbsp organic extra virgin olive oil

a good squeeze of organic lemon juice

200g organic cherry tomatoes, halved

a small handful of organic fresh chives, finely chopped

sea salt (my favourite for serving at the table is fine Pu‘uwai Deep Ocean Hawaiian Sea Salt)

Instructions - for the nuts

Pre-heat the oven to 170℃ / 325℉ / Gas mark 3

Toss the almonds in a bowl with the olive oil and tamari, then toss in the thyme, scatter over the cayenne pepper and toss again.

Tip the nuts into a small roasting tin or baking tray and spread them out into a single layer. 

Toast in the oven for 15 to 20 minutes, until deep golden and crisp. 

Transfer the nuts to a plate lined with a paper towel and leave to cool.


Instructions - for the salad

Remove the avocados from the stone by cutting in two halves and picking the stone out. 

Peel the skin off the avocado halves, then slice each half into four long segments (8 segments per avocado).

Toss the spinach in a large bowl with the olive oil and lemon juice, then carefully fold in the halved cherry tomatoes and chopped chives.

Pile the salad on to four individual plates and scatter over the spiced nuts.

Serve straight away, leaving each diner to season their own salad with sea salt. 


Notes

Impossible to resist, the spicy, piquant almonds make a superb stand-alone snack. I chose premium, organic, ready-skinned almonds from sunny Sicily for their larger size and superior creamy, sweet taste but any raw, organic, blanched almonds are fine.

Readers will notice that I always create Primal Plate recipes from organic ingredients. For your health and wellbeing, it’s extremely important you do likewise. Many nuts have a high oil content, which means that they easily absorb pesticides. It is always best to purchase organic. For more information read why you need to buy organic nuts and seeds.


Carbohydrate 15g Protein 8g - per serving


Bone Broth With Vegetables

by Susan Smith in ,


We don’t eat much meat because intrinsically we believe that animals belong in our hearts, not in our stomachs, but that doesn’t mean I don’t regularly buy meat. Almost exactly a year ago to the day, my cat Sushi was suffering from distressing symptoms that the vet diagnosed as the onset of renal failure. We thought her death was imminent. Rather than accept the vet’s unhappy prognosis, which meant subjecting Sushi to the ongoing stress of regular blood tests, injections and the daily oral administration of drugs for the rest of her life, I boldly decided that I would responsibly ‘manage’ her condition by fully taking care of her nutritional needs. It is no mean feat to hand prepare fresh, organic pet food from scratch, but that was what I committed to do and one year later (Sushi’s now 17), she’s completely free of symptoms and, as they say, “As happy as Larry.”

When people think the cost of organic food is too expensive and cooking is a bore, they need to also think about the future cost of healthcare for humans and animals once good health disappears - as it most surely will - when they choose to feed themselves and their pets chemically processed food made with heavily refined ingredients and artificial additives that essentially amounts to toxic crap. It’s this catastrophic dietary decision that makes so many people and animals sick and fat. Good for vets’ profits maybe, but not so good for a cash-strapped NHS when the lifestyle and dietary choices of an ageing population starts to catch up with them! Today I am out to prove a point. Even though my idea of pet food is freshly ground, organic, grass-fed beef, lamb and chicken made from meat cut off the bone by me, when you factor in a nutritious meal for four conjured-up out of the leftovers, 63 pence per portion for my pet food versus 45 pence for Lily’s Kitchen is, in my view, a monetary piffle. What’s 19 pence when I’ve saved £100’s on veterinary fees and my beloved cat’s quality of life?   

Bone Broth, or homemade stock as we used to call it, has been hailed as a trendy new superfood by the Paleo/Primal fraternity, but in fact our ancestors always used to have a pot of meaty bones continually brewing over the fire. Our modern day equivalent would be to throw some good quality bones (they must be organic) and vegetables into a slow-cooker in the morning, go to work and come home to a beautiful, clear, savoury broth. The longer bone broth is slow-cooked, the more nutritious and gelatinous the broth. Yet, for the forward thinking cook, this is healthy, fast food at it’s best because it requires nothing more than shoving a few ingredients into a pot and walking away. 

Renowned for healing the gut, fighting inflammation and strengthening bones and teeth, the numerous nutrients found in bone broth are easily absorbed and used by the body. However, today’s recipe is not just for the health conscious, it’s for foodies, cooks and those of us with darling pets to care for because from scraps and remnants, a few meaty bones, freshly filtered water and a handful of organic vegetables, Bone Broth With Vegetables is a fuss-free way to produce the most soothing, nourishing, warming ‘hug-in-a-bowl’ imaginable. 

Last week Sushi’s monthly meat order coincided with me working at a wedding fair with Mirror Imaging at the weekend and because Perfect Roast Chicken is one of the simplest of meals for my husband to prepare in our absence, I ordered an extra chicken for us too. Whilst it isn’t always about preferring to eat vegetarian, it is always about consciously eating less meat and fully appreciating it when we do. For me this this means not throwing out what most people think of as waste i.e. leftover raw bones, giblets and the Sunday roast chicken carcass. And, when it comes down to it, the more variety of bones, the better the broth. Simmered long and slow in freshly filtered water with a handful of vegetables, these simple ingredients are the makings of another meal. All that’s needed to elevate the delicious resulting broth into a visually appealing, light yet filling lunch or supper is some finely chopped vegetables, seasoning and a generous handful of fresh parsley.

Not so much a recipe, more ‘waste not, want not’ opportunism, bone broth can be made from the remains of Perfect Roast Chicken, including the roasted vegetables you cooked it with, plus a few raw, organic meat bones and/or half a dozen raw organic chicken wings, a stick or two of celery, a carrot and an onion. This super cheap, super satisfying ‘superfood’ is so good, you’ll probably be left wondering why you never thought of making it before.

Bone Broth With Vegetables (Serves 4)

Ingredients - to make the broth

The remains of a Perfect Roast Chicken including the vegetables/herbs you roasted it with

Raw, organic lamb/beef bones or 500g raw organic chicken wings

1 organic onion, unpeeled and chopped into quarters

1 large or 2 medium organic carrots, scrubbed (no need to peel) and cut into thick wedges

2 sticks organic celery, washed and chopped into large pieces

Fresh filtered water - enough to virtually cover the bones/chicken carcass  


Ingredients - for the vegetables (can be varied according to what’s fresh and in season)

30g organic butter or olive oil

I large or 2 medium organic leeks, tough green tops and roots removed, cut into fine dice

1 small organic sweet potato, peeled and cut into small dice (no bigger than a pea)

2 organic carrots, peeled and cut into small dice (no bigger than a pea)

2 medium sticks organic celery, washed, trimmed and cut into small dice (no bigger than a pea)

½ large organic courgette, washed and cut into small dice (no bigger than a pea) 

100g organic frozen peas, defrosted 

1-2 tbsp organic tamari

a little sea salt and freshly ground black pepper


Ingredients - to serve

small bunch organic parsley, finely chopped

cold, roast chicken, cut or shredded into small pieces - optional

Instructions - to make the bone broth

Place all the ingredients into a very large saucepan (or you can use a slow-cooker, if you have one).

Add enough cold, freshly filtered water to virtually cover - push down any bits and pieces that are sticking out above the water line.

Set the pan over a medium-high heat and bring to boiling point. Keep your eye on it. As soon as the liquid starts to boil, turn the heat down to a very low setting and, using a metal tablespoon, skim off any scum that’s risen to the surface. 

Cover with the pan lid and allow the liquid to simmer very gently for at least 2 hours - although 4 hours would be better. N.B. It is very important that the liquid does not boil rapidly at any time because this will make the finished broth cloudy rather than clear.

After a couple of hours - longer if possible - the liquid will have turned into a clear, golden broth and will smell really inviting. Allow the contents of the pan to cool down a little before straining the hot broth through a metal sieve into a clean saucepan. Or, if you’re not planning to use it straightaway, a glass bowl. Leave to cool completely, then cover and store in the refrigerator, where it will turn into a savoury jelly.


Instructions - to cook the vegetables and finish the dish

In a large saucepan, melt the butter (or gently heat the olive oil) then add the diced vegetables and stir everything together well to lightly coat the vegetables in the oil.

Cut a circle of greaseproof paper to fit the pan and press this down directly on top of the vegetables. Put the pan lid on and cook gently over a medium-low heat for approximately 8 minutes or until the vegetables are just soft - they should retain their natural, vibrant colour.

Bring the bone broth back to boiling point, then season to taste with Tamari, sea salt and black pepper. 

Add the hot broth to the saucepan containing the vegetables and simmer over a medium-low heat for 10 minutes. 

If using, add the diced chicken to the broth and allow to warm through for a further minute before ladling into individual pre-warmed serving bowls - making sure that the vegetables and chicken pieces are evenly distributed between each bowl. 

Sprinkle over the chopped parsley and serve. 


Notes

The broth will keep for up to 5 days covered in a refrigerator.

Before using jellied broth straight from the fridge, scrape off the top layer of fat from the surface.

You can freeze the cooled liquid broth in ice cube trays and then use the resulting frozen stock cubes individually to add depth of flavour to savoury sauces and gravies. 


Carbohydrate 21g Protein 5g - per serving


Nut Roast

by Susan Smith in ,


2017 began in much the same way that 2016 ended… assisting Mirror Imaging with two back-to-back winter weddings and spending the rest of January up to my neck in legalese and paperwork. True, for the sake of our health and wellbeing I do still spend quality time in the kitchen devising good things to eat, but actually getting around to photographing the end result and writing up the recipes to share on Primal Plate’s blog has, over the past month, been a stretch too far. Sorry. 

With the start of the new year and a couple of pounds gained, I turned my attention away from the meaty feasts (organic and pasture-fed, no less) that we’d enjoyed over Christmas and reignited my appreciation for all things vegetarian. I know that generally nutloaf gets a bad press - at least with non-vegetarians - but I kid you not, this fabulously flavoursome Nut Roast could knock most meat dinners into a cocked hat. Healthy and chock-full of protein from an abundance of nuts, this Nut Roast has all the savoury heartiness of meat without the heaviness. Plus, it packs more taste, it costs less to make, it looks better on the plate and you can prepare it in advance. Served with my mouthwatering vegetarian gravy (recipe coming soon) that Sarah thought was so tasty it must have made with homemade chicken stock, some seasonal oca roasted with thyme (the nearest low-carbohydrate equivalent to roast potatoes) and tender stem broccoli, this low-carb, Primal, vegetarian meal is so good it verges on the genius.  

It’s equally delicious served cold with salad. 

Nut Roast (Serves 6)

Ingredients

50g raw organic pecans 

50g raw organic Brazil nuts 

50g blanched organic almonds

2 tbsp raw organic pumpkin seeds 

25g organic unsalted butter

3 large organic shallots, peeled and finely chopped

150g organic chestnut mushrooms, coarsely chopped 

50g raw organic cashews, coarsely chopped 

2 tbsp organic smooth almond butter

2 tsp Marmite

100g organic strong cheddar cheese - finely grated

3 tbsp organic parsley, finely chopped

1½ tbsp organic sage, finely chopped

400g tin organic chopped tomatoes, well drained

2 organic medium eggs, beaten

1 dsp Sukrin organic coconut flour

Celtic sea salt

Freshly ground organic black pepper

Organic watercress or chopped parsley to serve

Organic oca are part of the yam family and look a little like radishes when raw. When roasted in the oven they make a fantastic low-carb potato substitute, close in favour and texture to roast new potatoes.

Organic oca are part of the yam family and look a little like radishes when raw. When roasted in the oven they make a fantastic low-carb potato substitute, close in favour and texture to roast new potatoes.

Instructions

Melt 10g of the butter over a very low heat (or in a microwave). Grease a 400g /1lb loaf tin with the melted butter before lining with a long strip of non-stick baking parchment to cover the base and narrow sides of the tin. Grease the baking parchment too. 

Toast the pecans, Brazil nuts, blanched almonds and pumpkin seeds in a large frying pan over a low heat until nicely golden. 

Take the pan off the heat and allow the nuts/seeds to cool slightly, then whizz in a food processor until finely chopped.

Pre-heat oven to 190℃ / ℉ / Gas mark

Melt the remaining 15g of butter in a small frying pan and gently cook the chopped shallots for about 3-4 minutes until soft and beginning to turn golden. Add the chopped mushrooms to the pan and continue to cook for a further 5 minutes, stirring occasionally.

In a large bowl, combine the toasted ground nut mixture with the cooked shallots and mushrooms and the rest of the ingredients. Season with sea salt and black pepper and mix together well. 

Spoon into the prepared loaf tin and level off the top. Cover with a piece of buttered non-stick foil.

Cook for 45 minutes or until a skewer inserted in the middle comes out clean. Remove the tin foil - if the top isn’t evenly browned pop the nut loaf back into the oven, uncovered, for a further 5-10 minutes.

Cool for 15 minutes in the tin before loosening around the edges with a small knife and carefully turning out onto a warm serving plate. Peel away the parchment paper and cut into slices.


Carbohydrate 12g Protein 15g - per serving


Nutty Parsnip Gratin

by Susan Smith in , ,


I am fully “living life on the veg” courtesy of Riverford Organics, and I could not be happier with my regular supply of the freshest, tastiest organic produce that they deliver every Friday straight to my door. An absolutely brilliant service!

Notwithstanding my new-found addiction to drinking a large glass of freshly pressed juice every day - which I’m convinced is far more life enhancing than the proverbial ‘apple a day’ that’s reputed to ‘keep the doctor away’ - I’m having a ball creating new recipes from a plethora of organic fruit and vegetables that you can never reliably find on supermarket shelves.

Because eating Primal is what my close family prefers, we never succumb to eating white potatoes or even compensate very often with other high-carb root vegetables. However, last week I couldn’t resist ordering some new season parsnips for inclusion in my weekly Riverford box of goodies. When they arrived, I thought I’d go all out and make a main meal of them.

Totally delicious, this creamy Nutty Parsnip Gratin has a gorgeous sweet spiciness about it that pairs beautifully with salty Parmesan cheese and crunchy roasted hazelnuts. In fact, I think I’ve succeeded in elevating the humble parsnip to giddying new heights with this dish! Let’s just say, when you dive in with your fork you might not even recognise that you’re eating parsnips - it’s just the most perfectly balanced, tasty, autumnal meal that ticks all those cold-weather comfort food cravings without a potato or grain in sight. How good is that? 

Nutty Parsnip Gratin (serves 3-4)

Ingredients

500g organic parsnips (trimmed and peeled weight of approximately 3 large parsnips)

2 large organic shallots

300ml organic whole milk 

125ml organic double cream

1 dsp fresh rosemary leaves, finely chopped (about 2 decent sprigs of rosemary)

1 tsp English mustard

¼ tsp organic nutmeg, freshly grated 

1 tsp Celtic sea salt

80g Parmesan cheese (I used Gran Moravia vegetarian Parmesan-style hard cheese), finely grated

50g organic roasted, blanched hazelnuts, chopped

40g organic ground almonds

15g organic unsalted butter

Freshly ground organic black pepper


Instructions

Pre-heat the oven to 200℃ / 400℉ / Gas mark 6

Peel and finely slice the parsnips lengthways into 2-3mm thick strips using a mandolin. If the parsnips are large, first cut them in half across the middle, then cut the top half into quarters and using a vegetable peeler, trim away the fibrous core before slicing.

Peel the shallots and still using the mandolin, slice them very finely.

In a large, wide, lidded sauté pan heat the milk to scalding point (just below boiling) then add the parsnip and shallot slices, pressing them down into the milk (the vegetables won’t be completely covered at this stage).

Cover and cook over a medium-low heat for 4 minutes until the parsnips are soft but not broken up. Tip: Gently stir the vegetables around after 2 minutes to ensure that everything cooks evenly. Take off the heat and set aside.

In a medium-sized bowl, mix together the cream, rosemary, mustard, nutmeg and salt, then stir in half the grated cheese. Pour the mixture over the parsnips and shallots and gently combine everything together. Tip into a gratin dish, press down with the back of a spoon and level off the top.

In a small bowl mix together the rest of the cheese, ground almonds, chopped hazelnuts and a good grating of freshly ground black pepper. Scatter evenly on top of the parsnip mixture.

Dot all over with small pieces of cold butter and bake the gratin for 30 minutes until lovely-bubbly, crisp and golden.

Eat and enjoy.

Notes

Nutty Parsnip Gratin tastes special enough to serve as a vegetarian main course with all the trimmings on Christmas Day. It’s also a brilliant make-ahead vegetable side dish for carnivores - I imagine that served alongside something meaty, it would be an absolute winner.

It doesn’t matter so much for this recipe because you’re boiling the milk anyway, but because it’s kinder to cows and much healthier for humans, I only ever buy whole milk that’s raw and organic from Gazegill Organics This is what they say:

Here at Emma’s Dairy we believe that cows should have the freedom to roam, grazing our pastures and producing raw organic milk that is naturally high in omega 3. Our cows produce a natural amount of milk and are not intensified in any way to produce more, thats why our milk is rich in butterfat and protein. We do not homogenise our milk but believe that in leaving a cream line you can enjoy simply put an un-tampered with natural product that is full of natures best, we also offer raw organic milk and pasteurised milk as well as cream and offer UK wide delivery, we hope you enjoy it.” 


Carbohydrate 31g Protein 15g - per serving


Sweet Potato Gnocchi With Sage Butter & Goats Cheese

by Susan Smith in , ,


Good news for all Primal/Paleo enthusiasts who still crave potatoes. Today’s blog post for sweet potato gnocchi offers all that’s best about the much-loved spud - golden and crisp on the outside, soft and fluffy on the inside - without going off-piste. These delicious little pillows of potato-like perfection have the heart of soft, light-tasting mashed potato and the soul of crispy, caramelised, umami-flavoured chips.

Sweet potatoes offer a healthier, lower-starch alternative to other potato varieties, but here I’ve tamed down their sweetness and cancelled out their higher water content with primal-friendly ingredients to mimic the taste and texture of regular potatoes. As a cook, there have been many occasions when I’ve thought that only potato can properly complete a meal that’s lacking the comfort and pleasure of something satisfyingly starchy. No longer. These sweet potato gnocchi have the density and depth of flavour I’ve been missing and are the perfect potato substitute for any meal crying out for chips, mash, roasties or croquettes. 

However, I think today’s recipe for Sweet Potato Gnocchi With Sage Butter & Goat’s Cheese is at its best presented as a gratifyingly simple, vegetarian main course. With just enough sweetness from the gnocchi to complement the saltiness of strong-tasting goat’s Cheddar, it’s a combo that’s so tasty you won’t even think about reaching for the ketchup! Also, these beauties are a brilliant dinner-party starter or, piled onto a platter with freshly grated goat’s Cheddar and crispy fried sage leaves scattered over, they will blow your guests away when handed around as a hot savoury canapé to accompany drinks. 

Unlike traditional gnocchi that’s made from regular potato and refined wheat flour, Primal Plate gnocchi are grain-free, potato-free and gluten-free too. They may require a little effort to make but the pre-cooked and cooled gnocchi ‘sausages’ can be stored, still in their cling-film wrapping, for up to 2 days before being cut into gnocchi-sized pillows and quickly fried off in butter. Finally, without compromise, my appetite for potato is satiated!

Sweet Potato Gnocchi With Sage Butter & Goats Cheese (Serves 6)

Ingredients

750g organic sweet potatoes (should yield about 500-550g sweet potato puree)

1 organic egg yolk, lightly beaten

200g organic ground almonds

50g Sukrin organic coconut flour

50g organic arrowroot powder

1½ tsp Celtic sea salt

100g full-fat organic soft cheese

40g organic butter

18 fresh sage leaves

100g Quicke's Goat Cheddar (I purchased this from Waitrose's deli counter) or Parmesan-style cheese, freshly grated - to serve

Freshly ground black pepper - to serve


Instructions

Pre-heat oven to 180°C / 350℉ / Gas mark 4

Place the sweet potatoes on a baking tray and bake for 45-60 minutes (depending on their size) until completely cooked through.

Remove the potatoes from the oven and whilst they’re still hot cut them in half, then scoop out the centres of each. Pass the sweet potato flesh through a fine sieve into a large bowl. Discard the skins.

Add the ground almonds, coconut flour, arrowroot powder, cream cheese, egg yolk and sea salt to the sieved sweet potatoes and mix everything together well. 

Cover and chill for 20-30 minutes in a refrigerator.

Bring a wide, deep pan of water to boil.

Divide the cooled gnocchi mixture into manageable portions (about 200g each). Roll each portion out between cling film into a 2 cm (¾ inch) thick long sausage. Twist the ends of the cling film together tightly then cook each sausage for 6 minutes in the boiling water.

At the end of the cooking time, remove the gnocchi sausage from the boiling water with the aid of two spatulas and lay each one down in an ice-cold water bath to cool down.

Once cool, remove the cling film and slice each sausage into little gnocchi ‘pillows’ i.e. about 2.5cm (1 inch) long pieces. Cover and keep chilled. N.B. They can be stored for up to 2 days in a refrigerator.

When you’re ready to eat, heat 40g grass-fed butter in a large frying pan set over a medium heat. Do not let the pan get too hot - you want the butter to foam, not burn. Sizzle the sage leaves for 1 minute, then remove from the pan and set aside. 

Top left: Gnocchi rolled into cling wrapped  'sausages'. Top right: Blanching in simmering water (put the lid on). Bottom left: In the ice cold water bath. Bottom right: Chopping the chilled Gnocchi 

Top left: Gnocchi rolled into cling wrapped  'sausages'. Top right: Blanching in simmering water (put the lid on). Bottom left: In the ice cold water bath. Bottom right: Chopping the chilled Gnocchi 

Now add the gnocchi pillows to the pan and fry them in the sage-infused butter until golden on the outside and light and fluffy in the centre. Depending on how many people you’re feeding, you may have to do this in several batches. N.B. It’s important that you don’t overcrowd the pan and if the butter starts to burn, clean the pan out and start afresh with more butter. When the gnocchi are nice and golden on all sides, lift them onto a warm plate lined with kitchen paper.

Serve the gnocchi hot with a generous amount of grated goat’s Cheddar sprinkled over and a good grinding of fresh black pepper. Garnish with the crispy sage leaves.


Carbohydrate 29g Protein 13g - per serving


Perfect Roast Chicken

by Susan Smith in ,


Everyone’s favourite, it’s been said "A kitchen is not truly your own until you’ve roasted a chicken in it." Simple and delicious, the perfect roast chicken is aromatic, succulent and tasty with golden, crispy skin. 

Harking back to my childhood, white chicken meat was considered superior to red meat and would most often grace the table for special occasions. Worlds away from the pitiful, intensively reared chickens that now predominate most supermarket shelves, my remembrance is of free-range, pastured, happy hens that, when their time had come, were slaughtered out of sight of the rest of the flock. 

When I was very little, my parents shipped my sister and I off for a month long summer holiday to Gear Farm in Helston, Cornwall. It was here that I endured what at first felt like abandonment but turned out to be a most edifying exposure to farming life. It was rustic. There was no running hot water so we had a washbowl in our bedroom and once a week we bathed in a tin bath in the front sitting room. The only flush toilet was outside. At night if we needed to pee we used under-the-bed chamber pots. The only in-house entertainment was a piano, which is where the family and farmhands gathered in the evening for a sing-along. My all-time favourite was our rendition of a Doris Day song ‘Que Sera Sera’, which to a little girl full of imagination and uncertainty seemed to resonate. Come to think of it, the lyrics still hold good! 

It was a simple but good life. To be woken up very early in the morning to the whinnying of a majestic shire horse stood immediately below my bedroom window, helping to herd the cows from field to farm and back again for their twice-daily milking, hand-collecting fresh, warm eggs from straw filled nests in purpose-made wooden henhouses, walking through fields of ripening wheat, gathering pure white field mushrooms ankle-deep in morning dew, peacefully watching a sow suckling her piglets. And, on the dark side, taking care to avoid the padlocked shed that housed the farm’s very large and vocal bull, lying in bed listening to the sound of a chicken trying to escape having it’s neck wrung and the squeals of terrified pigs being forced onto the slaughter truck. After all these years, I have still not managed to come to terms with the variance between life and death. 

Accordingly, at Primal Plate the vast majority of our meals are vegetarian. However, we do still occasionally eat organic, grass-fed meat, which I also buy to make into healthy, raw pet food for my cat Sushi. An occasional treat for us, a Perfect Roast Chicken is probably what most people think of as the best meal in the world!

I’ve avoided all the ‘faff and fiddle' that many classic roast chicken recipes call for, so you don’t need to be a seasoned cook to bring a perfectly roasted chicken to the table in all it’s golden glory. In fact it’s so easy to cook, it almost beggars belief. However, please don’t be cheapskate when buying chicken. Honour the bird you’re about to eat - and yourself - by paying extra for free-range, pastured and preferably organic, then follow the instructions step-by-step for the best roast chicken you’ve ever tasted.

Finally, there’s nothing much more useful to have in your refrigerator than a cold roast chicken. I like to pile juicy bite-sized pieces of cold roast chicken mixed with lemony mayonnaise, crunchy celery, fresh tarragon and crisp lettuce leaves between slices of grain-free bread to make the most deliciously satisfying sandwiches to take on a picnic with a bottle of chilled champagne. Simply add English strawberries and cream for the ultimate celebration of summer.

Hot or cold, I guarantee that once you’ve learned how to roast a chicken to finger-licking perfection, it’ll be a friend for life!  

Perfect Roast Chicken (Serves 4)

Ingredients

1 organic onion, halved

2 organic carrots, cut into chunks

1 free-range, organic chicken about 1.5 kg / 3lb 5oz

40g grass-fed butter, softened

Celtic sea salt

freshly ground black pepper

1 lemon, pricked all over with the point of a sharp knife & microwaved for 30 seconds

small bunch thyme - optional


Instructions

Take the chicken out of the refrigerator at least 30-45 minutes before you want to cook it to allow it to come to room temperature. 

Remove any plastic packaging and stand the chicken on a plate lined with paper-towel. Pat the chicken dry - inside and out - using more paper towels. N.B. Do not rinse under the tap, the chicken needs to be really dry for its skin to crisp up to a beautiful golden-brown.

Heat the oven to 190℃ (175℃ fan) 375℉ / Gas mark 5. Have a shelf ready in the middle of the oven without any shelves above it.

Scatter the vegetables over the base of a roasting dish that fits the chicken snugly (see photograph).

Season the underside of the chicken (its back) and inside the cavity with salt and pepper, then stuff the cavity with the lemon and thyme, if using. 

Sit the chicken on top of the vegetables and smother it all over with the butter. Then, liberally season it on the outside with a generous amount of sea salt and a good grinding of black pepper. 

Place in the oven and leave, undisturbed, for 1 hr 20 mins – this will give you a perfectly roasted, crispy-skinned chicken. 

To check, pierce the thigh with a skewer and the juices should run clear.

Remove the cooked chicken from the oven and carefully lift the chicken onto a dish or board to rest for at least 15-20 mins. As you lift the chicken, let any juices from the chicken pour out of the cavity into the roasting dish - you can use this to make delicious gravy, soups and sauces. 


Carbohydrate 0g Protein 70g - per serving

Cold roast chicken with tarragon mayonnaise and crispy lettuce between our Grain-Free Bread

Cold roast chicken with tarragon mayonnaise and crispy lettuce between our Grain-Free Bread

Or serve warm roast chicken with a simple salad and our Fast & Easy Vinaigrette 

Or serve warm roast chicken with a simple salad and our Fast & Easy Vinaigrette 


Lemon Courgetti With Summer Vegetables & Tomato Salad

by Susan Smith in , ,


Celebrate summer, when it shows up, with an ‘Italian-style’ meal of healthy, seasonal deliciousness. The shops are filled with a cheap and plentiful supply of courgettes in July and August, so now is the time to make them into the brilliant, low-carb, pasta substitute popularly dubbed “courgetti”. This fresh, healthy and surprisingly substantial dish accompanied by a selection of the most vibrant of summer fruits - sweet tomatoes - is an amazingly flavourful way to enjoy a taste of Italy without the high-starch hit you get from eating regular pasta.  

My eldest daughter Elizabeth provided the inspiration for Primal Plate's tomato salad recipe. Last weekend she served up something very similar at an impromptu family BBQ and it tasted so fresh and looked so colourful that I was reminded how versatile a simply prepared and beautifully presented plate of tomatoes can be. This salad is a great way to lighten-up all manner of dishes, or perhaps to eat on its own with some fresh goat's cheese with grain-free bread to mop up the juices.

Quick, light and super-easy to make, this lovely combo is my idea of summer on a plate!

Ingredients - for the Lemon Courgetti with Summer Vegetables

300ml organic double cream

1 organic lemon, juice and finely grated zest

80g organic full-fat cream cheese

100g Parmesan-style cheese, finely grated

200g frozen peas

200g frozen baby broad beans

200g fresh asparagus tips

4 medium-large, firm, flat (not curved) chunky courgettes - size and shape matters!

small bunch of basil

sea salt and black pepper


Ingredients - for the Tomato Salad

600g ripe vine tomatoes - for interest and sheer good looks, choose from a selection of red or yellow cherry tomatoes, heirloom golden-orange, red and green vine tomatoes, baby plum tomatoes or the beautiful red and green Tigerella varieties

2 tbsp organic cold-pressed olive oil

2 tsp best-quality Balsmanic of Modena vinegar

sea salt and freshly ground black pepper

fresh basil leaves - to decorate

Instructions

Boil a kettle-full of fresh water. Pre-heat 4 individual pasta bowls.

Measure the frozen peas and broad beans into two separate heat-proof jugs or bowls. Pour the boiling water from the kettle equally over the peas and broad beans and allow to stand until they’re defrosted. 

Prepare the courgettes by washing them and spiralising into long thin spaghetti-like shreds - alternatively, this can be done with a knife by cutting them into long, thin strips.

Drain the defrosted peas through a sieve and tip them into a clean bowl. When the broad beans have cooled down, drain them too before popping them out of their tough outer skins between your finger and thumb straight into the bowl with the peas. 

Trim the bottom of the asparagus tips - it’s not necessary, but I also like to peel the bottom third of the stems with a potato peeler. Boil a second kettle of water.

Heat the cream with the lemon zest in a medium-large saucepan over a medium heat until it comes to the boil. Turn the heat down to simmer and continue cooking for 3 minutes. Cover and set aside.

Meanwhile, pour the boiling water into the bottom of a steamer, then put the asparagus tips into the steamer basket, cover and steam for just 1 minute. Remove the asparagus tips from the steamer with a slotted spoon into a bowl of cold water (or put into a sieve and run under the cold tap) to ‘set’ their bright green colour. Drain and dry on kitchen paper. Cut the asparagus into 3 centimetre pieces (or in half) and then add them to the bowl of peas and broad beans.

Reserve 4 sprigs of basil then strip the leaves off the rest of the basil stems and tear them into small pieces. Set aside.

Whisk the cream cheese, 80g of Parmesan and 30ml of lemon juice into the lemon infused cream and then over a medium heat bring the sauce back to just below boiling point. Taste, then season with sea salt and a good grinding of black pepper. Taste again and add a little more lemon juice if you think it needs it. 

Add the asparagus, broad beans and peas to the cream sauce and then over a low/medium heat, allow the vegetables to gently warm through - make sure the sauce gets nice and hot but don't let it boil.

Bring the water in the steamer back to the boil, add the courgetti to the steamer basket, cover and steam for just 1½ minutes - no longer. They need to cook just long enough to lose their raw-edge and get hot but not so long that they become limp and soggy. 

Immediately tip the courgetti out of the steamer basket onto a dry, clean tea-towel. Wrap them up in the tea towel to absorb as much water as possible.

Divide the drained courgetti equally between the 4 pre-heated serving dishes. Stir the torn basil leaves into the cream sauce and vegetables then ladle or spoon this on top of the courgetti - distributing the vegetables and sauce evenly. Sprinkle the rest of the grated Parmesan-style cheese over each serving and finish with a good grinding of black pepper and a sprig of fresh basil.

Serve immediately with tomato salad.   


Instructions - to make Tomato Salad

No need to peel or remove the seeds from the tomatoes. Wash and slice the larger tomatoes, removing the core at the stem end by cutting out a small ‘v’ at the centre of the bigger slices with the point of a small, sharp knife. Halve the cherry tomatoes.

Layer all the tomatoes attractively on a large platter. Lightly season with sea salt and then drizzle over the olive oil and balsamic vinegar. Add a grinding of freshly ground black pepper and decorate with green and/or purple basil leaves. 

Serve at room temperature for a simply delicious way to enjoy all the nutritional benefits of sweet, fragrant tomatoes. Yum!

Notes

If you prefer, you can substitute the frozen vegetables with 500 grams each of fresh peas and broad beans (weight before podding). Pod them, then cook in boiling water (or steam) for 3 minutes before draining well and adding to the cream sauce to keep warm. 


Carbohydrate 14g Protein 19g - per serving of lemon courgetti with summer vegetables

Carbohydrate 7g Protein 1g - per serving of tomato salad


Mushroom & Three-Cheese Pizza

by Susan Smith in , , ,


Last week, when Sukrin tweeted the idea of making pizza with their ‘just add water’ Chia & Hemp bread mix I couldn’t resist giving it a go! 

Notwithstanding that low-carb practitioners and the gluten intolerant are particularly susceptible to temptation, we all seem to get cravings for pizza. Unfortunately, I also know far too many other people who complain they’re fat and unwell but won’t give up eating grains (bread, pasta, rice and pizza) and doggedly refuse to cook for themselves at home. In a last ditch effort to convince them that not everything that looks stylish and tastes delicious is laboriously difficult to prepare and cook, this Mushroom & Three-Cheese Pizza recipe should be universally appealing! 

Though probably not strictly Primal or indeed ‘proper’ pizza - because I’ve deliberately left homemade tomato sauce out of the equation to save you the bother of making one! - it is nevertheless an extremely low-carb, satisfyingly healthy, cheesy pizza ‘fix’ that everyone can enjoy. We love it with a glass of Chianti or icy-cold Pinot Grigio.  

Mushroom & Three-Cheese Pizza (Serves 4)

Ingredients - for the base

210 g pack of Sukrin Chia & Hemp Mix

250 ml cold filtered water

1 dsp fresh rosemary leaves, finely chopped


Ingredients - for the topping

225 g organic chestnut mushrooms

30 g organic unsalted butter

sea salt 

freshly ground black pepper

2 dsp fresh rosemary leaves, finely chopped

120 g soft goat’s cheese, without rind (I used Sainsbury’s Taste The Difference Goats Cheese and removed its rind before dicing into small pieces)

125 g organic vegetarian mozzarella

50 g vegetarian Parmesan-style cheese (I used Gran Moravia)


Ingredients - to serve

40 g organic wild rocket 

8 large fresh basil leaves 

1 dsp organic, cold pressed, extra virgin olive oil

Balsamic vinegar of Modena - for drizzling

The part-cooked, grain-free pizza bases, topped with mushroom and cheese, before returning to the oven 

The part-cooked, grain-free pizza bases, topped with mushroom and cheese, before returning to the oven 

Instructions

Cut the base of the stems off the mushrooms and wipe them clean with a damp paper towel. Cut the mushrooms into thick slices.

Warm the butter in a large non-stick frying pan over medium-high heat. Add the mushrooms and cook, stirring occasionally, until tender and tinged golden-brown and the majority of the juices in the pan have evaporated (about 5 minutes). Take off the heat, season the mushrooms to taste with sea salt and freshly ground black pepper. Cover and set aside.    

Preheat an oven to 200℃ /  400°F / Gas mark 6.

Tip the Chia & Hemp mixture into a medium sized bowl and add the filtered water and the finely chopped rosemary. Stir everything together well with a fork and allow to stand for 3 minutes (as directed on the packet)

Form into 4 x 15 cm / 6” ‘mini’ pizzas. The best way to do this is to divide the bread mixture into 4 equal portions (weighing approximately 105 g - 110 g each) before placing each piece of dough in the centre of a 15 cm / 6” non-stick baking parchment circle (4 baking parchment circles in total).

Using a sheet of cling film placed on top of the dough to stop it from sticking to you or the rolling pin, flatten it down - first with the palm of your hand and then rolling out evenly - into a round pizza shape that just comes to the edges of the parchment circle. Lift or slide the pizza, still on its parchment paper, onto a baking tray.  Repeat to make 4 pizzas.

Bake in the pre-heated oven for 15 minutes.

Meanwhile, grate the Parmesan-style cheese and crumble or cut the goat's cheese into small pieces. Lastly, drain the mozzarella cheese, then coarsely grate it onto a plate lined with paper kitchen towel (this soaks up any milky liquid that may ooze from the cheese when it’s left to stand). If not using immediately, keep the prepared cheeses covered and refrigerated on 3 separate plates. 

After the pizza bases have had their first baking, remove from the oven. Whilst they're still sat on the baking tray, top the pizzas evenly with grated mozzarella, goat’s cheese and mushrooms. Don’t take the topping right to the edges of the pizza bases - leave a 1.5 cm gap all the way round to allow the cheese to melt and spread out in the heat of the oven without it running off the top of the pizzas. Sprinkle over the rest of the chopped rosemary and finally, add an even layer of Parmesan-style cheese divided equally between each pizza.

Put the baking tray back into the oven and bake the pizzas for a further 10-12 minutes until the cheese is meltingly hot and bubbly and the edges of the pizza tinged golden-brown. 

During this final cooking time, finely slice the basil leaves and mix them with the rocket. Dress lightly with olive oil. 

Remove the pizzas from the oven. Wait for 1-2 minutes then, with the aid of a flat spatula, carefully remove the pizzas from their paper circles. Put the pizzas onto 4 warmed serving plates. 

Pile equal quantities of the dressed rocket and basil leaves on top of each pizza and drizzle over a little real Modena balsamic vinegar before serving. 


Carbohydrate 5.5 g Protein 16g - per pizza


Spicy Salmon Fishcakes / Halloumi & Toasted Cashews With Paleo Pad Thai ‘Slaw’

by Susan Smith in , , ,


East meets West in this Primal/Paleo culinary take on fishcakes and coleslaw. Without the potato, flour and breadcrumbs used in traditional fishcake recipes, these Asian inspired, fishcakes are so much simpler and quicker to make. 

Fresh and light - with no mayo or endless amounts of shredded cabbage to chomp your way through - the Pad Thai ‘Slaw’ is also a wonderful thing!

Put the two together for a surprisingly satisfying, clean-eating, Omega-3 packed family meal that’s high in protein and low in carbs.

Vegetarians can also make a meal of this punchy-flavoured Paleo Pad Thai ‘Slaw’ by topping it with 60g toasted cashew nuts and replacing the salmon fishcakes with slices of freshly griddled ‘vegetarian-friendly’ - i.e. not made with animal rennet - halloumi cheese - you’ll need to allow about 80g-100g of halloumi per person.

Tasty, pure and simple…job done! 

Spicy Salmon Fishcakes With Paleo Pad Thai ‘Slaw’ (Serves 4)

Ingredients - for the fishcakes

800 g wild Alaskan salmon, boned and skinned

3 spring onions, finely chopped

juice of 1 lime

1 tsp organic dried chilli flakes

1 tbsp tamari

1 dsp fresh ginger, peeled and finely grated (approx. 1 x 2.5 cm / 1inch piece)

4 tbsp finely chopped coriander leaves

1 organic egg, beaten 

1 tsp sea salt

freshly ground black pepper

75-100 g organic ground almonds

1-2 tbsp organic coconut oil - for frying the fishcakes


Ingredients - for the Paleo Pad Thai ‘Slaw’ 

2 medium courgettes, cut into thin slices, coarsely grated or spiralised (see Notes below)

3 medium carrots, cut into thin slices, coarsely grated or spiralised (see Notes below)

200g frozen baby broad beans, thawed and shelled (about 120g prepared weight)

1 tbsp chopped fresh chives

1 tbsp raw organic sesame seeds


Ingredients - for the dressing

40 ml fresh lime juice

40 g raw organic cashew nut butter

1 tbsp tamari (I used Clearspring)

40 ml Co Yo natural coconut milk yogurt

1-2 drops organic liquid stevia


Ingredients - to serve

1 tsp raw sesame seeds

coriander leaves and/or micro leaves


Instructions - to make the fishcakes

Put all the fishcake ingredients, except the ground almonds, into a food processor and pulse together until well blended. N.B. Be careful not to over-process - you want the mixture to retain a little of its chunky texture rather than turn into a mushy fish paste! 

Tip the fishcake mixture into a large bowl and add just enough of the ground almonds to ensure that it will hold together sufficiently well to form into fishcakes. The final mixture may still feel a little wet but should be easy enough to shape in your hands and will firm up in the refrigerator prior to cooking.

Divide into 8 fishcakes about 2.5 cm / 1 inch thick (weighing approximately 125g each). Transfer to a large plate, cover and refrigerate for at least 30 minutes.

Heat the coconut oil in a large, non-stick frying pan over a medium/high heat until the surface of the oil starts to shimmer (don’t allow it to smoke!). Cook the fishcakes for 3 minutes until crisp and golden on the underside, then flip them over and cook on the other side for another 3 minutes.

Serve with Pad Thai ‘Slaw’ and a squeeze of fresh lime juice.


Instructions - for the Paleo Pad Thai ‘Slaw’

Using a small hand whisk, combine all dressing ingredients together in a small bowl or cup until you have a smooth dressing that’s of pouring consistency.

To quickly defrost and remove the broad beans from their pods. Weigh out the frozen broad beans into a heatproof bowl or jug. Bring a kettle of water to the boil and pour over the beans. Let stand for 3-5 minutes. When the water has cooled down pop the tender, bright green beans out of their thick, leathery skins by squeezing gently between two fingers. 

In a large bowl, combine courgette, carrots and shelled broad beans. Add the chopped chives and sesame seeds, mix together gently and set aside.

Just before serving, pour over the dressing and gently toss all the ingredients together until the vegetables are evenly coated.

Transfer to plates and top with a sprinkling of sesame seeds, chopped coriander and/or micro leaves. 

Serve with either Spicy Salmon Fishcakes or Fried Halloumi and Toasted Cashews (see below).

The vegetarian option: Fried Halloumi and Toasted Cashews

The vegetarian option: Fried Halloumi and Toasted Cashews

Instructions to make Fried Halloumi & Toasted Cashews With Paleo Pad Thai 'Slaw' (V)

Firstly, toast the cashews in a large frying pan over a medium heat for about 5 minutes or until turning pale gold, then take off the heat and set aside. 

Cut the halloumi into 1 cm thick slices. Heat some coconut oil or olive oil in a pan until hot, then fry the halloumi for just 1-2 minutes on each side until golden and crispy around the edges. 

Arrange the Paleo Pad Thai ‘Slaw’ on 4 serving plates, top with the toasted cashews, sesame seeds and coriander leaves, then serve the fried cheese slices (3-4 per person) alongside, with wedges of fresh lime for squeezing over.

N.B. Be sure to plate-up the fried halloumi immediately after it’s cooked - it’s so much nicer warm! If you allow cooked halloumi to go cold, it will tend to become too hard and rubbery.


Notes

To make carrot and courgette julienne for the Paleo Pad Thai ‘Slaw’, I first cut the washed courgettes and peeled carrots in half horizontally, then finely sliced the halved vegetables vertically (on a mandolin) before using a small sharp knife to cut them into 6 cm long thin julienne strips. Coarsely grating them in a food processor would be a lot quicker!

The Paleo Pad Thai ‘Slaw’ is suitable for vegans.


Carbohydrate 17g Protein 66g - per serving (assuming 2 fishcakes per person)


Celeriac Dauphinoise

by Susan Smith in , ,


If I could have one 'mardy' about my Primal diet it’s that I just can’t seem to tactically allow potatoes back into my life…not ever! Having initially lost one and a half stones by eating low-carb, high fat (LCHF), I have on more than one occasion subsequently pined for the simplicity and density of potatoes. Carby they may be, but potatoes are in a league of their own and their virtues are not easily replicated. As well as being a naturally nutritious whole-food, simple spuds need no more than the application of heat to make them into something very, very tasty indeed (is there anyone that doesn’t love golden, crispy roasties?). When pre-cooked and chilled (think yummy potato salad) potatoes are also an alluring dietary source of resistant starch - which is top-notch food for ‘good’ gut bacteria, and thus your overall health. Or so I debate with myself…

Unfortunately, neither my nostalgia for potatoes or their nutritional profile is of any help to me. As far as my metabolism is concerned it’s not playing! I cannot ignore the fact that previously, within an hour or so of eating potatoes, my feet and ankles would swell alarmingly. No doubt potatoes had also long been playing havoc with my blood glucose levels, but after the age of fifty the almost immediate inflammatory response (edema) not only made me look like a frump, it actually made me feel quite queasy. I may forever mourn their loss, but for me it’s a case of R.I.P. potatoes! 

Another thing that peeves me is cheese! It’s virtually impossible to be a non-meat eater on compassionate grounds and still follow Primal principles without eating eggs and cheese. Unfortunately, almost all vegetarian recipes seem to ignore the fact that the most wonderful-tasting, beautifully-textured, traditionally-made cheeses, such as Parmesan, Gruyere and Mozzarella, are totally unsuitable for vegetarians. Whilst I’ve found good-enough substitutes for Parmesan and Mozzarella, I have still not found a copy-cat vegetarian version of Gruyere D.O.P. that’s available to retail customers, which can emulate anything like Gruyere’s unique melting quality and depth of flavour. Even if you can get past the ‘no-no’ of cheese made with calf rennet, there’s still the massive cruelty involved in milk production generally, and the nutritional degradation that occurs with pasteurised milk taken from grain-fed cows. Given that not all cheese is created equal, there is one family-run traditional cheese dairy that I am happy to be acquainted with because they share Primal Plate’s ethos - a passionate commitment to animal welfare and human health. This family run business makes award-winning, artisan, vegetarian cheeses from the raw milks of free-range, grass-fed cows, goats and ewes. In this day and age of intensive factory farming, small enterprises such as The Traditional Cheese Dairy make my heart sing. Not only because they fly in the face of extreme human exploitation of animals inherent in the dairy industry, but also because their end-products taste so good and are naturally healthful to animals and humans alike. I know it isn’t always practical, but please try to seek out and support all farmers that treat their animals as animals - not just a commodity for ‘growing’ meat or as 24/7 milking machines. Raw milk from free-range, grass-fed cows is not only better for the animals it is far, far better for you.  

Wherever you shop, substitute any mature, organic, vegetarian Cheddar in recipes that call for Gruyere. You may need to ask for advice at the Deli counter. It is often a case of trial and error when you’re trying to find a decent tasting vegetarian Cheddar cheese that doesn’t disintegrate into an oil-slick when baked or grilled! I will keep you posted if and when I find the perfect one!

Rant over, I have stopped arguing with reality long enough to create a potato-like dauphinoise using that great potato ‘pretender’…celeriac. Whilst the finished result isn’t as pillow-soft as cooked potatoes, cheesy gratins and bakes always have the yummy, comfort factor that low-carbers sometimes crave - and this cheese-topped Celeriac Dauphinois is no exception. I’ve lightened-up the full-on fat experience of double cream and cheese (oftentimes called for in traditional dauphinoise recipes), by substituting dry white wine for most of the cream. The crispy, crunchy cheesy topping speaks for itself. All in all, much tastier and less rich, Celeriac Dauphinois is an excellent low-carbohydrate main course for a light family supper or when entertaining vegetarians. It’s equally delicious served as a vegetable accompaniment.  

Ingredients

3 medium/large shallots, finely sliced

2 small celeriac, total weight about 900g

½ lemon, juiced

2 tbsp fresh lemon thyme, leaves only

2 tbsp olive oil

40g butter

sea salt and freshly ground black pepper

¼ tsp freshly grated nutmeg

150 ml dry white wine (I used a dry, white Spanish Rioja)

60 ml organic double cream

165g Gruyere (or mature, vegetarian Cheddar), finely grated              

60g Parmesan (or Parmesan-style cheese), freshly grated                 


Instructions

Pre-heat the oven to 190℃ / 375℉ / Gas mark 5

Fill a large bowl with cold fresh water and add the lemon juice.

Cut the top and bottom off the celeriac and then stand flat on a chopping board. With a sharp knife cut off the thick skin working all the way around the celeriac from top to bottom.

Cut each peeled celeriac into 4 quarters.

Using the thinnest slicer on a food processor, a hand-held mandolin slicer or a very sharp knife, cut the celeriac into 3mm thin slices. Put the celeriac slices into the lemon water to prevent them discolouring.

If not done already, finely slice the shallots. 

Heat the butter and olive oil together in a large pan until the butter has melted.

Drain the celeriac then either spin in a salad spinner or dry on a clean tea-towel. 

Add the shallots and drained celeriac to the pan. Continue to cook over a medium heat for about 5 minutes, turning the vegetables over now and again to make sure that everything is well coated in the olive oil and butter. 

Season with salt, freshly ground pepper and nutmeg then pour in the wine and continue to cook for about 10-12 minutes more with the pan lid on, stirring occasionally, until the celeriac is just tender.  

Tip the contents of the pan into a gratin dish. Scatter half the thyme leaves over the top then drizzle over the double cream and flatten the slices of celeriac down so they’re submerged as much as possible under the liquid.

Mix the two grated cheeses i.e. Gruyere & Parmesan (or vegetarian substitutes) together, then sprinkle on top of the celeriac in a thick even layer. Cover the dish with tin foil.

Place in the pre-heated oven and cook for 20 minutes. 

Remove the foil, then place back in the oven for a further 20-25 minutes until bubbling and golden brown. 

Remove from the oven and allow to stand for 2 minutes. 

Scatter over the rest of the thyme leaves before serving with a fresh green salad.


Notes

Cheese has a tendency to break down when cooked at high temperatures. The maximum temperature you should bake this dauphinoise - and any other cheesy casserole - is 190℃ / 375℉ / Gas mark 5, or below. If the cheese does separate and you’re left with a layer of fat sat on the surface of your Celeraic Dauphinoise, lightly dab off the excess oil with sheets of paper towel before allowing to stand for a couple of minutes prior to serving. It will still taste good!

If you like your cheese topping really brown and crozzly a couple of minutes under a very hot grill at the end of the cooking time should do the trick.  

Only buy small heads of celeriac - larger specimens can lack flavour, tend to be a bit woody and are much more unwieldy to peel and slice.


Carbohydrate 23g Protein 17g - per serving


Thai Green Curry With Prawns & Thai Green Garden Curry

by Susan Smith in , , , ,


Ever since I walked into the Royal Thai restaurant in Nottingham 20 years ago, I have been enchanted by Thai cuisine. Not so much the ‘farang' (Thai for Western foreigners of white descent!) version of Thai food, with our predilection for all things deep-fried - a sort of spring rolls with everything attitude - but the fresh and light, hot and spicy flavours brought together in a variety of harmonious dishes that seem to make every Thai meal a banquet.

Without dairy and hardly any emphasis on meat, Thai cooking is the embodiment of all the main flavour components - sweet, sour, spicy, salty and bitter - perfectly balanced in playful, imaginative dishes that are full of colour and texture. I’ll never forget the sheer joy and excitement of one gorgeous Thai girl called Tinkerbell (how endearing a nick-name is that?) as she ran out from the restaurant’s kitchen to proudly show us her first representation of a beautiful bird she’d painstakingly carved out of a carrot! 

Our first visit to the Royal Thai was an attempt to educate ourselves in anticipation of a month long business trip to Bangkok. At first they must have smiled at our naivety, but, prior to the journey we were generously afforded numerous ‘insider’ traveller’s tips and we quickly became one of their more regular customers…hungry for their companionship as much as the food! Subsequently, the amazingly beautiful, gracious and intelligent Thai girls running the business at that time welcomed us with open arms into the Thai community, and for many years it was as if we were part of their family. Sadly, the girl I most fell in love with died in a road traffic accident shortly after opening a second restaurant in Nottingham (formerly known as Siam Thani). Nang was the dearest of friends to me and the absolute epitome of all that I now associate with Thai people generally - kind, generous and incredibly friendly.

Now that we’re low-carb and Primal, it’s not so easy to eat out in Thai restaurants - you really do need lots of steamed rice to quieten down the chilli-heat - but for the home cook, authentic-tasting Thai food is simple and fast to prepare, and because you’re in control it doesn’t have to be the hottest of the hot. 

Prawns are synonymous with Thai cookery, but their popularity comes at a price. A violent, Asian slave trade exists to produce most of the prawns for sale in Western supermarkets, so please be careful that the prawns you buy are ethically and responsibly sourced. Choose organic king prawns from Waitrose or Honduran raw prawns from M&S. Thank you. Or you could forego the prawns altogether by opting for our vegan-friendly, equally flavoursome, Thai Green Garden Curry.

I’ve paired Primal Plate's tasty, just nicely spicy, warming green curry with pak-choi but Cauliflower Rice is good too. Vegans and vegetarians can simply substitute cherry tomatoes and asparagus tips for the prawns. Hand-carved vegetable flowers and birds are optional!

With food as delectable as this, no wonder Thailand is known as the “land of smiles”.

Thai Green Curry With Prawns (Serves 4) 

1 tbsp organic coconut oil

2 medium organic sweet red peppers, cored, de-seeded and cut into thin strips

4 medium/large organic spring onions, sliced diagonally into 5 or 6 pieces  

2 x 400ml tins organic coconut milk (full fat)

1 tbsp Marigold organic Swiss vegetable bouillon powder

4 tsp Thai green curry paste

1 tbsp organic tamari

450g raw peeled organic king prawns

200g frozen petits pois, defrosted  

½ tsp sea salt and freshly ground black pepper

20-30ml freshly-squeezed lime juice

2-3 drops organic liquid stevia

20g fresh coriander leaves, chopped

Thai Green Garden Curry

Simply follow the instructions given below - omitting the prawns and substituting with:

300g organic cherry tomatoes, halved

300g asparagus tips, trimmed and cut in to 5cm (2”) pieces

To Serve

2 x 235g packs pak choi, washed, prepared (*see below) and lightly steamed for 3 minutes. 

*If using very young pak choi they can be left whole or cut into halves or quarters. However, larger stems of pak choi will cook more evenly and are much easier to manage on the plate if you cut the leafy tops off their white stems. If the outer stems and leaves are still too large, split them in half down the middle. Place the white stems into the bottom of the steamer, then pile the green leaves on top and steam for 3 minutes with the pan lid on.


Instructions

Fill and boil a kettle of water. Pre-heat 4 large serving dishes/bowls. 

For making the Thai Green Garden Curry: Pour some of the boiling water from the kettle in to a medium saucepan. Bring back to the boil, throw in the asparagus and cook for just 2 minutes (do not overcook them, they should still have some ‘bite’). Drain and refresh the blanched asparagus in cold water (or place under a cold running tap) to stop the cooking process and set their bright green colour. Drain again and set aside.

To quickly defrost the petits pois: Put the peas in a heatproof jug, pour over the boiling water then drain and set aside.

Melt the coconut oil over a medium/high heat in a large, deep sauté pan. Add the pepper strips and spring onions to the pan and stir-fry for about 2 minutes or until just beginning to soften. 

Add the bouillon powder and the green curry paste and continue to stir-fry for a further 30 seconds - try to avoid breathing in the fumes at this stage, they’re quite pungent!

Pour the coconut milk into the pan and bring the mixture to the boil whilst stirring constantly. Once it comes to the boil turn the heat down to medium, then add the tamari, half the lime juice and a single drop of liquid stevia. Taste. Add a pinch of sea salt and a good grinding of black pepper - plus an extra drop of stevia, if you think it needs it. 

Let the sauce gently bubble away over a medium heat for 5 minutes to allow it to reduce down slightly.

Meanwhile fill a steamer with the rest of the boiling water from the kettle. Place the pak choi in the top of the steamer and cook with the pan lid on for 3 minutes.

Whilst the pak choi is cooking, tip the prawns (or, if making Thai Green Garden Curry, the cherry tomatoes and blanched asparagus tips) and the petits pois into the curry sauce and cook for a further 2 minutes or until the prawns turn pink and are completely opaque - or if making the Thai Green Garden Curry, just until the tomatoes, asparagus and peas are warmed through. 

Take the pan off the heat and stir in half the chopped coriander. Check the seasoning again and adjust to taste - also add a little more lime juice and/or another drop of stevia, if needed.

Pile the cooked and drained pak choi in the centre of the four pre-warmed serving bowls. Carefully ladle the green curry over the top dividing the prawns and vegetables equally between each bowl.

Sprinkle over the rest of the coriander and serve immediately. 


Notes

N.B. To keep the Thai green curry fresh and vibrant you need to be careful not to over-boil it in the final two minutes of cooking time. Gently heat through until just below boiling point. If you over-cook it at this stage, you’ll end up with tough prawns, collapsed tomatoes and dirty-looking, more-khaki-than-green, vegetables. Not very nice!


Carbohydrate 21g Protein 25g - per serving (with prawns)

Carbohydrate 26g Protein 10g - per serving (with cherry tomatoes & asparagus)


Cheesy Sweet Potato, Cauliflower & Spinach Gratin

by Susan Smith in , ,


Want something fast, fresh and fabulous for supper tonight? This vegetarian cheesy gratin ticks all the boxes - comforting, healthy, delicious and on the table in under 45 minutes.

Although today’s recipe includes full-fat crème fraîche, cheese and sweet potatoes, let’s be clear - a Primal, low-carbohydrate / high fat diet (LCHF) does not mean eliminating carbohydrates completely or that it’s okay to gorge yourself on fatty food. In my view, Dr. Atkins was much maligned and misrepresented in this respect. It does mean that oftentimes you’ll find Primal Plate recipes are contrarian to decades of public health advice which has hoodwinked most people into believing that saturated fat - fatty meat, milk, butter and cheese - is the root cause of clogged-up arteries, high cholesterol, heart attacks and obesity. Truth is, there’s never been a shred of reliable scientific evidence that can demonstrate saturated fat is harmful to human health. In fact, numerous scientific studies show the opposite to be true. The real culprit for the type 2 diabetes epidemic and obesity crisis (which are themselves a risk factor for heart disease and stroke) is a fat-phobic society indoctrinated into believing that a healthy diet is one low in fat and high in carbohydrates (LFHC). 

This myth has been perpetuated for the past fifty years or so and it’s time we turned things around. In a nutshell: It’s not fat that makes you fat and sick, it’s sugar. 

In layman’s terms, all the carbohydrates we eat are converted by the body into a type of sugar called glucose. Glucose is fuel for the cells and is transported around the body in the bloodstream. In response to glucose in the bloodstream the pancreas secretes insulin. Without insulin, glucose stays in the bloodstream - it’s insulin that allows glucose to enter the cells (of the brain, heart, liver and muscles) to provide the energy for them to work. Or, if it’s not required for immediate use, to be converted into glycogen and stored in the liver and muscles for later. 

However, once the cells are full to the gunnels with excess glucose they become increasingly resistant to the call of insulin to open up their cell doors and let more in. When there’s nowhere for glucose to go it stays in the bloodstream and blood sugar levels stay high - a toxic situation. What follows is pancreatic panic! In a frantic attempt to get rid of excess glucose in the bloodstream, the pancreas makes even more insulin. Unfortunately excess insulin is also toxic so then the cells become even more insulin resistant. Catch 22!

Eventually the over-production of insulin will help convert the excess glucose into fat but in the meantime the glucose in the bloodstream forms a sort of sludge that blocks arteries and causes systemic inflammation - the underlying cause of multiple degenerative diseases, including heart disease and cancer. Furthermore, an excess of insulin stops the fat-burning enzyme lipase from working efficiently inside the cells, so you don’t even burn off the fat that’s been stored!  

Most human beings are genetically predisposed to insulin resistance, which worsens with age and inactivity. The solution is to stop feeding the problem with high carbohydrate food - no grains, no potato, no sugar - and to exercise more. When you’re not constantly topping-up the body with sugar and starches it can start burning fat for energy instead. Without high carb foods spiking your blood sugar, natural, healthy fat becomes your new best friend. It satiates your appetite, you feel full for longer, it stops sugar cravings and it helps make all food look and taste yummy. 

As for the shoddy science and scaremongering that aims to convince you otherwise, I’ve been on the frontline of a randomised double-blind controlled study (the ‘gold-standard’ of scientific research) when I taught a group of asthmatics the Buteyko Method in the first UK Clinical Trial funded by the National Asthma Campaign. Unfortunately, several participants reported back to me that the study was biased against Buteyko because during their reviews with research staff they had been actively encouraged to continue using their asthma medication. According to our carefully compiled records, over ninety per cent of the Buteyko group either significantly reduced or gave up their bronchodilators completely during the study. However, when the scientific paper was finally published these remarkable results were buried. True, there was much scientific gobbledygook that I wasn’t familiar with, but suffice to say it took several more years before the method was given any credence whatsoever by the NHS. Why did I expect otherwise? Like most people I never imagined that highly respected academics would stoop so low. In reality, too many vested interests - years of study potentially wasted, livelihoods at risk, research funding cut, pharma greed and charity donations threatened - is a massive incentive to keep schtum or worse, go on the offensive to protect the status quo. It’s just how egos rock n’ roll. Nobody wants to admit they’ve been complicit in giving health advice that actually destroys tens of thousands of peoples’ lives but the truth is, there’s safety in numbers and the powers that be are far more interested in self-preservation than your health and well-being.

Dr Aseem Malhotra says it best: “In my opinion a perfect storm of biased research funding, biased reporting in the media and commercial conflicts of interest have contributed to an epidemic of misinformed doctors and misinformed patients. The result is a nation of over-medicated sugar addicts who are eating and pill-popping their way to years of misery with chronic debilitating diseases and an early grave.”

After years of trial and error, I found my way through the lies, confusion, chronic illness and creeping weight gain to discover that the exact opposite of ‘conventional wisdom’ is the truth. It convinced me that eating LFHC is tantamount to death, disease and obesity by the Food Pyramid and that switching to LCHF diet stops the rot. However, if you’re overweight or unwell please don’t ‘wait and see’ how the continuing debate about fat plays out between the warring scientific community - and please don’t take my word for who’s right either. For a few short weeks, simply test out the LCHF hypothesis yourself - using Primal Plate recipes for your inspiration - to see if it works for you.   

Primal Plate is proud to play its part by translating unbiased scientific evidence into a pleasurable eating plan for life. If you want to join in, I think the quick and easy-to-make cheesy deliciousness of today’s vegetable gratin might be a very good place to start. 

Although a LCHF diet avoids white potatoes, we still eat orange-fleshed sweet potatoes because of their versatility in recipes and powerful nutritional punch. In spite of them being sweet-tasting, they have more fibre, fewer calories and less carbohydrates than white potatoes and their natural sugars are slowly released into the bloodstream, which helps ensure a balanced and regular source of energy, without the blood sugar spikes associated with fatigue and weight gain. They’re also a beautiful complementary colour to the Red Fox Leicester cheese I’ve used in the recipe!

It’s really important not to stint on the quality of crème fraîche you use for making the cheese sauce. Unlike most cheese sauces, this one isn’t thickened with flour so its success relies on the crème fraîche not breaking down during the cooking process. For a really silky-smooth, cheese sauce finish, I always recommend Rodda’s crème fraîche (available from Waitrose) because it doesn’t curdle or turn into a thin liquid when heated - this is what usually happens with lesser varieties. If you can’t find Rodda’s, Longley Farm’s crème fraîche is also a good bet.

Cheesy Sweet Potato, Cauliflower & Spinach Gratin (Serves 4) 

Ingredients

280g Leicester cheese (I use Red Fox), coarsely grated

250g crème fraîche (I use Roddas)

1 dsp Dijon mustard

Sea salt and freshly ground black pepper

3 medium orange-fleshed organic sweet potatoes, unpeeled and cut into 1-2inch chunky ‘chips’

1 medium organic cauliflower, broken into largish florets

235g organic spinach, washed

2 tbsp fresh chives, finely chopped


Instructions

Fill the bottom of a steamer with boiling water from the kettle and butter a large gratin dish.

Pre-heat the oven to 190℃ / 375℉ / Gas mark 5 

Steam the sweet potatoes in the top of the steamer, covered, for 10-12 minutes. 

Whilst the sweet potatoes are steaming, make a cheese sauce by whisking the crème fraîche, Dijon mustard and three quarters of the grated cheese together in a medium-sized saucepan set over medium heat. Keep whisking everything together until the cheese has fully melted in to a silky smooth, hot cheese sauce. Don’t let it boil. Season to taste with sea salt and freshly ground black pepper then take the pan off the heat, cover and set aside. 

Using a large metal draining spoon scoop the cooked sweet potato wedges out of the top of the steamer and lay them flat in the bottom of the gratin dish. Cover and keep warm.

Add the cauliflower florets to the steamer basket and steam them, with the pan lid on, for 5-6 minutes. They need to be just cooked through, so don’t let them get too soft or soggy.

Arrange the cooked cauliflower, placing it evenly between the potato wedges in the gratin dish. 

Now pile the spinach into the steamer basket, put the lid back on and steam for 1-2 minutes until the leaves have just collapsed. Drain well then add to the sweet potatoes and cauliflower in the gratin dish spreading it out evenly. Sprinkle the chopped chives on top. 

Whilst stirring constantly, re-heat the cheese sauce to just below boiling point. Spoon over the vegetables making sure they’re all nicely coated. Finally, sprinkle over the remaining cheese and bake the gratin in a hot oven for 15 minutes. 

At the end of the cooking time switch the overhead oven grill to hot and continue to cook the gratin a little longer under the direct heat until the top is gorgeously crisp and golden. 

Serve immediately with a fresh green salad, if liked.  


Carbohydrate 43g Protein 26g - per serving