Bone Broth With Vegetables

by Susan Smith in ,


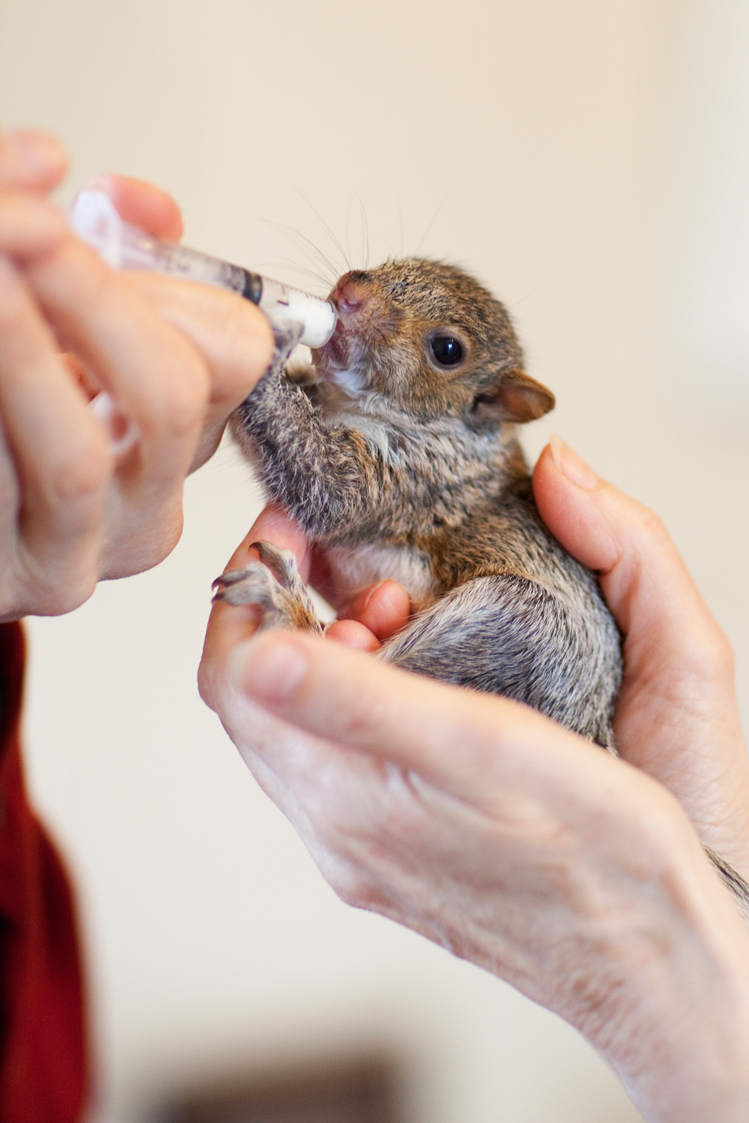
We don’t eat much meat because intrinsically we believe that animals belong in our hearts, not in our stomachs, but that doesn’t mean I don’t regularly buy meat. Almost exactly a year ago to the day, my cat Sushi was suffering from distressing symptoms that the vet diagnosed as the onset of renal failure. We thought her death was imminent. Rather than accept the vet’s unhappy prognosis, which meant subjecting Sushi to the ongoing stress of regular blood tests, injections and the daily oral administration of drugs for the rest of her life, I boldly decided that I would responsibly ‘manage’ her condition by fully taking care of her nutritional needs. It is no mean feat to hand prepare fresh, organic pet food from scratch, but that was what I committed to do and one year later (Sushi’s now 17), she’s completely free of symptoms and, as they say, “As happy as Larry.”

When people think the cost of organic food is too expensive and cooking is a bore, they need to also think about the future cost of healthcare for humans and animals once good health disappears - as it most surely will - when they choose to feed themselves and their pets chemically processed food made with heavily refined ingredients and artificial additives that essentially amounts to toxic crap. It’s this catastrophic dietary decision that makes so many people and animals sick and fat. Good for vets’ profits maybe, but not so good for a cash-strapped NHS when the lifestyle and dietary choices of an ageing population starts to catch up with them! Today I am out to prove a point. Even though my idea of pet food is freshly ground, organic, grass-fed beef, lamb and chicken made from meat cut off the bone by me, when you factor in a nutritious meal for four conjured-up out of the leftovers, 63 pence per portion for my pet food versus 45 pence for Lily’s Kitchen is, in my view, a monetary piffle. What’s 19 pence when I’ve saved £100’s on veterinary fees and my beloved cat’s quality of life?   

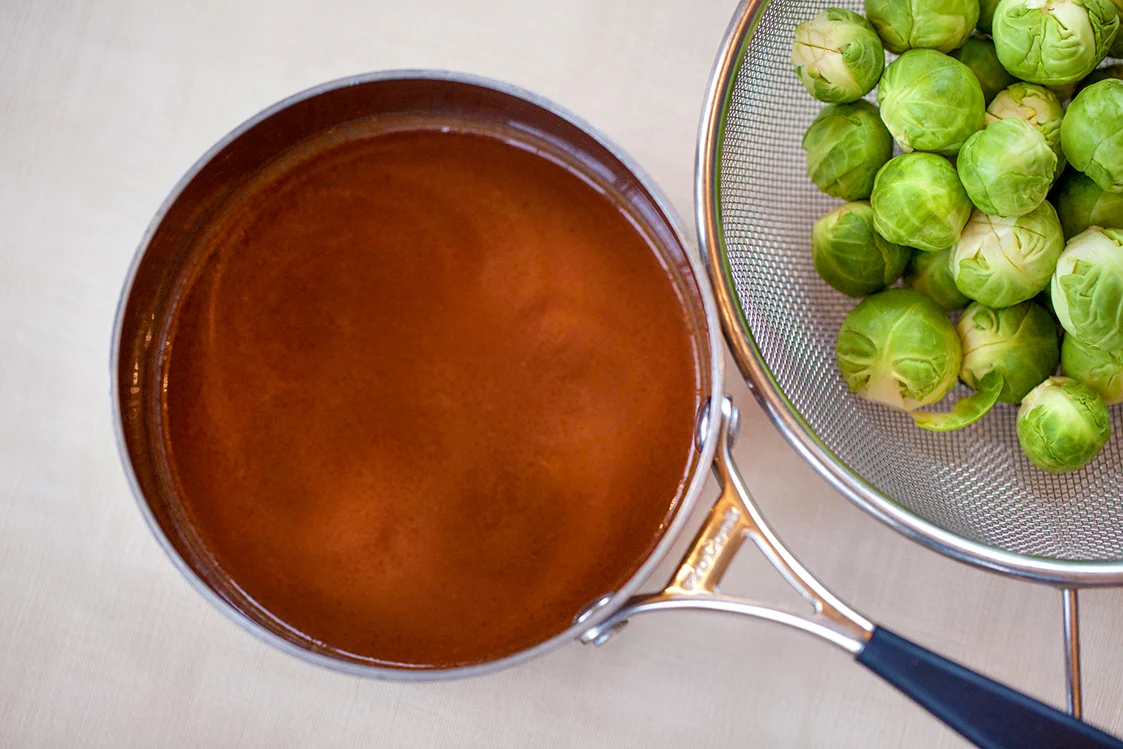
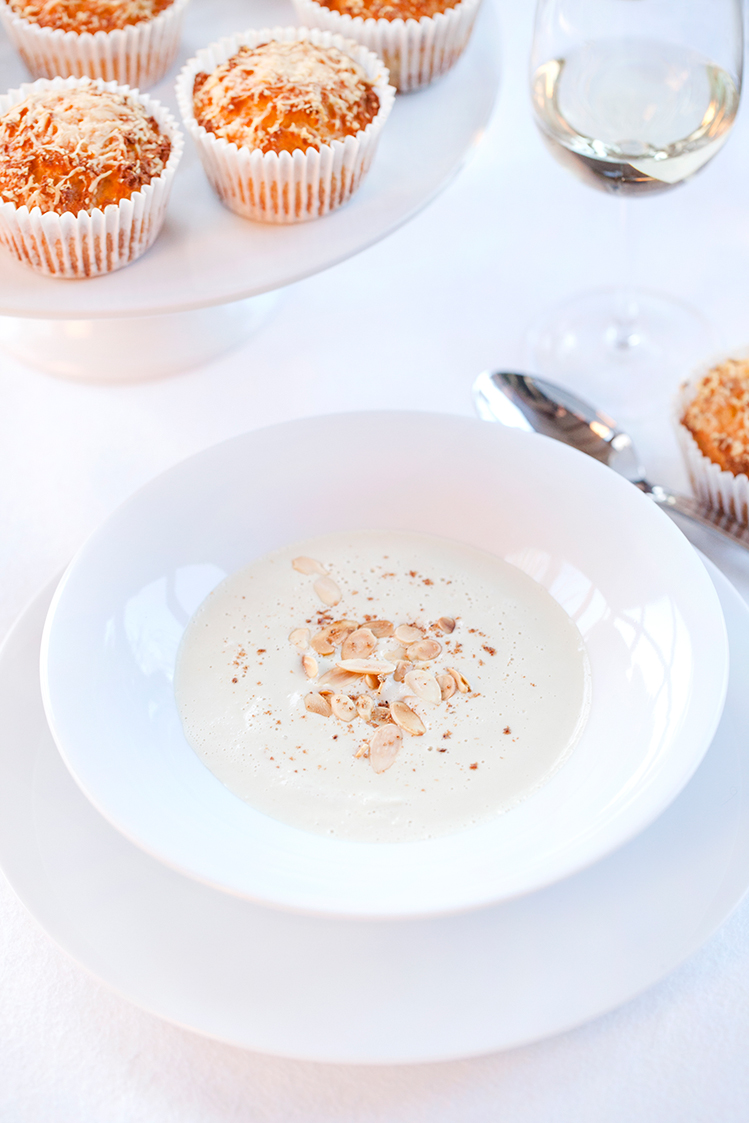
Bone Broth, or homemade stock as we used to call it, has been hailed as a trendy new superfood by the Paleo/Primal fraternity, but in fact our ancestors always used to have a pot of meaty bones continually brewing over the fire. Our modern day equivalent would be to throw some good quality bones (they must be organic) and vegetables into a slow-cooker in the morning, go to work and come home to a beautiful, clear, savoury broth. The longer bone broth is slow-cooked, the more nutritious and gelatinous the broth. Yet, for the forward thinking cook, this is healthy, fast food at it’s best because it requires nothing more than shoving a few ingredients into a pot and walking away. 

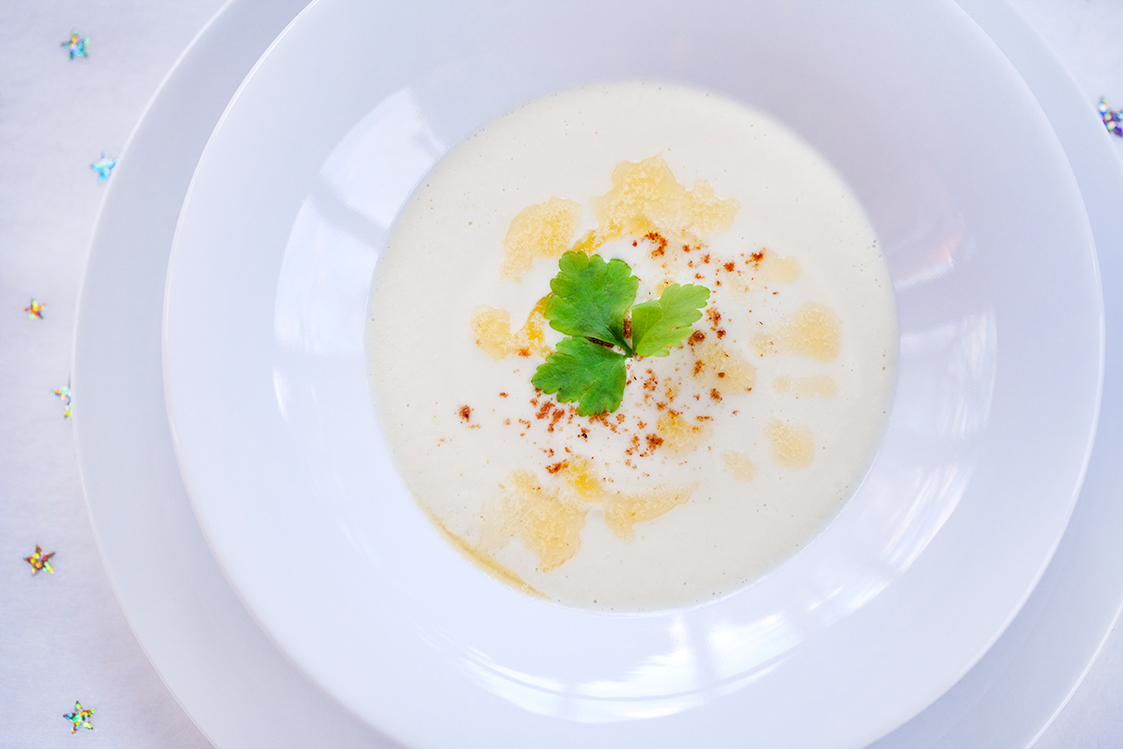
Renowned for healing the gut, fighting inflammation and strengthening bones and teeth, the numerous nutrients found in bone broth are easily absorbed and used by the body. However, today’s recipe is not just for the health conscious, it’s for foodies, cooks and those of us with darling pets to care for because from scraps and remnants, a few meaty bones, freshly filtered water and a handful of organic vegetables, Bone Broth With Vegetables is a fuss-free way to produce the most soothing, nourishing, warming ‘hug-in-a-bowl’ imaginable. 

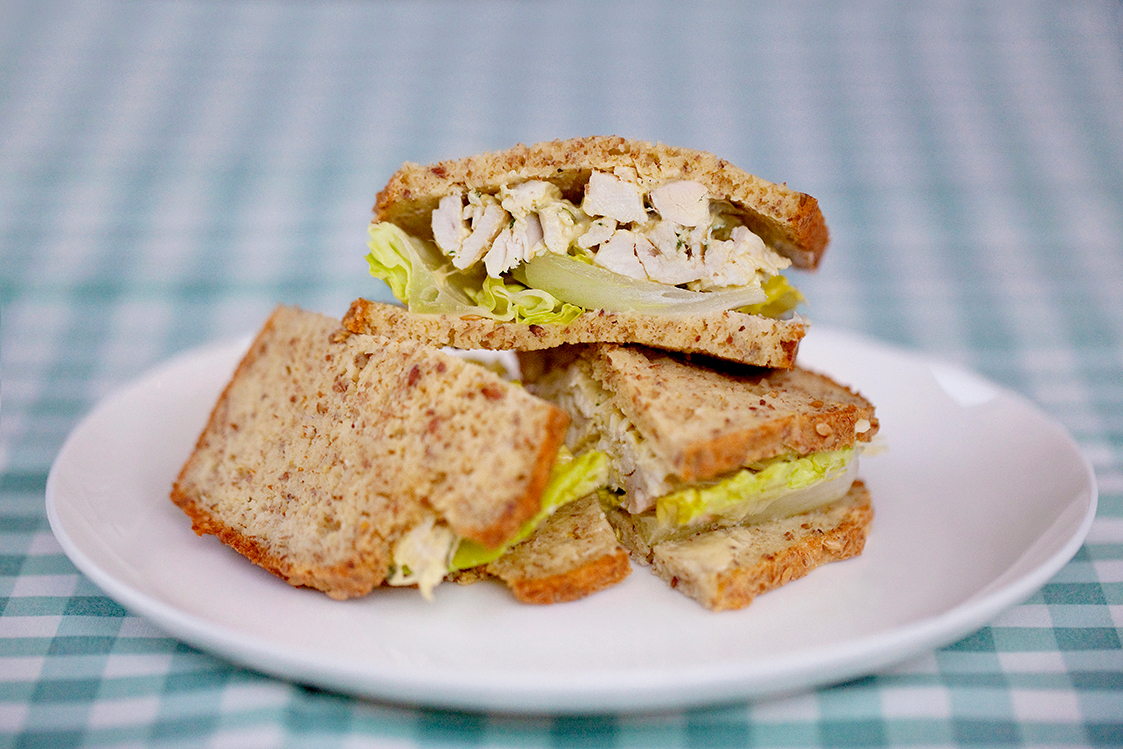
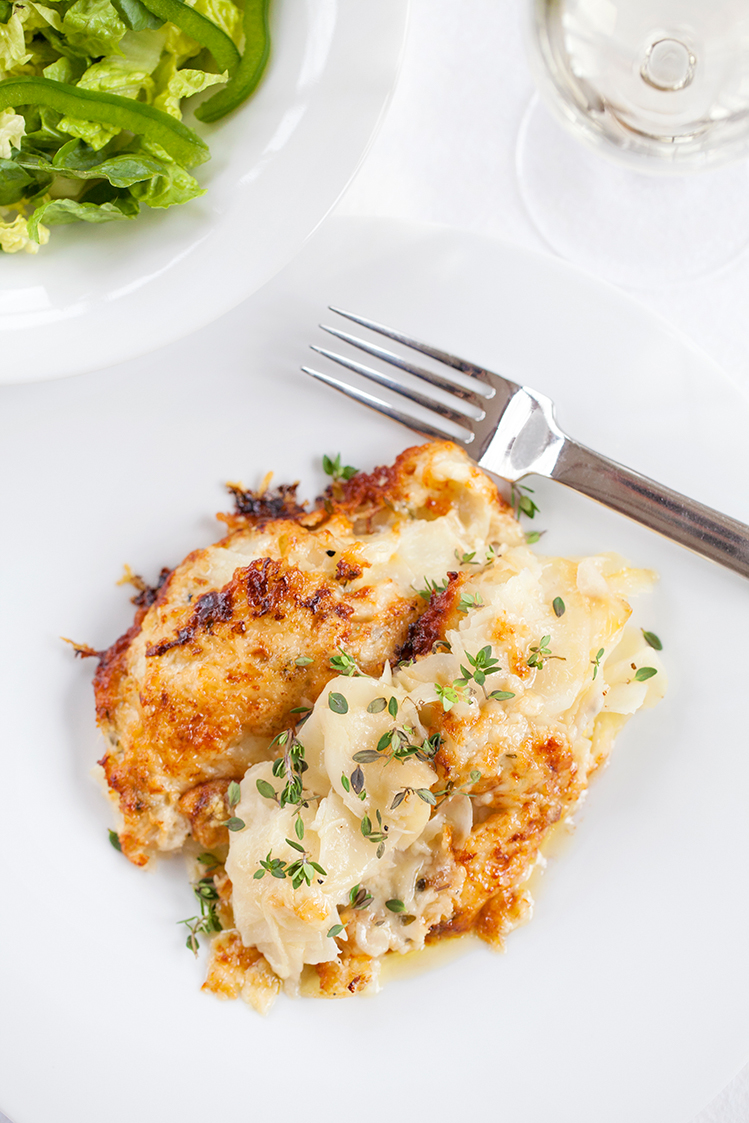
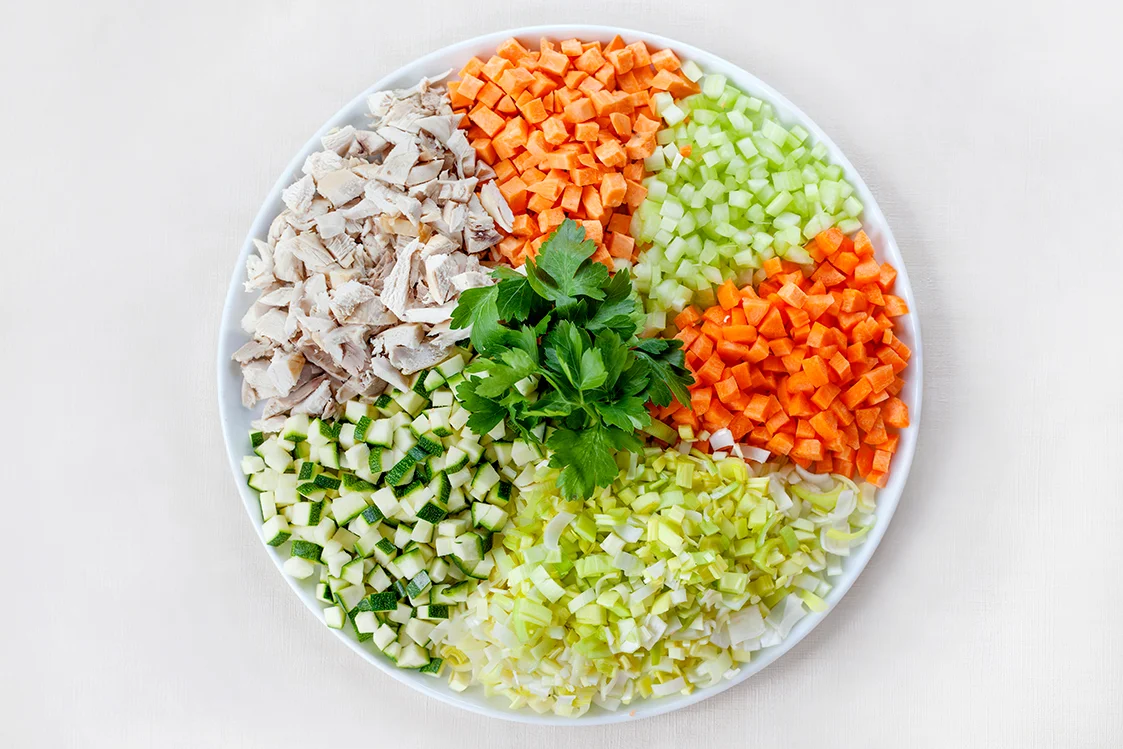
Last week Sushi’s monthly meat order coincided with me working at a wedding fair with Mirror Imaging at the weekend and because Perfect Roast Chicken is one of the simplest of meals for my husband to prepare in our absence, I ordered an extra chicken for us too. Whilst it isn’t always about preferring to eat vegetarian, it is always about consciously eating less meat and fully appreciating it when we do. For me this this means not throwing out what most people think of as waste i.e. leftover raw bones, giblets and the Sunday roast chicken carcass. And, when it comes down to it, the more variety of bones, the better the broth. Simmered long and slow in freshly filtered water with a handful of vegetables, these simple ingredients are the makings of another meal. All that’s needed to elevate the delicious resulting broth into a visually appealing, light yet filling lunch or supper is some finely chopped vegetables, seasoning and a generous handful of fresh parsley.

Not so much a recipe, more ‘waste not, want not’ opportunism, bone broth can be made from the remains of Perfect Roast Chicken, including the roasted vegetables you cooked it with, plus a few raw, organic meat bones and/or half a dozen raw organic chicken wings, a stick or two of celery, a carrot and an onion. This super cheap, super satisfying ‘superfood’ is so good, you’ll probably be left wondering why you never thought of making it before.

Bone Broth With Vegetables (Serves 4)

Ingredients - to make the broth

The remains of a Perfect Roast Chicken including the vegetables/herbs you roasted it with

Raw, organic lamb/beef bones or 500g raw organic chicken wings

1 organic onion, unpeeled and chopped into quarters

1 large or 2 medium organic carrots, scrubbed (no need to peel) and cut into thick wedges

2 sticks organic celery, washed and chopped into large pieces

Fresh filtered water - enough to virtually cover the bones/chicken carcass  


Ingredients - for the vegetables (can be varied according to what’s fresh and in season)

30g organic butter or olive oil

I large or 2 medium organic leeks, tough green tops and roots removed, cut into fine dice

1 small organic sweet potato, peeled and cut into small dice (no bigger than a pea)

2 organic carrots, peeled and cut into small dice (no bigger than a pea)

2 medium sticks organic celery, washed, trimmed and cut into small dice (no bigger than a pea)

½ large organic courgette, washed and cut into small dice (no bigger than a pea) 

100g organic frozen peas, defrosted 

1-2 tbsp organic tamari

a little sea salt and freshly ground black pepper


Ingredients - to serve

small bunch organic parsley, finely chopped

cold, roast chicken, cut or shredded into small pieces - optional

Instructions - to make the bone broth

Place all the ingredients into a very large saucepan (or you can use a slow-cooker, if you have one).

Add enough cold, freshly filtered water to virtually cover - push down any bits and pieces that are sticking out above the water line.

Set the pan over a medium-high heat and bring to boiling point. Keep your eye on it. As soon as the liquid starts to boil, turn the heat down to a very low setting and, using a metal tablespoon, skim off any scum that’s risen to the surface. 

Cover with the pan lid and allow the liquid to simmer very gently for at least 2 hours - although 4 hours would be better. N.B. It is very important that the liquid does not boil rapidly at any time because this will make the finished broth cloudy rather than clear.

After a couple of hours - longer if possible - the liquid will have turned into a clear, golden broth and will smell really inviting. Allow the contents of the pan to cool down a little before straining the hot broth through a metal sieve into a clean saucepan. Or, if you’re not planning to use it straightaway, a glass bowl. Leave to cool completely, then cover and store in the refrigerator, where it will turn into a savoury jelly.


Instructions - to cook the vegetables and finish the dish

In a large saucepan, melt the butter (or gently heat the olive oil) then add the diced vegetables and stir everything together well to lightly coat the vegetables in the oil.

Cut a circle of greaseproof paper to fit the pan and press this down directly on top of the vegetables. Put the pan lid on and cook gently over a medium-low heat for approximately 8 minutes or until the vegetables are just soft - they should retain their natural, vibrant colour.

Bring the bone broth back to boiling point, then season to taste with Tamari, sea salt and black pepper. 

Add the hot broth to the saucepan containing the vegetables and simmer over a medium-low heat for 10 minutes. 

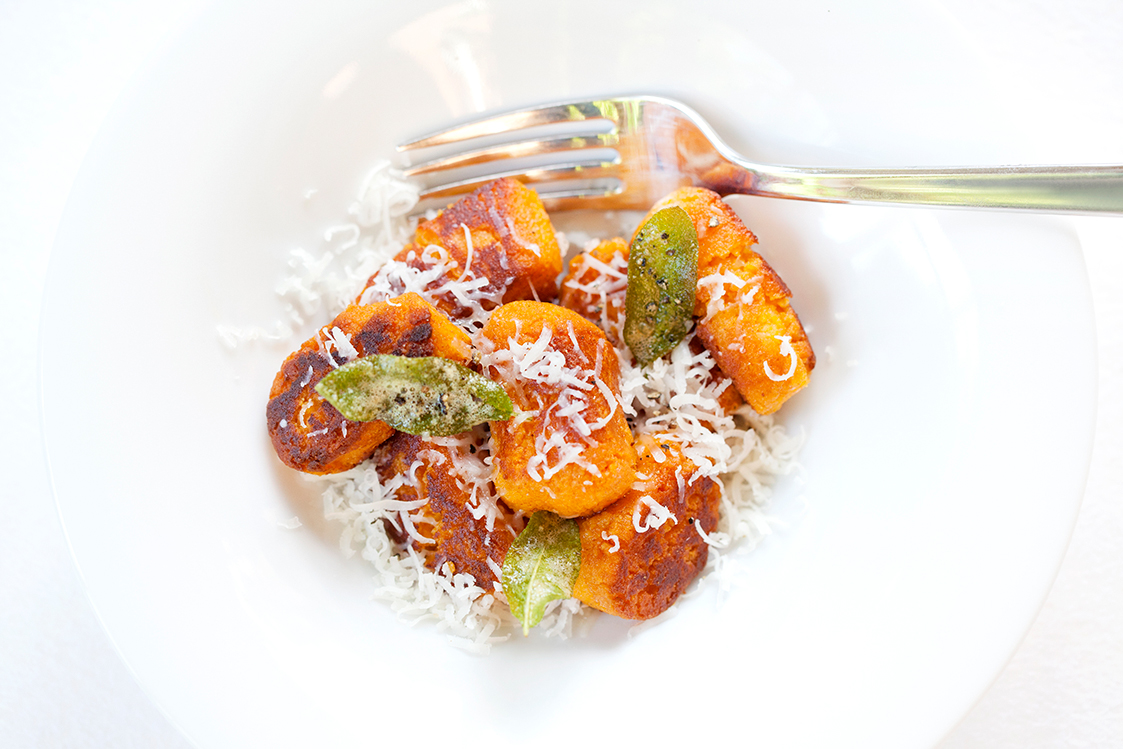
If using, add the diced chicken to the broth and allow to warm through for a further minute before ladling into individual pre-warmed serving bowls - making sure that the vegetables and chicken pieces are evenly distributed between each bowl. 

Sprinkle over the chopped parsley and serve. 


Notes

The broth will keep for up to 5 days covered in a refrigerator.

Before using jellied broth straight from the fridge, scrape off the top layer of fat from the surface.

You can freeze the cooled liquid broth in ice cube trays and then use the resulting frozen stock cubes individually to add depth of flavour to savoury sauces and gravies. 


Carbohydrate 21g Protein 5g - per serving


Sarah’s Taleggio, Broccoli & Leek Tart

by Susan Smith in


I am never one to say “No” to an invitation to dinner and last week Sarah surprised me by inviting us over to her’s…twice! It just so happens that’s she’s become a dab hand at making today’s recipe for Taleggio, Broccoli and Leek Tart - although after years of perfecting the art, neither of us can remember where her original inspiration came from. As with all things Primal, there have been enough modifications to allow me to confidently call this deeply delicious, satisfying tart “Sarah’s Taleggio, Broccoli & Leek Tart.” 

Firstly, being Primal, there are no grains allowed and secondly, she’s confidently upped the ante on the eggs and cheese to make this a really luxurious and filling family dinner - albeit it’s not unknown for us to eat the whole of this tart, which is supposed to feed six, between the three of us. 

As it turns out, it was much trickier to get the recipe out of Sarah’s head and into written form than it is for her to bake it! It took her a couple of hours to write the recipe down and me twice as long as that to decipher what she’d written before it could make an appearance on Primal Plate’s blog! Nevertheless, as you can see from the picture of my serving of tart, it is very worthy of its honorary place.

Taking on the ‘huff and puff’ of food blogging is very much akin to photographing the finished food on the plate. From time to time, this strong mother-daughter team, of which I am so proud, will attempt to walk a mile in each other’s shoes. Sometimes Sarah passes me her camera, but on this occasion she volunteered for a day in the life of a food blogger. This is what workplace equality is all about and as I write, epitomises the spirit of today’s ‘International Women’s Day’ (8 March 2017) but more than this, it is always a privilege to have Mirror Imaging Photography create such beautiful images to bring to life all of Primal Plate's recipes. 

This one is an absolute winner. It’s also much easier to make than a conventional tart because the nut-based pastry behaves itself so much better than a normal wheat flour pastry does. Sarah learned this lesson very early on in life from Mrs Bainbridge, her home economics teacher at secondary school, who thought that the way to get a crumbling flour pastry mix under control was to bash it around on the worktop until it surrendered itself up as a pliable piece of dough, which then cooked out to something resembling a brick. Did I miss my vocation? Is this why so many of Sarah’s generation have given up on cooking their own food? Over-handling or adding too much water to normal flour is the sure-fire way to achieve pastry disaster. This can’t happen with nut-based pastry. Provided that you add the diluted milk judiciously - just enough to bring the mixture together (see instructions below) - you cannot help but achieve a crispy, golden, melt-in-the-mouth almond pastry because, without gluten, it’s impossible to overwork. Perfect for the novice cook and, without any grains or gluten, it's much healthier for you too.

Sarah’s Taleggio, Broccoli & Leek Tart (serves 6)

Ingredients - for almond pastry

400g organic ground almonds

2 teaspoons gluten-free baking powder 

50g organic butter, melted + a little extra for greasing

4-6 tbsp diluted whole organic milk (to dilute the milk, mix 3 tbsp milk & 3 tbsp fresh filtered water together)


Instructions - to make the pastry case

Preheat oven to 190℃ / 375℉ / Gas mark 5 

Grease a 25cm / 10inch round, fluted, non-stick, loose-bottomed pastry case with a little melted butter, then line the base with a round piece of non-stick baking parchment for good measure.

To make the almond pastry - sieve the baking powder into the ground almonds and mix together well. 

Stir the melted butter into the almond mixture, then add the diluted milk - one tablespoon at a time - and stir everything together with a fork. N.B. We’ve found that 4 tablespoons of diluted milk is usually enough to bind the mixture without the pastry becoming too wet.

When it starts to clump together, abandon the fork and use your hand to bring the mixture together into a firm but moist dough (the warmth of your hand will help to do this by releasing the oil in the nuts). Shape into a ball.

Lay out a large sheet of clingfilm onto a work surface (you may need two sheets overlapped), then place your smooth ball of pastry in the middle and flatten it out slightly.

Lay a second sheet of clingfilm over the top of the pastry (this will stop it from sticking to your rolling pin) and roll out evenly to about 3mm-5mm thickness. As you roll, turn regularly to achieve an even round shape that is approximately 2½cm/1” larger than the circumference of your tart tin (this allows for the sides of the tart). 

Carefully peel off the top layer of clingfilm, then loosely wrap the pastry around your rolling pin removing the bottom layer of clingfilm as you do. Then using the rolling pin to support the pastry, lift it in one piece directly into the tart tin. If it splits or breaks in transition (as it often does!), don’t worry, just patch it back together by pressing it firmly and evenly into the base and up the sides of the tin with your hands. You can add smaller pieces of pastry to fill any gaps and particularly to reinforce the top edge - just press any seams together with your fingers so there are no gaps and it’s as even as you can make it. N.B. Since almond nut flour is gluten-free it’s easier to handle than normal shortcrust pastry, because it doesn't get harder and tougher when you re-work it.

Once it’s settled in the tart tin in an even thickness, prick the base with the prongs of a fork, then lift the pastry tin into the air and, rotating the tin with one hand, use a sharp knife to trim any raggedy bits of pastry off the top edge to create a neat finish. Form any leftover pastry into a ball, cover in clingwrap and store in the fridge for up to a week. You can then re-roll and make into almond biscuits, which are perfect served with cheese after dinner, or as a base for pre-dinner smoked salmon canapés.

Bake the pastry case blind i.e. place a large piece of baking parchment on top of the pastry - it needs to be big enough to cover the entire pastry case - and weight down with ceramic baking beans (rice grains, dried peas or dried beans will do just as well) then bake in the pre-heated oven for about 8-10 mins. 

After this first baking, remove the baking beans and parchment and cook for a further 5-6 minutes - you’re looking for an evenly baked, pale golden case without any wet pastry showing in the middle. N.B. Keep a careful eye on it to ensure that the top edge doesn’t get too brown - nut-based pastry can scorch easily and if it’s over-browned at this stage it will be too dark after it’s filled and re-baked. 

When cooked, remove from the oven and set aside. 

Ingredients - for filling

Head of organic broccoli (about 350g)

200g taleggio cheese

6 tbsp organic whole-fat milk

2 tsp English mustard powder

6 organic eggs

120ml organic double cream

sea salt and freshly ground black pepper

1 tbsp organic butter, melted (or organic olive oil)

2 organic medium-sized leeks

1 tbsp organic fresh thyme leaves, chopped 


Instructions - to make filling

Reduce the oven temperature to 170℃ / 325℉ / Gas mark 3

Cut the broccoli into small florets. Steam for about 4-5 minutes or until just tender. Drain and put straight into ice cold water (or run under the cold tap) to stop the cooking process and to keep their colour.

Trim off the roots and coarse dark green tops of the leeks, then with a sharp knife slice them lengthways halfway through i.e. from top to root without actually cutting them in half. Wash under a running tap, fanning the layers out with your fingers to rinse away any grit or soil trapped between them. Drain thoroughly and then slice across into 1cm thick rings. 

Place the leeks and the olive oil into a large saucepan, give the leeks a quick stir to make sure that they’re evenly coated in the oil, then cover with a circle of greaseproof paper cut to fit the pan and the pan lid. Cook over a gentle heat for about 8-10 minutes until the leeks are soft and tender but not coloured. 

Remove the paper lid and stir in the broccoli and thyme then, whilst continually stirring, turn up the heat to cook off any excess liquid. You need to make sure the mixture is as dry as possible without browning the vegetables. Season with salt and pepper and set aside.

Prepare the taleggio cheese by removing its wrapping and cutting off any of the rind as thinly as you can (it will have a mould-like bloom, which you don’t want in the tart). Slice into thin pieces, and set aside.

In a Pyrex jug or bowl, first whisk the mustard powder into a little of the milk until smooth, then add the rest of the milk, cream, eggs and season to taste with salt and pepper. Whisk the mixture until the eggs are broken up and all the ingredients are well combined. Set aside.


Instructions - to assemble the tart

Lay a sheet of tin foil on a flat baking sheet, then place your pastry case, still in its tin, on the sheet. Scrunch the tinfoil up a little around the base of the tin because if your pastry has any gaps at all, this will prevent the filling running out all over your oven!

Evenly distribute the vegetables in the base of the pastry case. 

Give the egg custard mixture a quick stir (sometimes the mustard settles at the bottom) and carefully pour into the pastry case over the vegetables. Lay the slices of taleggio cheese evenly over the top. 

Bake immediately in the pre-heated oven for about 25 minutes, or until the custard is lightly set and the surface of the tart is nicely golden.

Remove from the oven and let the tart cool for 5-10 minutes. Then, using a small sharp knife, loosen around the top edge of the tart before releasing from its tin.

Slice and serve warm or cold. 


Notes

Sarah doubles up on the quantity of Primal Plate’s original almond pastry recipe to make sure there is plenty to roll out without scrimping; this means that there will be about a third left over for almond biscuits etc. The remaining raw dough can be stored in a refrigerator for up to a week. 

Taleggio cheese is made from non-vegetarian rennet, strict lacto-vegetarians could substitute a soft-melting cheese such as Duchy’s organic brie.


Carbohydrate 12g Protein 33g - per serving


Beef Stroganov

by Susan Smith in ,


Because I didn’t get around to grinding-up Sushi The Cat’s finest, organic steak in time for her to enjoy last week, I was forced to put Beef Stroganov on our Saturday night dinner menu so that it didn’t go to waste. It’s come to something when our puss-cat is apparently more of a fussy eater than her health conscious owners, but there you have it. According to Sushi, if anything is left in the refrigerator for more than 3 days before mincing and freezing it down for cat food, it’s not fit for her to eat. Her loss. 

However, I hadn’t just been lackadaisical in prepping Sushi’s meals. Every week there is a last minute panic for me to create something fabulous that will use up all the previous week’s Riverford organic fruit and vegetables so we have enough fridge space to store the current week’s delivery. Inevitably, I get so excited when I’m placing my regular Riverford order that I double-up on fruit and veggies still not eaten from the week before. On this occasion, I had mushrooms, onions, a pack of salad leaves, organic cream, lemon and cauliflower leftovers. I suppose it’s a testament to the lack of air miles and their just-picked freshness, but I always marvel at how Riverford’s produce stays ‘alive’ for so long - especially their bags of organic salad leaves. Truly, the salad you see in the photos had been sat in my fridge for over a week! Anyway, I had everything I needed to put together, what is for us, a rare treat.

It must be in the 1960’s that I last made Beef Stroganov. Back then it was the height of sophistication to order this dish in a posh restaurant and have it cooked at your table in an elaborate chafing dish by the maître d’ (headwaiter). As rich-tasting and as luxurious as this meal is, if you don’t even need to be in the kitchen to cook it, it’s clearly not that difficult to make!

Beef Stroganov is named after Count Pavel Stroganoff (1774–1817) or should that be Count Pavel Alexandrovich Stroganov? I think it should, and named my recipe accordingly. The ridiculously wealthy, Europe-hopping, Russian Count Pavel Stroganov was born in Paris and later employed French chefs. For me, just one delicious mouthful of lightly sautéed, tender beef in its creamy, tangy sauce tells me that Beef Stroganov’s origins are clearly French. It was in fact gourmet Pavel’s renowned French chef who adapted a simple beef fricassee from a textbook recipe by adding Smetana (a type of soured cream from Eastern Europe), and then christened it Beef Stoganov after his Russian employer. Rich food for rich people! I like to think that Beef Stroganov was perhaps one of the first fusion foods to be invented.

Pure, simple and indulgent, don’t be tempted to make Beef Stroganov with anything other than prime, organic, grass-fed steak. Fillet steak is best, but the good news is that you need about a third less meat for this recipe than you do when cooking individual steaks, and the finished dish is so deeply satisfying that you won’t even notice that ‘less’ has remarkably transformed itself into ‘more’. Partnered up with cauliflower ‘rice’ and a fresh green salad drizzled over with the finest olive oil and balsamic vinegar, it’s a dish fit for Counts, Kings and all of us that are primally-orientated towards turning our bodies into fat-burning mode rather than sugar-burning.  

Enjoy with a decent bottle of organic no-added-sulphur red wine and you’ll soon see why this quick to make, full of flavour, ultimate comfort food earned itself the reputation of fancy-pants dining in restaurants in the 1960’s. Because it can be on the table in less than thirty minutes, I think it’s a classic that’s perfectly suited to make a comeback in our kitchens, with or without my kitty’s approval!

Beef Stroganov (Serves 4)

Ingredients

45g organic unsalted butter

3 organic onions, very thinly sliced

250g organic chestnut mushrooms, sliced

600g organic beef steak, cut into strips 

sea salt

organic black pepper, freshly ground

1 tsp organic whole grain or Dijon mustard

250ml organic full-fat creme fraîche, sour cream or fresh organic double cream soured with the juice of ½ an organic lemon

small handful of organic flat-leaf parsley, finely chopped

Instructions

Heat half the butter in a heavy frying pan and fry the onions slowly over medium-low heat for 10-15 minutes until soft and golden brown. Lift out with a slice and keep warm.    

Add the mushrooms to the pan and quickly fry over medium-high heat for 3-5 minutes. Keep warm with the onions.

Add the rest of the butter to the frying pan and turn the heat up to high. Very quickly stir-fry the steak for 1-2 minutes on each side until it is seared brown on both sides. N.B. Take care that the juices don’t run. To avoid this, fry the meat in two batches - overcrowding the pan will ‘steam’ the meat rather than fry it.

Return all the meat to the pan, season well, then add the mushrooms and onions. Shake everything together over a high heat, then pour in the soured cream and add the mustard, stirring it in well.   

When everything is bubbling, finally stir in the parsley and take off the heat. 

Serve with mounds of cauliflower ‘rice’ and a fresh green salad dressed with a little olive oil and balsamic vinegar drizzled over.


Carbohydrate 6g Protein 25g - per serving


Best Ever Vegetarian Gravy

by Susan Smith in


I’m sort of selling myself short on today’s recipe title because this gravy may well be the best ever gravy for everyone; vegan, vegetarian and carnivore alike. It doesn’t need meat juices from the roasting pan for depth of flavour, this stand-alone gravy is as intensely flavoursome as any I’ve tasted…ever! Better still, it can be made well in advance, so there’s no last minute panic to rustle up a tasty gravy whilst the rest of dinner goes cold. Simply make ahead of time then, whilst you’re plating up the rest of the meal, re-heat your gravy to boiling point and pour over.   

I knocked this vegetarian gravy up ‘out of the blue’ in about 15 minutes flat whilst the Nut Loaf that was featured on last week’s Primal Plate blog was resting in its tin before being turned out and sliced. Frantically looking around my kitchen for any ingredients that I could gravy-fie to get our meal onto the table pronto, the first thing I espied was the tomato juice leftover from a 400g tin of chopped tomatoes I’d used to make the Nut Loaf. The second was my husband’s glass of red wine poured in readiness for dinner.

Combined with a few other store cupboard ingredients - not least Sukrin almond flour to thicken - it was gravy alchemy. A light, bright, delicious, vegetarian accompaniment to elevate the pure and simple into the most tasty meal imaginable. 

Best Ever Vegetarian Gravy (Serves 4)

Ingredients

1 tbsp organic olive oil
1 organic medium onion, finely chopped
1 dsp organic tomato puree
2 tsp organic reduced salt vegetable bouillon powder
1 heaped tsp Sukrin organic reduced fat almond flour
75 ml organic tomato juice (I used the juice that I’d drained from a 400g tin of organic chopped tomatoes)
75 ml red wine
200ml fresh filtered water
1 tbsp organic tamari
½ tsp Marmite or natural yeast extract
1 fresh bay leaf - optional

Instructions

Heat the olive oil in a medium sized saucepan. Add the chopped onion and cook gently with the pan lid on for about 8-10 minutes, stirring occasionally, until the onion is soft and light golden in colour.

Meanwhile, in a small bowl, combine the Sukrin almond flour with a little of the tomato juice, stirring well to make sure there are no lumps before adding the rest of tomato juice. Set aside.

When the onions are soft and golden, take the saucepan off the heat and add the tomato puree and bouillon powder. Stir everything together really well until it forms into a smooth-ish paste then add the red wine. Keep stirring until this is fully integrated, then do the same with the almond flour/tomato juice mixture. Finally add the water, the tamari, the Marmite and the bay leaf (if using).

Set the pan back over a medium-hot heat and stir continuously until the gravy comes to the boil and has thickened slightly. Turn the heat down to a simmer and continue cooking, uncovered, for a further 10 to 15 minutes.

Strain the gravy through a stainless steel sieve into a clean saucepan - I also like to press about half of the softened onions through the sieve to achieve a gravy with a bit more substance. Cover the pan and set aside until you’re ready to eat.

Alternatively, strain into a clean glass or ceramic bowl, cover and store in the refrigerator for up to a week.

Notes

The drained chopped tomatoes can be used to make Nut Roast, Virgin Mary Vegetable Cocktail (recipe coming soon) and Coconut King Prawn Curry (recipe also coming soon) - as you can see I’m currently awash with ideas for organic tinned tomato recipes!

I’ve not included sea salt or freshly ground pepper in the ingredients list for this recipe because quite frankly the Swiss bouillon powder, tamari and Marmite do the trick without. However, if you’re using ‘no-salt’ natural yeast extract you might want to test for seasoning and adjust to taste if needs be.


Carbohydrate 4g Protein 2g - per serving


Sweet Potato Gnocchi With Sage Butter & Goats Cheese

by Susan Smith in , ,


Good news for all Primal/Paleo enthusiasts who still crave potatoes. Today’s blog post for sweet potato gnocchi offers all that’s best about the much-loved spud - golden and crisp on the outside, soft and fluffy on the inside - without going off-piste. These delicious little pillows of potato-like perfection have the heart of soft, light-tasting mashed potato and the soul of crispy, caramelised, umami-flavoured chips.

Sweet potatoes offer a healthier, lower-starch alternative to other potato varieties, but here I’ve tamed down their sweetness and cancelled out their higher water content with primal-friendly ingredients to mimic the taste and texture of regular potatoes. As a cook, there have been many occasions when I’ve thought that only potato can properly complete a meal that’s lacking the comfort and pleasure of something satisfyingly starchy. No longer. These sweet potato gnocchi have the density and depth of flavour I’ve been missing and are the perfect potato substitute for any meal crying out for chips, mash, roasties or croquettes. 

However, I think today’s recipe for Sweet Potato Gnocchi With Sage Butter & Goat’s Cheese is at its best presented as a gratifyingly simple, vegetarian main course. With just enough sweetness from the gnocchi to complement the saltiness of strong-tasting goat’s Cheddar, it’s a combo that’s so tasty you won’t even think about reaching for the ketchup! Also, these beauties are a brilliant dinner-party starter or, piled onto a platter with freshly grated goat’s Cheddar and crispy fried sage leaves scattered over, they will blow your guests away when handed around as a hot savoury canapé to accompany drinks. 

Unlike traditional gnocchi that’s made from regular potato and refined wheat flour, Primal Plate gnocchi are grain-free, potato-free and gluten-free too. They may require a little effort to make but the pre-cooked and cooled gnocchi ‘sausages’ can be stored, still in their cling-film wrapping, for up to 2 days before being cut into gnocchi-sized pillows and quickly fried off in butter. Finally, without compromise, my appetite for potato is satiated!

Sweet Potato Gnocchi With Sage Butter & Goats Cheese (Serves 6)

Ingredients

750g organic sweet potatoes (should yield about 500-550g sweet potato puree)

1 organic egg yolk, lightly beaten

200g organic ground almonds

50g Sukrin organic coconut flour

50g organic arrowroot powder

1½ tsp Celtic sea salt

100g full-fat organic soft cheese

40g organic butter

18 fresh sage leaves

100g Quicke's Goat Cheddar (I purchased this from Waitrose's deli counter) or Parmesan-style cheese, freshly grated - to serve

Freshly ground black pepper - to serve


Instructions

Pre-heat oven to 180°C / 350℉ / Gas mark 4

Place the sweet potatoes on a baking tray and bake for 45-60 minutes (depending on their size) until completely cooked through.

Remove the potatoes from the oven and whilst they’re still hot cut them in half, then scoop out the centres of each. Pass the sweet potato flesh through a fine sieve into a large bowl. Discard the skins.

Add the ground almonds, coconut flour, arrowroot powder, cream cheese, egg yolk and sea salt to the sieved sweet potatoes and mix everything together well. 

Cover and chill for 20-30 minutes in a refrigerator.

Bring a wide, deep pan of water to boil.

Divide the cooled gnocchi mixture into manageable portions (about 200g each). Roll each portion out between cling film into a 2 cm (¾ inch) thick long sausage. Twist the ends of the cling film together tightly then cook each sausage for 6 minutes in the boiling water.

At the end of the cooking time, remove the gnocchi sausage from the boiling water with the aid of two spatulas and lay each one down in an ice-cold water bath to cool down.

Once cool, remove the cling film and slice each sausage into little gnocchi ‘pillows’ i.e. about 2.5cm (1 inch) long pieces. Cover and keep chilled. N.B. They can be stored for up to 2 days in a refrigerator.

When you’re ready to eat, heat 40g grass-fed butter in a large frying pan set over a medium heat. Do not let the pan get too hot - you want the butter to foam, not burn. Sizzle the sage leaves for 1 minute, then remove from the pan and set aside. 

Top left: Gnocchi rolled into cling wrapped  'sausages'. Top right: Blanching in simmering water (put the lid on). Bottom left: In the ice cold water bath. Bottom right: Chopping the chilled Gnocchi 

Top left: Gnocchi rolled into cling wrapped  'sausages'. Top right: Blanching in simmering water (put the lid on). Bottom left: In the ice cold water bath. Bottom right: Chopping the chilled Gnocchi 

Now add the gnocchi pillows to the pan and fry them in the sage-infused butter until golden on the outside and light and fluffy in the centre. Depending on how many people you’re feeding, you may have to do this in several batches. N.B. It’s important that you don’t overcrowd the pan and if the butter starts to burn, clean the pan out and start afresh with more butter. When the gnocchi are nice and golden on all sides, lift them onto a warm plate lined with kitchen paper.

Serve the gnocchi hot with a generous amount of grated goat’s Cheddar sprinkled over and a good grinding of fresh black pepper. Garnish with the crispy sage leaves.


Carbohydrate 29g Protein 13g - per serving


Perfect Roast Chicken

by Susan Smith in ,


Everyone’s favourite, it’s been said "A kitchen is not truly your own until you’ve roasted a chicken in it." Simple and delicious, the perfect roast chicken is aromatic, succulent and tasty with golden, crispy skin. 

Harking back to my childhood, white chicken meat was considered superior to red meat and would most often grace the table for special occasions. Worlds away from the pitiful, intensively reared chickens that now predominate most supermarket shelves, my remembrance is of free-range, pastured, happy hens that, when their time had come, were slaughtered out of sight of the rest of the flock. 

When I was very little, my parents shipped my sister and I off for a month long summer holiday to Gear Farm in Helston, Cornwall. It was here that I endured what at first felt like abandonment but turned out to be a most edifying exposure to farming life. It was rustic. There was no running hot water so we had a washbowl in our bedroom and once a week we bathed in a tin bath in the front sitting room. The only flush toilet was outside. At night if we needed to pee we used under-the-bed chamber pots. The only in-house entertainment was a piano, which is where the family and farmhands gathered in the evening for a sing-along. My all-time favourite was our rendition of a Doris Day song ‘Que Sera Sera’, which to a little girl full of imagination and uncertainty seemed to resonate. Come to think of it, the lyrics still hold good! 

It was a simple but good life. To be woken up very early in the morning to the whinnying of a majestic shire horse stood immediately below my bedroom window, helping to herd the cows from field to farm and back again for their twice-daily milking, hand-collecting fresh, warm eggs from straw filled nests in purpose-made wooden henhouses, walking through fields of ripening wheat, gathering pure white field mushrooms ankle-deep in morning dew, peacefully watching a sow suckling her piglets. And, on the dark side, taking care to avoid the padlocked shed that housed the farm’s very large and vocal bull, lying in bed listening to the sound of a chicken trying to escape having it’s neck wrung and the squeals of terrified pigs being forced onto the slaughter truck. After all these years, I have still not managed to come to terms with the variance between life and death. 

Accordingly, at Primal Plate the vast majority of our meals are vegetarian. However, we do still occasionally eat organic, grass-fed meat, which I also buy to make into healthy, raw pet food for my cat Sushi. An occasional treat for us, a Perfect Roast Chicken is probably what most people think of as the best meal in the world!

I’ve avoided all the ‘faff and fiddle' that many classic roast chicken recipes call for, so you don’t need to be a seasoned cook to bring a perfectly roasted chicken to the table in all it’s golden glory. In fact it’s so easy to cook, it almost beggars belief. However, please don’t be cheapskate when buying chicken. Honour the bird you’re about to eat - and yourself - by paying extra for free-range, pastured and preferably organic, then follow the instructions step-by-step for the best roast chicken you’ve ever tasted.

Finally, there’s nothing much more useful to have in your refrigerator than a cold roast chicken. I like to pile juicy bite-sized pieces of cold roast chicken mixed with lemony mayonnaise, crunchy celery, fresh tarragon and crisp lettuce leaves between slices of grain-free bread to make the most deliciously satisfying sandwiches to take on a picnic with a bottle of chilled champagne. Simply add English strawberries and cream for the ultimate celebration of summer.

Hot or cold, I guarantee that once you’ve learned how to roast a chicken to finger-licking perfection, it’ll be a friend for life!  

Perfect Roast Chicken (Serves 4)

Ingredients

1 organic onion, halved

2 organic carrots, cut into chunks

1 free-range, organic chicken about 1.5 kg / 3lb 5oz

40g grass-fed butter, softened

Celtic sea salt

freshly ground black pepper

1 lemon, pricked all over with the point of a sharp knife & microwaved for 30 seconds

small bunch thyme - optional


Instructions

Take the chicken out of the refrigerator at least 30-45 minutes before you want to cook it to allow it to come to room temperature. 

Remove any plastic packaging and stand the chicken on a plate lined with paper-towel. Pat the chicken dry - inside and out - using more paper towels. N.B. Do not rinse under the tap, the chicken needs to be really dry for its skin to crisp up to a beautiful golden-brown.

Heat the oven to 190℃ (175℃ fan) 375℉ / Gas mark 5. Have a shelf ready in the middle of the oven without any shelves above it.

Scatter the vegetables over the base of a roasting dish that fits the chicken snugly (see photograph).

Season the underside of the chicken (its back) and inside the cavity with salt and pepper, then stuff the cavity with the lemon and thyme, if using. 

Sit the chicken on top of the vegetables and smother it all over with the butter. Then, liberally season it on the outside with a generous amount of sea salt and a good grinding of black pepper. 

Place in the oven and leave, undisturbed, for 1 hr 20 mins – this will give you a perfectly roasted, crispy-skinned chicken. 

To check, pierce the thigh with a skewer and the juices should run clear.

Remove the cooked chicken from the oven and carefully lift the chicken onto a dish or board to rest for at least 15-20 mins. As you lift the chicken, let any juices from the chicken pour out of the cavity into the roasting dish - you can use this to make delicious gravy, soups and sauces. 


Carbohydrate 0g Protein 70g - per serving

Cold roast chicken with tarragon mayonnaise and crispy lettuce between our Grain-Free Bread

Cold roast chicken with tarragon mayonnaise and crispy lettuce between our Grain-Free Bread

Or serve warm roast chicken with a simple salad and our Fast & Easy Vinaigrette 

Or serve warm roast chicken with a simple salad and our Fast & Easy Vinaigrette 


Asparagus Loaf

by Susan Smith in , ,


There’s been a seismic shift in my life situation over the past few weeks - and yes, it’s been every bit as horrible as it sounds. All self-care has gone out of the window and I’ve thrown my despairing food-blogging hands up in the air more than once because there has been no time for me to be creative. Nevertheless, with just a few more days left to get your hands on the last of the English Asparagus - the notoriously short season starts on St. George’s Day and ends on 21st June - I was determined to blog one of my all time favourite asparagus recipes. 

Thankfully, not much original thought was required. I’ve borrowed this recipe straight out of Rose Elliot’s book ‘The New Vegetarian Cookbook’ - although I’ve more than doubled the amount of ingredients than the original recipe calls for, because it just doesn’t make enough of this delicious savoury loaf to satisfy my greed for English asparagus.

If I wasn’t strictly Primal, I would most enjoy eating a couple of slices of this asparagus loaf for a lazy lunch in the garden on a warm summer’s afternoon, with a few Jersey Royal potatoes, homemade mayo, a fresh leaf salad and a glass of ice-cold wine. My food fantasy aside - and the fact that so far this year there’s been precious little summer weather to speak of - mangetout peas and some crisp lettuce will do just as nicely in place of potatoes for a lovely Primal-inspired summer dinner party dish. Alternatively, cut the loaf into tasty, canapés-sized mouthfuls to serve with drinks, transport to a glamorous picnic, or serve as a delicious vegetarian option as part of a buffet party spread. I think Asparagus Loaf is very, very delicious - anywhere, anytime, any place. 

Asparagus Loaf (serves 6)

Ingredients

1 medium onion, peeled and grated

225g Parmesan or Vegetarian Parmesan-style Cheese (I used Gran Moravia)

225g organic ground almonds (I bulk buy ground almonds online here)

4 large organic eggs

285ml single cream (I actually used 250ml organic double cream and made up the quantity with filtered water)

sea salt and freshly ground black pepper

freshly-grated nutmeg (I used about ⅓ of a whole nutmeg)

750g green asparagus (at least 30 decent-sized asparagus spears)

Sprigs of organic watercress - to garnish


Instructions

Boil a kettle of water. 

Set the oven to 190℃ / 375℉ / Gas mark 5

Snap the ends off the asparagus spears and using a potato peeler trim off the bottom third of the spears to make sure that all the tough part has been removed - you should end up with about 325-350 grams of trimmed asparagus.

Pour the boiling water from the kettle into a large pan. Put the trimmed asparagus into a steamer basket set over the boiling water, put the pan lid on and steam the asparagus for 3 minutes. Drain, refresh under cold water, drain well again and set aside. 

Grease a 2lb loaf tin with melted butter and line with a long strip of baking parchment to cover the base and short-end sides.

In a large bowl, mix together the grated onion, cheese, ground almonds, eggs and cream.

Season with sea salt (about a teaspoon), a generous grinding of black pepper and the nutmeg.  

Put a layer of this nut mixture into the base of the loaf tin, then neatly arrange a layer of asparagus spears on top. Continue in layers like this until all the ingredients are used up, ending with the nut mixture. 

Bake for 60-70 minutes, until risen and firm in the centre.

Cool completely in the tin, then slip a knife around the sides and carefully turn out onto a plate.

Strip off the paper. Cut into slices. Arrange the slices on a plate - or individual plates - and garnish with watercress.


Notes

It’s well worth taking the time to arrange the asparagus spears neatly into the loaf tin. 

You’ll end up with 4 layers of the nut mixture and 3 layers of asparagus spears in your loaf tin, so try to split your ingredients evenly upfront. When baking this for the blog, I threatened to run out of the nut mixture for the final layer. From experience I know that If the top nut layer is too thin, when the loaf is cut into slices it will tend to break off. Annoyingly, I also ended up 2 asparagus spears short, which then had to be steamed separately! 

Season carefully as Parmesan cheese tends to be salty.

If you’re making canapés - makes about 48 - cut the slices neatly again into thirds.

Although leftovers keep well in a sealed container in the fridge, if the size of this loaf is too much for your needs, simply halve the ingredients and bake in a 1lb loaf tin for 45-60 minutes. 


Carbohydrates 11g Protein 28g - per serving


Lucky's Nut Truffles

by Susan Smith in ,


As I write this blog I’m sat at the end of my hallway with my computer balanced on top of a pile of books, hemmed in by displaced furniture and various bits of office paraphernalia (phase 3 of our annual home improvement and re-decoration schedule has been going on for what seems an interminable 4 weeks already) whilst my man stands next to me with his computer resting on a still unwrapped furniture delivery, trying to research plant variants that have sprouted in our garden, which we don’t recognise.

We’re not green-fingered, but we do like to try and make sense of our green space without destroying all life within it. You only have to look up to see that we’re unusual in this respect. It seems that the majority of people are hell-bent on ‘managing’ nature, particularly when it comes down to so-called tree maintenance a.k.a. the ceaseless year-round topping, lopping and felling of trees. Question: When is a tree not a tree? Answer: When some idiot has butchered all its magnificent branches back to stubs and spindly, finger-like projections have grown in place of the beautiful tree-shaped canopy that once was…or cut it down completely to an ugly stump. 

Stupid is as stupid does. I’m convinced the obsessive compulsion to mess with trees is a form of egocentric behaviour that satisfies man's craving for power and control. With big tool in hand - I mean chain-saw - I believe the power rush they get from hacking, sawing and destroying a living entity is an addiction that feeds on itself. Not only do they spoil the look of the trees that still stand, the resulting pitiful, topped and disfigured specimens are left with open wounds that are vulnerable to attack from invading pathogens (fungi and bacteria). Cutting back, thinning out and removing branches destroys a tree’s natural defences - the tree bark that protects the underlying tree tissue. It also threatens its life support system - the loss of leaves that are every tree’s source of food. Exposed to the sun, the cuts are in effect death wounds and the removal of a large percentage of leaf-bearing branches, starvation.

If a starving tree has enough energy, it will send out multiple shoots beneath the cuts to try and replace its leaves as quickly as possible. These new shoots will never be as strong as the original branch they emerge from and can easily snap off even years after they’ve grown back to the size that the tree was before it was attacked. Furthermore, trees can’t heal - they try to defend themselves by closing off their wounds with a tough, woody substance called wound wood. A tree’s ability to seal off its wounds depends on many variables; its age, species, health and vigour, the size and shape of the wound and the time of year. If a tree can’t respond quickly to its injury it falls prey to rot, insect infestation and wood decay, which in turn leads to a loss of vitality and vigour that results in the tree’s inevitable decline, dieback and structural failure.

It is of course a cunning way for tree cutters to future-proof their industry. If you didn’t need the services of a tree surgeon before, you most certainly will when your decayed and dying trees become a health and safety issue for you and your neighbours!

Despite all the ugliness surrounding them, people still have embedded in their sub-conscious that regular tree felling and pruning is both necessary and good. "It lets in more light; it prevents tree root damage to property; it stops the mess trees create (have they not heard of a broom?); wet leaves are dangerous; tall trees block TV/Sky/Broadband reception; it spoils my view; I can’t see the sky (!); I need the space for off-road parking…" are just some of the excuses given. Then there are the unqualified tree surgeons stalking the neighbourhood for mature trees that they can cash-in on, knocking on doors and persuading homeowners that their trees are an imminent threat unless they are cut-back. I give them short thrift, but many folk are convinced.

What these people don’t seem to know or appreciate is:

  • Trees give us oxygen and oxygen helps us breathe - a mature tree in season produces as much oxygen as ten people inhale in a year!
  • Trees give birds and animals shelter so if you cut them down you’re messing up their homes.
  • Trees help clear the air of heat and pollutant gases. 
  • Trees clean the soil - trees filter dangerous chemicals and pollutants out of the soil, which helps assure our food security. 
  • Trees absorb carbon dioxide and help stop global warming.
  • Trees help conserve rain (to prevent drought) and reduce the likelihood of flooding. They fight soil erosion by protecting the soil from surface flooding - binding soil to sloping land with their roots.
  • Trees help control noise pollution.
  • Trees mask ugliness and keep unsightly structures from view.  
  • Trees save energy. In winter they act as wind breaks - breaking the force of cold, blustery winds and reducing the cost of heating your home. In summer, strategically planted trees around your home shield your property from UV rays and reduce the need for air conditioning.
  • Trees give us food - e.g. nuts and fruits.
  • Trees improve human health and well-being. As well as offering cooling shade and protecting us from the sun’s harsh rays, they are aesthetically pleasing to look at. Full of life, strong and magnificent, their beauty is more than skin deep. Exposure to trees and nature calms the mind and uplifts the soul. Being in a natural environment surrounded by trees can lower blood pressure and heart rate. Hospital patients who have a view of trees from their window heal quicker, take less drugs and have fewer post surgical complications than those who don’t. Even babies born to mothers that live near to trees are less likely to be underweight. 
  • Trees increase property values significantly - they not only beautify your property and the surrounding area, there is less fear and violence in well-planted, green spaces than there is in and around homes in barren neighbourhoods. Houses surrounded by trees sell for 15-25 percent higher than houses with no trees. 

Since trees do so much to benefit humans, we think it’s best to leave them alone to do their job. No radical pruning of healthy trees is required or allowed! Our reward is a semi-wild garden that nature has developed into something quite Disney-like. As well as owls, doves, pigeons, innumerable songbirds, hedgehogs, mice, frogs, bats, the occasional pheasant seeking refuge from the local Sunday shoot, and a hungry female sparrowhawk that knows for sure there are rich pickings to be had, we live harmoniously alongside a small army of grey squirrels that are accidentally planting more trees.

Because humans have destroyed so much of the natural landscape, squirrels have been forced to adapt to a more urban environment to survive. Grey squirrels have adapted more successfully than their red squirrel counterparts, but that doesn’t excuse the widespread racism against grey squirrels, which vilifies them with exaggerated claims that they damage/kill trees by bark stripping and excuses the culling of them because, according to urban myth, grey squirrels are deemed pests that destroy property and cause a decline in red squirrel populations. As with the obsession for tree-pruning, it’s all a load of twaddle. Both red and grey squirrels strip tree bark to build their dreys (squirrel nests) and to get to the underlying wood as a source of nutrition when times are hard but, unlike human crime against trees, the damage they cause is minimal and it doesn’t kill the trees. Here are the facts about the demise of red squirrels and, as you might expect, it’s mostly down to humans!

Given that the natural habitat of squirrels is now disappearing at a rate of knots, they make their dreys in any tree-like structure they can find. Four years ago, around the time our next door neighbour cut down an entire copse of eighteen mature trees, one beautiful, dedicated, mamma squirrel sought shelter on our roof under the solar panels, where she built her drey and tried to raise her kittens (baby squirrels). Sadly, it was not meant to be. Somehow, mum sustained a fatal injury to her back and later that day (Friday 13th April 2012) two kittens fell out of their nest and slid straight off the roof - three storeys high - directly onto the solid concrete path outside our back door. What to do? Tiny, helpless and with their eyes still closed, we had no choice but to take on the immediate squirrel care challenge in front of us! 

In the first few weeks of life, baby squirrels don’t do much more than eat, sleep and grow. However, it wasn’t long before our two little boys became gorgeous handfuls of wriggly, noisy, messiness that took over our lives completely. Active during daylight hours, they lived right next to my desk in our home office. Despite the immense parental responsibilities thrust upon us, we soon discovered what a life-affirming joy these intelligent, industrious, characterful and acrobatic critters are. With the help and support of Clarissa Summers we loved and cherished little Kipp and Lucky 24/7, until they were about six months old and ready to be released back into the wild. Our boys may be long gone, but our love and respect for squirrels lives on.

Whether chasing each other from tree branch to tree branch, jumping around in the tops of our trees, sitting perfectly still in the classic squirrel pose with their tail arched over their back, pausing in front of us to munch on a nut or cheekily peering through the window to get our attention, squirrels are without doubt the cutest, most entertaining of all the wildlife species living in our garden, and we happily pay the price to secure their allegiance. Not only do we make executive-style squirrel boxes to keep them warm and safe, we’re also their most reliable food source - namely, an all-year-round supply of best-quality walnuts (their favourite), hazelnuts and, when in-season, acorns too. It’s part of a deliberate plan. The squirrels have learned how to exploit our generosity by approaching us with charming gestures that signal their need for more nuts, and we know that large quantities of these will be stored in the ground. As squirrels don’t always remember where they’ve buried their nuts, there’s always the potential for some of their cache to take root and grow into new trees.

Helping squirrels survive and thrive in captivity very much depends on what you feed them. As well as whole nuts, fruit and veggies, I used to make my two boys nutritious seed and nut balls that helped them grow strong and kept them noisily bouncing around their cage for hours. It seems timely that today’s recipe for Lucky’s Nut Truffles (no prizes for guessing why I’ve called them that) are an energy ball equivalent for humans. These blissful little bombs of goodness mix protein, vitamins, fibre, minerals and essential fats and are a chocolatey, nutty delight to enjoy any time you need an energy boost. Sweetly satisfying and sustaining, Lucky’s Nut Truffles are ideal for a pre or post workout snack, yet still dainty enough for some after dinner indulgence. Incredibly moreish, I suggest you squirrel away a plentiful stash for yourself in the refrigerator, where they could (but I predict won’t!) last a couple of weeks.

Lucky’s Nut Truffles (make about 22)

Ingredients

100g organic raw walnuts

100g organic raw hazelnuts, unskinned

15g raw cacao powder

100g Medjool dates, pitted (about 6)

1 ½ shots (60 ml) freshly brewed espresso-strength coffee

1 tbsp smooth almond butter

3 tbsp coconut butter

2 tsp organic ground cinnamon

2 drops organic liquid stevia

2 tsp pure vanilla extract

50g organic shredded coconut, for coating

Instructions

Pre-heat the oven to 180℃ / 350℉ / Gas mark 4. 

Put the pitted dates into a bowl and pour over the hot coffee. Set aside.

Place the walnuts and hazelnuts together on a baking tray and toast for 8-9 minutes. 

Place the shredded coconut on a separate baking sheet and toast at the same temperature for 5-6 minutes, or until a deep golden brown. Leave on the tray to cool.

Tip the toasted nuts - it doesn’t matter if they’re still warm - into a food processor bowl and blitz until finely chopped. Don’t allow all the walnuts and hazelnuts to become totally smooth as some slightly larger, crunchy pieces in the mix adds texture. Empty the ground nuts into a bowl and set aside.

Add the dates, coffee, cacao powder, almond and coconut butters, ground cinnamon, vanilla extract and liquid stevia to the now empty processor bowl (no need to wash it first) and process until the mixture clumps together into a sticky, gooey paste. You may need to scrape down the sides of the bowl a couple of times to ensure an even mix.

Add the toasted nuts to the paste and pulse everything together until the nuts are evenly distributed.

Using a dessertspoon, scoop the dough into individual bite-sized portions (approximately 17g each) and roll anti-clockwise between the palms of your hands into smooth, round balls.

To finish, roll the truffles in the toasted coconut. 


Carbohydrate 6g Protein 2g - per truffle


Primal Pronto Drop Scones

by Susan Smith in , , ,


Light, versatile and so quick to make, these little fluffy cushions of loveliness can be served with either sweet or savoury dishes whenever you fancy something bready to eat. I like them for breakfast - either topped with a little raw honey, maple syrup, fresh berries or 100% fruit spread - though my real ‘soft-spot’ is for old fashioned marmalade, because it brings back memories of my childhood. 

Sent off to boarding school at five years old, I could never seem to get enough food to eat! It was here that I was introduced to Robertson’s Golden Shred marmalade with their (now politically incorrect) Golliwog branding, which included beautifully made enamel brooches to collect and pin to the lapel of my school blazer. Overly sweet and unsophisticated it may have been, but back then, much like Paddington Bear, marmalade was my hunger monster’s saviour! 

School breakfasts were usually our choice of pre-packaged cereal (Sugar Puffs for me please!) followed by plates stacked high with yesterday’s scantily ‘buttered’ (with Stork margarine, I fear), pre-sliced white bread. It seemed to me that magic marmalade could transform these half-stale offerings into something rather nice that temporarily filled me up. Teatimes were similarly skewed in favour of high carb foods. Bread with jam or chocolate spread, a banana and soft, sticky buns - the sort topped with glacé white icing. We didn’t mind! These are sweet treats as far as children are concerned and, for me, also a real source of comfort that helped me deal with the stress of being away from home.

Unfortunately, overloaded with wheat, gluten and sugar, young children are particularly vulnerable to tummy bloating, clogged-up systems and chronic constipation. Our guardians must have had an inkling because every morning they would check to see if we were ‘regular’ by keeping a 'poo log'! The ‘little me’ thought it most prudent to try and save face when asked the question, so I’d always answer in the affirmative. Unfortunately, I didn’t realise that no amount of toilet paper rammed down the loo would disguise the fact if I’d lied! I’d only know I’d been rumbled when I was given All-Bran for breakfast instead of my favourite cereal. My blushes weren’t spared either. An uninteresting bowl of roughage foisted on a child lets everyone know where their bowels are at. I was embarrassed and ashamed - as if it was my fault! Scarred by this early life experience, I was still eating what I thought was a mandatory bowl of All-Bran every morning up until my thirty-eighth birthday! 

Being regularly fed massive amounts of refined, processed, high carbohydrate foods not only caused my digestive discomfort, but also nagging hunger too. I was part of an experimental dietary disaster promulgated by the food industry in collusion with public health advisers, which in my view was, and still is, tantamount to child abuse because… 

Normally when you eat some food your blood sugar goes up and your insulin levels rise to get the nutrients into your body cells. Once this work is done, your blood sugar goes back to normal. All is as it should be and you’ll only get hungry again when you need more energy. However, when you eat certain foods that contain a lot of sugar and carbohydrates, your blood sugar sky-rockets. In response, your body releases inordinately high amounts of insulin to get the sugar inside your cells. Once your blood sugar spikes, the excess insulin, which is far more than your body needs, continues affecting your blood sugar way and beyond just normalising it. Consequently, your blood sugar continues to plummet much lower than it’s supposed to. At which point, your brain then tells you you’re still hungry! Unbelievably, as a child, in an attempt to satisfy these constant hunger cravings I resorted to eating Germolene after dormitory lights out! By the time I was eleven I was, unsurprisingly, quite porky!

Fast forward almost sixty years, and today’s recipe for Primal Pronto Drop Scones served with orange fruit spread is my idea of heaven. This is bread and marmalade revisited in satisfyingly good taste with no nasty consequences. As warm and as soft as a hug, these high protein, low-carb, nutritious Primal Pronto Drop Scones a.k.a Scotch pancakes served straight from the pan, showcase all the comfort factor of freshly baked or toasted bread with the crunch of pumpkin seeds. Grain-free and gluten-free, and loaded up with tangy, low-carb, organic orange ‘marmalade’ served with a plentiful supply of freshly brewed coffee, they are one of the things I most love about being a grown-up. Oh, and they are really filling too!  

Primal Pronto Drop Scones (make about 16)

Ingredients

150 g organic ground almonds

50 g organic tiger nut flour

2 tbsp organic coconut flour               

2 tsp baking powder

½ tsp sea salt

250 ml raw organic full-fat milk (or homemade, unsweetened almond milk)

3 eggs, beaten 

30 ml organic tiger nut oil (or coconut oil, melted)

2 drops organic liquid stevia

50 g organic pumpkin seeds

1 tbsp organic tiger nut oil (or coconut oil) - for frying

Instructions

In a large bowl, combine the ground almonds, tiger nut flour, coconut flour, baking powder and sea salt together with a whisk.

Measure out the milk into a jug then add the beaten eggs, liquid stevia, and tiger nut oil.

Make a well in the centre of the dry ingredients and slowly pour in the wet ingredients, whisking the mixture as you go. Keep whisking until the mixture becomes a thick, but still pourable, smooth batter - no lumps please! 

Set aside for a minute or two to allow the coconut flour to fully thicken out the mixture. If the batter then seems too thick to pour thickly from a spoon or ladle, add a little filtered water. When you’re satisfied that the batter is of a thick ‘dropping’ consistency, stir in the pumpkin seeds. 

Place a smidge of oil in a large, shallow non-stick frying pan and set over a medium heat. When hot (takes about 2 minutes), spoon small pools (heaped tablespoons) of the batter into the pan, spacing them well apart - no more than 2 or 3 pancakes at a time - making each pancake about 6 centimetres (2.5 inches) in diameter. 

Cook for about 1½ - 2 minutes until the underside is golden brown, then using a flexible, thin-edged silicon spatula to help you, carefully turn them over and cook for 1½ - 2 minutes on the reverse side. 

Turn onto warmed plates and serve immediately with either no-added-sugar 100% fruit spread, fruit puree, fresh berries, a drizzle of honey or maple syrup. 


Notes

Primal Pronto Drop Scones are every bit as good served alongside a cooked breakfast, a bowl of soup, or curry. Alternatively, spread lavishly with savoury toppings e.g. Carrot Hummus or a feisty tomato and avocado salsa for a filling snack or starter. Or, make them into small ‘blini-sized’ canapés and serve with drinks.  

Whilst these drop scones are very quick and easy to make, you may find you need to cook several batches before you get fully acquainted with the optimum temperature (medium/low not medium/high) and exact cooking times (keep checking their doneness' after 1½ minutes) to get them light, fluffy and perfectly golden on both sides. N.B. Let the drop scones firm up just enough for you to turn them over without the uncooked batter running off the top surface when you do. It takes a little practice!  


Carbohydrate 3g Protein 4g - per pancake


Spicy Salmon Fishcakes / Halloumi & Toasted Cashews With Paleo Pad Thai ‘Slaw’

by Susan Smith in , , ,


East meets West in this Primal/Paleo culinary take on fishcakes and coleslaw. Without the potato, flour and breadcrumbs used in traditional fishcake recipes, these Asian inspired, fishcakes are so much simpler and quicker to make. 

Fresh and light - with no mayo or endless amounts of shredded cabbage to chomp your way through - the Pad Thai ‘Slaw’ is also a wonderful thing!

Put the two together for a surprisingly satisfying, clean-eating, Omega-3 packed family meal that’s high in protein and low in carbs.

Vegetarians can also make a meal of this punchy-flavoured Paleo Pad Thai ‘Slaw’ by topping it with 60g toasted cashew nuts and replacing the salmon fishcakes with slices of freshly griddled ‘vegetarian-friendly’ - i.e. not made with animal rennet - halloumi cheese - you’ll need to allow about 80g-100g of halloumi per person.

Tasty, pure and simple…job done! 

Spicy Salmon Fishcakes With Paleo Pad Thai ‘Slaw’ (Serves 4)

Ingredients - for the fishcakes

800 g wild Alaskan salmon, boned and skinned

3 spring onions, finely chopped

juice of 1 lime

1 tsp organic dried chilli flakes

1 tbsp tamari

1 dsp fresh ginger, peeled and finely grated (approx. 1 x 2.5 cm / 1inch piece)

4 tbsp finely chopped coriander leaves

1 organic egg, beaten 

1 tsp sea salt

freshly ground black pepper

75-100 g organic ground almonds

1-2 tbsp organic coconut oil - for frying the fishcakes


Ingredients - for the Paleo Pad Thai ‘Slaw’ 

2 medium courgettes, cut into thin slices, coarsely grated or spiralised (see Notes below)

3 medium carrots, cut into thin slices, coarsely grated or spiralised (see Notes below)

200g frozen baby broad beans, thawed and shelled (about 120g prepared weight)

1 tbsp chopped fresh chives

1 tbsp raw organic sesame seeds


Ingredients - for the dressing

40 ml fresh lime juice

40 g raw organic cashew nut butter

1 tbsp tamari (I used Clearspring)

40 ml Co Yo natural coconut milk yogurt

1-2 drops organic liquid stevia


Ingredients - to serve

1 tsp raw sesame seeds

coriander leaves and/or micro leaves


Instructions - to make the fishcakes

Put all the fishcake ingredients, except the ground almonds, into a food processor and pulse together until well blended. N.B. Be careful not to over-process - you want the mixture to retain a little of its chunky texture rather than turn into a mushy fish paste! 

Tip the fishcake mixture into a large bowl and add just enough of the ground almonds to ensure that it will hold together sufficiently well to form into fishcakes. The final mixture may still feel a little wet but should be easy enough to shape in your hands and will firm up in the refrigerator prior to cooking.

Divide into 8 fishcakes about 2.5 cm / 1 inch thick (weighing approximately 125g each). Transfer to a large plate, cover and refrigerate for at least 30 minutes.

Heat the coconut oil in a large, non-stick frying pan over a medium/high heat until the surface of the oil starts to shimmer (don’t allow it to smoke!). Cook the fishcakes for 3 minutes until crisp and golden on the underside, then flip them over and cook on the other side for another 3 minutes.

Serve with Pad Thai ‘Slaw’ and a squeeze of fresh lime juice.


Instructions - for the Paleo Pad Thai ‘Slaw’

Using a small hand whisk, combine all dressing ingredients together in a small bowl or cup until you have a smooth dressing that’s of pouring consistency.

To quickly defrost and remove the broad beans from their pods. Weigh out the frozen broad beans into a heatproof bowl or jug. Bring a kettle of water to the boil and pour over the beans. Let stand for 3-5 minutes. When the water has cooled down pop the tender, bright green beans out of their thick, leathery skins by squeezing gently between two fingers. 

In a large bowl, combine courgette, carrots and shelled broad beans. Add the chopped chives and sesame seeds, mix together gently and set aside.

Just before serving, pour over the dressing and gently toss all the ingredients together until the vegetables are evenly coated.

Transfer to plates and top with a sprinkling of sesame seeds, chopped coriander and/or micro leaves. 

Serve with either Spicy Salmon Fishcakes or Fried Halloumi and Toasted Cashews (see below).

The vegetarian option: Fried Halloumi and Toasted Cashews

The vegetarian option: Fried Halloumi and Toasted Cashews

Instructions to make Fried Halloumi & Toasted Cashews With Paleo Pad Thai 'Slaw' (V)

Firstly, toast the cashews in a large frying pan over a medium heat for about 5 minutes or until turning pale gold, then take off the heat and set aside. 

Cut the halloumi into 1 cm thick slices. Heat some coconut oil or olive oil in a pan until hot, then fry the halloumi for just 1-2 minutes on each side until golden and crispy around the edges. 

Arrange the Paleo Pad Thai ‘Slaw’ on 4 serving plates, top with the toasted cashews, sesame seeds and coriander leaves, then serve the fried cheese slices (3-4 per person) alongside, with wedges of fresh lime for squeezing over.

N.B. Be sure to plate-up the fried halloumi immediately after it’s cooked - it’s so much nicer warm! If you allow cooked halloumi to go cold, it will tend to become too hard and rubbery.


Notes

To make carrot and courgette julienne for the Paleo Pad Thai ‘Slaw’, I first cut the washed courgettes and peeled carrots in half horizontally, then finely sliced the halved vegetables vertically (on a mandolin) before using a small sharp knife to cut them into 6 cm long thin julienne strips. Coarsely grating them in a food processor would be a lot quicker!

The Paleo Pad Thai ‘Slaw’ is suitable for vegans.


Carbohydrate 17g Protein 66g - per serving (assuming 2 fishcakes per person)


Celeriac Dauphinoise

by Susan Smith in , ,


If I could have one 'mardy' about my Primal diet it’s that I just can’t seem to tactically allow potatoes back into my life…not ever! Having initially lost one and a half stones by eating low-carb, high fat (LCHF), I have on more than one occasion subsequently pined for the simplicity and density of potatoes. Carby they may be, but potatoes are in a league of their own and their virtues are not easily replicated. As well as being a naturally nutritious whole-food, simple spuds need no more than the application of heat to make them into something very, very tasty indeed (is there anyone that doesn’t love golden, crispy roasties?). When pre-cooked and chilled (think yummy potato salad) potatoes are also an alluring dietary source of resistant starch - which is top-notch food for ‘good’ gut bacteria, and thus your overall health. Or so I debate with myself…

Unfortunately, neither my nostalgia for potatoes or their nutritional profile is of any help to me. As far as my metabolism is concerned it’s not playing! I cannot ignore the fact that previously, within an hour or so of eating potatoes, my feet and ankles would swell alarmingly. No doubt potatoes had also long been playing havoc with my blood glucose levels, but after the age of fifty the almost immediate inflammatory response (edema) not only made me look like a frump, it actually made me feel quite queasy. I may forever mourn their loss, but for me it’s a case of R.I.P. potatoes! 

Another thing that peeves me is cheese! It’s virtually impossible to be a non-meat eater on compassionate grounds and still follow Primal principles without eating eggs and cheese. Unfortunately, almost all vegetarian recipes seem to ignore the fact that the most wonderful-tasting, beautifully-textured, traditionally-made cheeses, such as Parmesan, Gruyere and Mozzarella, are totally unsuitable for vegetarians. Whilst I’ve found good-enough substitutes for Parmesan and Mozzarella, I have still not found a copy-cat vegetarian version of Gruyere D.O.P. that’s available to retail customers, which can emulate anything like Gruyere’s unique melting quality and depth of flavour. Even if you can get past the ‘no-no’ of cheese made with calf rennet, there’s still the massive cruelty involved in milk production generally, and the nutritional degradation that occurs with pasteurised milk taken from grain-fed cows. Given that not all cheese is created equal, there is one family-run traditional cheese dairy that I am happy to be acquainted with because they share Primal Plate’s ethos - a passionate commitment to animal welfare and human health. This family run business makes award-winning, artisan, vegetarian cheeses from the raw milks of free-range, grass-fed cows, goats and ewes. In this day and age of intensive factory farming, small enterprises such as The Traditional Cheese Dairy make my heart sing. Not only because they fly in the face of extreme human exploitation of animals inherent in the dairy industry, but also because their end-products taste so good and are naturally healthful to animals and humans alike. I know it isn’t always practical, but please try to seek out and support all farmers that treat their animals as animals - not just a commodity for ‘growing’ meat or as 24/7 milking machines. Raw milk from free-range, grass-fed cows is not only better for the animals it is far, far better for you.  

Wherever you shop, substitute any mature, organic, vegetarian Cheddar in recipes that call for Gruyere. You may need to ask for advice at the Deli counter. It is often a case of trial and error when you’re trying to find a decent tasting vegetarian Cheddar cheese that doesn’t disintegrate into an oil-slick when baked or grilled! I will keep you posted if and when I find the perfect one!

Rant over, I have stopped arguing with reality long enough to create a potato-like dauphinoise using that great potato ‘pretender’…celeriac. Whilst the finished result isn’t as pillow-soft as cooked potatoes, cheesy gratins and bakes always have the yummy, comfort factor that low-carbers sometimes crave - and this cheese-topped Celeriac Dauphinois is no exception. I’ve lightened-up the full-on fat experience of double cream and cheese (oftentimes called for in traditional dauphinoise recipes), by substituting dry white wine for most of the cream. The crispy, crunchy cheesy topping speaks for itself. All in all, much tastier and less rich, Celeriac Dauphinois is an excellent low-carbohydrate main course for a light family supper or when entertaining vegetarians. It’s equally delicious served as a vegetable accompaniment.  

Ingredients

3 medium/large shallots, finely sliced

2 small celeriac, total weight about 900g

½ lemon, juiced

2 tbsp fresh lemon thyme, leaves only

2 tbsp olive oil

40g butter

sea salt and freshly ground black pepper

¼ tsp freshly grated nutmeg

150 ml dry white wine (I used a dry, white Spanish Rioja)

60 ml organic double cream

165g Gruyere (or mature, vegetarian Cheddar), finely grated              

60g Parmesan (or Parmesan-style cheese), freshly grated                 


Instructions

Pre-heat the oven to 190℃ / 375℉ / Gas mark 5

Fill a large bowl with cold fresh water and add the lemon juice.

Cut the top and bottom off the celeriac and then stand flat on a chopping board. With a sharp knife cut off the thick skin working all the way around the celeriac from top to bottom.

Cut each peeled celeriac into 4 quarters.

Using the thinnest slicer on a food processor, a hand-held mandolin slicer or a very sharp knife, cut the celeriac into 3mm thin slices. Put the celeriac slices into the lemon water to prevent them discolouring.

If not done already, finely slice the shallots. 

Heat the butter and olive oil together in a large pan until the butter has melted.

Drain the celeriac then either spin in a salad spinner or dry on a clean tea-towel. 

Add the shallots and drained celeriac to the pan. Continue to cook over a medium heat for about 5 minutes, turning the vegetables over now and again to make sure that everything is well coated in the olive oil and butter. 

Season with salt, freshly ground pepper and nutmeg then pour in the wine and continue to cook for about 10-12 minutes more with the pan lid on, stirring occasionally, until the celeriac is just tender.  

Tip the contents of the pan into a gratin dish. Scatter half the thyme leaves over the top then drizzle over the double cream and flatten the slices of celeriac down so they’re submerged as much as possible under the liquid.

Mix the two grated cheeses i.e. Gruyere & Parmesan (or vegetarian substitutes) together, then sprinkle on top of the celeriac in a thick even layer. Cover the dish with tin foil.

Place in the pre-heated oven and cook for 20 minutes. 

Remove the foil, then place back in the oven for a further 20-25 minutes until bubbling and golden brown. 

Remove from the oven and allow to stand for 2 minutes. 

Scatter over the rest of the thyme leaves before serving with a fresh green salad.


Notes

Cheese has a tendency to break down when cooked at high temperatures. The maximum temperature you should bake this dauphinoise - and any other cheesy casserole - is 190℃ / 375℉ / Gas mark 5, or below. If the cheese does separate and you’re left with a layer of fat sat on the surface of your Celeraic Dauphinoise, lightly dab off the excess oil with sheets of paper towel before allowing to stand for a couple of minutes prior to serving. It will still taste good!

If you like your cheese topping really brown and crozzly a couple of minutes under a very hot grill at the end of the cooking time should do the trick.  

Only buy small heads of celeriac - larger specimens can lack flavour, tend to be a bit woody and are much more unwieldy to peel and slice.


Carbohydrate 23g Protein 17g - per serving


Tiramisu

by Susan Smith in , ,


Here’s a novel way to spoil your mum with anti-ageing skin care this Mother’s day - treat her to tiramisu! You are what you eat, and this skin-loving dessert is rich in Vitamin E and healthy oils that are sure to get her skin glowing from the inside!

A fantastic confection made with a light tiger nut and almond sponge cake layered with sweet-tasting macadamia nut cream and a rich coffee/chocolate flavoured ‘ganache’, this is tiramisu re-invented - without sugar, dairy or grains.  

Boasting a wealth of antioxidants, essential vitamins, minerals and healthy fats from the ‘darlings’ of the nutritionally-aware foodie brigade - avocados, coconut oil/milk, raw cacao, tree nuts, tiger nuts and a little raw, unpasteurised organic honey (because I simply couldn’t ignore the skin-enhancing benefits of honey!) - this isn’t just tiramisu, it’s superfood! An unrecognisably healthy retro dessert so choc-a-block with nutrients you won’t believe it’s not the luscious (though sadly off the carbohydrate richter-scale!), Italian classic.

Primal Plate’s ‘light as a feather’ Tiramisu is part of my stay slim and gorgeous action plan to make low-carbohydrate/high fat eating (LCHF) a way of life even when the occasion calls for some sweet-toothed indulgence. Not only is this impressive dessert relatively low in carbs, you are nourishing your skin from the inside out by eating Vitamin E packed tiger nuts, almonds, avocado and coconut oil. Vitamin E is widely used in the cosmetics industry to help slow down the ageing of the body cells, improve the elasticity of the skin and reduce skin wrinkles. 

Whilst I maintain that you should never put anything on to your skin that you’re not prepared to put in to your mouth, It’s good fun to turn this beauty maxim on its head with a deliciously decadent dessert that can help every woman channel her inner goddess. Ingenious…the perfect solution to having your cake and eating it! Happy Mother’s day girls!

Tiramisu (makes 4-6 servings)

Ingredients - for the sponge layer            

45g unsalted butter    

60g organic tiger nut flour 

40g organic ground almonds 

1 tbsp raw cacao powder

pinch of sea salt

3 large eggs                            

75g Sukrin:1                             


Ingredients - for the nut cream layer            

125g macadamia nuts, soaked overnight in cold filtered water

250g full-fat coconut milk

20g raw organic honey

4 drops organic liquid stevia

1tsp pure vanilla extract (I use sugar-free Ndali)

25g coconut oil                


Ingredients - for the coffee/chocolate ganache layer            

2 ripe medium avocados (approx 350g unpeeled weight)

20g raw organic cacao powder

50g raw organic honey                                     

10-12 drops organic liquid stevia                 

1 tsp pure vanilla extract (I use sugar-free Ndali)                        

80ml espresso-strength coffee        


Ingredients - to assemble the tiramisu            

100ml freshly brewed expresso-strength coffee                

40 ml malt whisky                    

30g Sukrin Gold               

raw cacao powder, sifted                    

Sukrin no-sugar milk chocolate


Instructions - to make the sponge

Pre-heat the oven to 180°C / 350℉ / Gas mark 4

Melt the butter gently and leave to cool slightly. Use a little of it to grease a 23cm x 30cm (9” x 12”) swiss roll tin, then line the base and sides of the tin with a single sheet of baking parchment (cut down into the corners so that the paper lies flat against the sides of the tin).

Sift the tiger nut flour, salt and cacao powder in to a medium sized bowl. Stir in the ground almonds and set aside. 

Put the eggs and Sukrin:1 in a large heatproof bowl that will sit snugly over the top of a saucepan. Pour boiling water into the saucepan and sit the bowl on top. The hot water must not actually touch the bowl. Set the pan over a low heat so that the water is barely simmering. The steam will help dissolve the Sukrin and the mixture to thicken slightly.

Using a hand-held electric beater set on High, whisk the eggs and Sukrin sweetener together for about 6-8 minutes, or until the mixture is very pale, thick and mousse-like and has at least tripled in volume. It should hold its shape for a few seconds when it’s flicked across the surface of the rest of the mix.

Add one-quarter of the sifted flour/ground almond mixture into the egg and Sukrin mixture and very lightly and gently fold it in with a large metal spoon. Repeat 3-4 times more with the remaining flour/ground almond mixture - folding it in gently each time. When all the flour/ground almonds have been incorporated into the mix, carefully pour in the melted butter and gently fold this in too. N.B. Don’t be in a rush to do this and try not to be too heavy-handed - the idea is to retain as much air as possible inside the mix whilst at the same time bring everything uniformly together. 

Quickly pour the mixture into the tin - tilting the tin this way and that until the cake mixture has levelled itself out evenly in to all four corners of the tin - then bake in the oven for 20-25 minutes, until golden brown and firm to the touch. 

Leave to cool in the tin for a few minutes and then turn it out on to a wire rack to cool completely.

Once cooled, peel off the parchment paper and slice the cake into fingers or squares for making tiramisu or trifle.


Instructions - to make the nut cream layer

Rinse the macadamia nuts in fresh water then blitz all the ingredients together to form a smooth cream. Place in the fridge to set.


Instructions - to make the coffee & chocolate ganache layer

Blitz all the ingredients together to form a rich, smooth, chocolatey cream.


Instructions - to assemble the tiramisu

Make a fresh batch of espresso strength coffee, add the whisky and liquid stevia and pour into a shallow dish.

Cut the cold sponge into suitable sized cubes or fingers (whatever best fits your serving dish).

Layer 1: very briefly (2-3 seconds!) dip the sponge pieces into the coffee mixture until you can see that the liquid has risen about half-way up the depth of the sponge and lay the pieces one at a time as you go into the base of your serving dish(es) (I used 2.5cm / 1” squares for the base layer in 4 x 225ml martini glass)

Layer 2: Spoon over the nut cream layer and spread out evenly

Layer 3: Add a second layer of coffee-soaked sponge

Layer 4: Spoon over a second layer of nut cream and spread out evenly

Layer 5: Spoon or pipe over the coffee & chocolate ganache and spread out evenly

Cover and chill for 1-2 hours in a refrigerator. Then, when you’re ready to serve the tiramisu...

Layer 6: Sift over a fine layer of raw cacao powder

Layer 7: Use a small spoon to carefully transfer a generous, even layer of Sukrin sugar-free milk chocolate (straight off the plate it was grated on to) directly on to the top of each tiramisu - don’t try to sprinkle over the grated chocolate with your fingers as it will melt instantly!


Notes

The best diet for weight loss and maintenance is one that you can easily stick to. A low-fat/low calorie diet requires Herculean willpower because food without fat doesn’t taste good and oftentimes you still feel hungry. The joy of a low-carb/high fat diet is that you don’t count calories and the food you can eat is deliciously satisfying. Nevertheless, Primal Plate desserts and other sweet treats are delights to be enjoyed occasionally, not every day. You can achieve steady, effortless weight loss by limiting carbohydrates to between 50 grams and 100 grams per day - unless you are morbidly obese, in which case you may need to kick-start your body into burning fat by eating less than 50 grams of carbohydrate per day and avoiding tiramisu for the time-being! You can keep a tally of your carb intake at MyFitnessPal. If you then cross the line from time to time (without exceeding 150 grams of carbohydrate) a long, brisk walk should sort things out!

There is enough sponge cake in this recipe to make 6 tiramisu (or to have leftovers). The rest of the ingredients will make 4 very generous servings (it’s deliberate!). If you’re cutting carbs, have a small appetite or just more mouths to feed, simply divide the recipe between 6 smaller (150ml) serving dishes.

All the individual components of this dish can be made separately in advance. The sponge-cake will keep for up to 3 days in an airtight container, and both the nut cream and coffee/chocolate ganache will keep for several days in the refrigerator. You can also assemble the tiramisu up to and including layer 5, twenty-four hours before you want to eat it - finishing with the final flourish of raw cacao and grated chocolate just before serving. 

Although organic liquid stevia is a zero-carb, natural alternative to sugar, it can leave a slight aftertaste. To minimise this and to not miss out on the skin-enhancing benefits of honey, I’ve used a combination of stevia and honey to sweeten both the nut and coffee/chocolate creams.

I do not like overly sweet food, so this sophisticated, not-too-sweet dessert with a touch of alcohol is definitely one for the grown-ups. However, it can easily be adapted for children (or tomorrow’s breakfast!) by substituting a small/medium sliced banana (per serving) for the coffee/whisky soaked sponge and layering it with the nut and coffee/chocolate creams in the same way as described above. You may also want to add a little extra honey to the coffee and chocolate cream to make it more child-friendly. 

The cake mixture rises just enough to make it nicely spongy without being too thick. Firm yet really light in texture, it’s just made for soaking up the boozy coffee in this recipe and for making trifle generally. Once cold, it’s easily cut into neat fingers or cubes (Sarah loves to eat these plain) and is a brilliant substitute for those nasty trifle sponge fingers you can buy in the shops. 


Carbohydrate 25g Protein 11g - per serving (6 people)

Carbohydrate 36g Protein 15g - per serving (4 people)


Cheesy Sweet Potato, Cauliflower & Spinach Gratin

by Susan Smith in , ,


Want something fast, fresh and fabulous for supper tonight? This vegetarian cheesy gratin ticks all the boxes - comforting, healthy, delicious and on the table in under 45 minutes.

Although today’s recipe includes full-fat crème fraîche, cheese and sweet potatoes, let’s be clear - a Primal, low-carbohydrate / high fat diet (LCHF) does not mean eliminating carbohydrates completely or that it’s okay to gorge yourself on fatty food. In my view, Dr. Atkins was much maligned and misrepresented in this respect. It does mean that oftentimes you’ll find Primal Plate recipes are contrarian to decades of public health advice which has hoodwinked most people into believing that saturated fat - fatty meat, milk, butter and cheese - is the root cause of clogged-up arteries, high cholesterol, heart attacks and obesity. Truth is, there’s never been a shred of reliable scientific evidence that can demonstrate saturated fat is harmful to human health. In fact, numerous scientific studies show the opposite to be true. The real culprit for the type 2 diabetes epidemic and obesity crisis (which are themselves a risk factor for heart disease and stroke) is a fat-phobic society indoctrinated into believing that a healthy diet is one low in fat and high in carbohydrates (LFHC). 

This myth has been perpetuated for the past fifty years or so and it’s time we turned things around. In a nutshell: It’s not fat that makes you fat and sick, it’s sugar. 

In layman’s terms, all the carbohydrates we eat are converted by the body into a type of sugar called glucose. Glucose is fuel for the cells and is transported around the body in the bloodstream. In response to glucose in the bloodstream the pancreas secretes insulin. Without insulin, glucose stays in the bloodstream - it’s insulin that allows glucose to enter the cells (of the brain, heart, liver and muscles) to provide the energy for them to work. Or, if it’s not required for immediate use, to be converted into glycogen and stored in the liver and muscles for later. 

However, once the cells are full to the gunnels with excess glucose they become increasingly resistant to the call of insulin to open up their cell doors and let more in. When there’s nowhere for glucose to go it stays in the bloodstream and blood sugar levels stay high - a toxic situation. What follows is pancreatic panic! In a frantic attempt to get rid of excess glucose in the bloodstream, the pancreas makes even more insulin. Unfortunately excess insulin is also toxic so then the cells become even more insulin resistant. Catch 22!

Eventually the over-production of insulin will help convert the excess glucose into fat but in the meantime the glucose in the bloodstream forms a sort of sludge that blocks arteries and causes systemic inflammation - the underlying cause of multiple degenerative diseases, including heart disease and cancer. Furthermore, an excess of insulin stops the fat-burning enzyme lipase from working efficiently inside the cells, so you don’t even burn off the fat that’s been stored!  

Most human beings are genetically predisposed to insulin resistance, which worsens with age and inactivity. The solution is to stop feeding the problem with high carbohydrate food - no grains, no potato, no sugar - and to exercise more. When you’re not constantly topping-up the body with sugar and starches it can start burning fat for energy instead. Without high carb foods spiking your blood sugar, natural, healthy fat becomes your new best friend. It satiates your appetite, you feel full for longer, it stops sugar cravings and it helps make all food look and taste yummy. 

As for the shoddy science and scaremongering that aims to convince you otherwise, I’ve been on the frontline of a randomised double-blind controlled study (the ‘gold-standard’ of scientific research) when I taught a group of asthmatics the Buteyko Method in the first UK Clinical Trial funded by the National Asthma Campaign. Unfortunately, several participants reported back to me that the study was biased against Buteyko because during their reviews with research staff they had been actively encouraged to continue using their asthma medication. According to our carefully compiled records, over ninety per cent of the Buteyko group either significantly reduced or gave up their bronchodilators completely during the study. However, when the scientific paper was finally published these remarkable results were buried. True, there was much scientific gobbledygook that I wasn’t familiar with, but suffice to say it took several more years before the method was given any credence whatsoever by the NHS. Why did I expect otherwise? Like most people I never imagined that highly respected academics would stoop so low. In reality, too many vested interests - years of study potentially wasted, livelihoods at risk, research funding cut, pharma greed and charity donations threatened - is a massive incentive to keep schtum or worse, go on the offensive to protect the status quo. It’s just how egos rock n’ roll. Nobody wants to admit they’ve been complicit in giving health advice that actually destroys tens of thousands of peoples’ lives but the truth is, there’s safety in numbers and the powers that be are far more interested in self-preservation than your health and well-being.

Dr Aseem Malhotra says it best: “In my opinion a perfect storm of biased research funding, biased reporting in the media and commercial conflicts of interest have contributed to an epidemic of misinformed doctors and misinformed patients. The result is a nation of over-medicated sugar addicts who are eating and pill-popping their way to years of misery with chronic debilitating diseases and an early grave.”

After years of trial and error, I found my way through the lies, confusion, chronic illness and creeping weight gain to discover that the exact opposite of ‘conventional wisdom’ is the truth. It convinced me that eating LFHC is tantamount to death, disease and obesity by the Food Pyramid and that switching to LCHF diet stops the rot. However, if you’re overweight or unwell please don’t ‘wait and see’ how the continuing debate about fat plays out between the warring scientific community - and please don’t take my word for who’s right either. For a few short weeks, simply test out the LCHF hypothesis yourself - using Primal Plate recipes for your inspiration - to see if it works for you.   

Primal Plate is proud to play its part by translating unbiased scientific evidence into a pleasurable eating plan for life. If you want to join in, I think the quick and easy-to-make cheesy deliciousness of today’s vegetable gratin might be a very good place to start. 

Although a LCHF diet avoids white potatoes, we still eat orange-fleshed sweet potatoes because of their versatility in recipes and powerful nutritional punch. In spite of them being sweet-tasting, they have more fibre, fewer calories and less carbohydrates than white potatoes and their natural sugars are slowly released into the bloodstream, which helps ensure a balanced and regular source of energy, without the blood sugar spikes associated with fatigue and weight gain. They’re also a beautiful complementary colour to the Red Fox Leicester cheese I’ve used in the recipe!

It’s really important not to stint on the quality of crème fraîche you use for making the cheese sauce. Unlike most cheese sauces, this one isn’t thickened with flour so its success relies on the crème fraîche not breaking down during the cooking process. For a really silky-smooth, cheese sauce finish, I always recommend Rodda’s crème fraîche (available from Waitrose) because it doesn’t curdle or turn into a thin liquid when heated - this is what usually happens with lesser varieties. If you can’t find Rodda’s, Longley Farm’s crème fraîche is also a good bet.

Cheesy Sweet Potato, Cauliflower & Spinach Gratin (Serves 4) 

Ingredients

280g Leicester cheese (I use Red Fox), coarsely grated

250g crème fraîche (I use Roddas)

1 dsp Dijon mustard

Sea salt and freshly ground black pepper

3 medium orange-fleshed organic sweet potatoes, unpeeled and cut into 1-2inch chunky ‘chips’

1 medium organic cauliflower, broken into largish florets

235g organic spinach, washed

2 tbsp fresh chives, finely chopped


Instructions

Fill the bottom of a steamer with boiling water from the kettle and butter a large gratin dish.

Pre-heat the oven to 190℃ / 375℉ / Gas mark 5 

Steam the sweet potatoes in the top of the steamer, covered, for 10-12 minutes. 

Whilst the sweet potatoes are steaming, make a cheese sauce by whisking the crème fraîche, Dijon mustard and three quarters of the grated cheese together in a medium-sized saucepan set over medium heat. Keep whisking everything together until the cheese has fully melted in to a silky smooth, hot cheese sauce. Don’t let it boil. Season to taste with sea salt and freshly ground black pepper then take the pan off the heat, cover and set aside. 

Using a large metal draining spoon scoop the cooked sweet potato wedges out of the top of the steamer and lay them flat in the bottom of the gratin dish. Cover and keep warm.

Add the cauliflower florets to the steamer basket and steam them, with the pan lid on, for 5-6 minutes. They need to be just cooked through, so don’t let them get too soft or soggy.

Arrange the cooked cauliflower, placing it evenly between the potato wedges in the gratin dish. 

Now pile the spinach into the steamer basket, put the lid back on and steam for 1-2 minutes until the leaves have just collapsed. Drain well then add to the sweet potatoes and cauliflower in the gratin dish spreading it out evenly. Sprinkle the chopped chives on top. 

Whilst stirring constantly, re-heat the cheese sauce to just below boiling point. Spoon over the vegetables making sure they’re all nicely coated. Finally, sprinkle over the remaining cheese and bake the gratin in a hot oven for 15 minutes. 

At the end of the cooking time switch the overhead oven grill to hot and continue to cook the gratin a little longer under the direct heat until the top is gorgeously crisp and golden. 

Serve immediately with a fresh green salad, if liked.  


Carbohydrate 43g Protein 26g - per serving


Cheddar Muffins

by Susan Smith in , , , , ,


Tasty, filling and sustaining, these yummy Cheddar Muffins are a high-protein, low-carbohydrate viable alternative to bread and the perfect accompaniment to soup. So perfect, that soup need no longer be relegated to starter or snack status but can sit proudly at lunch or dinner as the main event. The fact is that these bread-like Cheddar Muffins pack enough nutritional oomph to turn every veggie soup into a satisfying meal. 

But don’t stop there. Their ‘breadiness' invites you to slice them through and fill them like a sandwich. They also toast beautifully - you only need to toast their cut side - before serving with scrambled eggs, creamy mushrooms, cheese and tomato or any other toast topper that takes your fancy. 

I like them best of all when they’re still warm from the oven and spread with generous amounts of grass-fed butter. A veritable nutritional powerhouse of goodness, it appeals to the child in me to split them in half horizontally (like a scone), then eat the all the bottom halves before slowing-down to savour the warm, golden, crunchy, deliciousness of their cheesy toppings. If you’re craving comfort food, Cheddar Muffins can be on the table in 40 minutes - with satisfaction guaranteed.  

Cheddar Muffins (Makes about 10)

IngredientsMakes 10

75g unsalted butter, melted

150g ground almonds

50g coconut flour

2 tsp baking powder

1 tsp sea salt

1 tsp paprika

freshly ground black pepper

4 large eggs, beaten

6 tbsp diluted milk (50/50 with filtered water)

125g organic vegetarian Cheddar cheese, finely grated

30g vegetarian parmesan-style cheese, finely grated

Instructions

Pre-heat the oven to 200℃ (fan) / 400℉ / Gas mark 6 and line a muffin tray with 10 large paper cases.

In a small saucepan melt the butter over a very low heat. Take the pan off the heat and allow the butter to cool slightly.   

In a large bowl mix together the ground almonds, coconut flour, baking powder, salt, paprika and black pepper. Add the grated Cheddar and combine well with a fork.

Add the melted butter, the beaten eggs & the diluted milk to the dry ingredients and continue to mix everything together well with a fork until a thick batter is formed.

Spoon the batter into the muffin cases (about 65-70g mixture per muffin) - for speed I use a self-releasing ice cream scoop - then lightly press the mixture down evenly into the paper cases with the back of a fork.  

Sprinkle over the grated Parmesan-style cheese, dividing it equally between the muffins and bake in the oven for 25 minutes (I turn the muffin tray around halfway through the cooking time to ensure even browning). 

Best served still warm from the oven.


Notes

Whilst I recommend these muffins are served warm fresh from the oven, they do have a tendency to vexingly stick to their paper cases until they’ve gone cold. If you don’t want the hassle of scraping remnants of muffin off their paper cases with a teaspoon, use non-stick tulip wrap muffin cases instead. 

Carbohydrate 7g Protein 14g - per muffin


Pizza Peppers

by Susan Smith in , ,


Who doesn’t love pizza? Since ditching grains, the anticipation, convenience and sheer pleasure that I still associate with sitting down to eat meltingly hot, delicious pizza with a glass of red wine just refuses to go away. I’ve done Primal Pizza before on this blog (and it is a real treat to eat) but if I’m honest, I’ll tell you what I really want…it’s to redefine pizza as a positively healthy, gourmet food that’s just as quick and easy to make as its classically-made ‘junk-food’ cousin.

Today’s Primal Pronto recipe for Pizza Peppers is intended to take all the time and effort out of creating a low-carb, ‘laid back’ pizza experience at home. There’s no cauliflower ‘crust’ to make - because I’ve used nature’s own convenient carriers of goodness in the form of red peppers to create the pizza ‘base’. 

However, what I was really wanting to tease out of the recipe was a flavour combination that would satiate my appetite for pizza:- basically, to create a pizza topping that replicates our all-time Pizza Express favourite: “Cajun, with extra tuna please!” It’s all changed now, but Pizza Express used to top their Cajun pizza with red peppers, prawns, Tabasco sauce, onion, mozzarella and, at our request, extra tuna.

Pizza Peppers with tuna and prawns

Pizza Peppers with tuna and prawns

First off the bat, these Pizza Peppers fully lived up to our expectations. Made with a smoky, scorched red pepper base, tomatoes, tuna, prawns, chillies, cheese, black olives, capers and onion we were transported back in time to the very same taste sensation that’s kept luring me back to thoughts of pizza ever since. But then remorse set in. Although I am pescatarian I mainly eat vegetarian, so it didn’t feel right to give the ‘green light’ to eating a plethora of fish without a second thought for vegetarian values. 

I didn’t have to ponder the problem for long. A quick ingredients check online for another of our former favourites at Pizza Express (Giardiniera) reminded us that this pizza topping included artichokes. It just so happens, I had a jar of marinated artichoke hearts in my cupboard (as you do!) and it seemed to me that they were possibly the nearest vegetarian equivalent to tinned tuna in olive oil that I could hope for. And so they proved to be. It turns out that artichokes in combination with vegetarian mozzarella are - from a taste, texture and visual perspective - so surprisingly akin to tuna and prawns that we could barely discern the difference between the two! 

Vegetarian Pizza Peppers with artichokes and mozzarella

Vegetarian Pizza Peppers with artichokes and mozzarella

Which is a remarkable triumph for vegetarianism, I’d say.  Who’d have thought that simple veggies could be compared to luxe ingredients like top quality cold-water prawns and Albacore tuna and still come out on top?  The fact is they can and they do, and for this reason, when it comes to our favourite Pizza Peppers, vegetarian wins hands down.

To be fair, both versions of these Pizza Peppers are equally delicious. Accordingly, I’ve posted both recipes so you can decide which gets your vote. This maybe pizza ‘reinvented’ but it still ticks all my boxes - healthy, tasty, fun, fast-food - in short, everything that’s good about pizza but without the downside of grains. Just grab a bottle of Chianti and your lover or a friend to fully appreciate this Primal Pronto Italiano-style supper that’s made for sharing. Buon appetito!


Pizza Peppers (Serves 3)

Ingredients - for pizza peppers with tuna and prawns

6 medium/large even-sized ‘pointy’ Ramiro/Romano organic red peppers (wider and fatter is better than longer and very thin!)

1½ 140g tins sustainably-sourced tuna (Waitrose, Marks & Spencer and Sainsbury’s are your best bet)

3 tbsp organic tomato puree (or organic low-sugar tomato ketchup)

90g mature vegetarian Cheddar cheese

¾ tsp organic chilli flakes

6 black (Kalamata) olives, stoned and cut into slivers

30g nonpareille capers, rinsed in cold water, drained and dried on kitchen paper

3 organic spring onions, finely chopped

3 medium-sized organic tomatoes, finely chopped

3 tbsp fresh parsley, finely chopped

sea salt and freshly ground black pepper, to taste

225g sustainably sourced frozen peeled prawnsnot defrosted

60g vegetarian ‘parmesan-style’ cheese (I use Gran Moravia)


Instructions - for pizza peppers with tuna and prawns

Pre-heat a grill to its highest setting. Line a large flat baking sheet or the grill pan with a non-stick baking mat or non-stick aluminium foil.

Cut the peppers in half lengthways, then remove the seeds and any white stringy bits (I don’t bother to remove the stalks). 

Place the pepper halves cut side down - skin side up - on the baking tray and grill fairly close to the heat source for about 4-5 minutes, or until their skins start to blister and slightly blacken. 

Remove from the grill, allow to cool for a couple of minutes then turn them over (be very careful when you do, the steam trapped underneath can still scald!)

Drain the tuna fish then place in a medium-sized bowl with the tomato puree/ketchup, mix together well, breaking the tuna up with a fork.

Add the Cheddar cheese, chilli flakes, olives, capers, spring onions, tomatoes, two tablespoons of the parsley and continue to mix with a fork until well combined. Taste and add a little sea salt and black pepper if you think it needs it.

With the help of two teaspoons, divide the mixture between the peppers spreading it out evenly along the length of each pepper half.

Top each pepper half with 4 or 5 ‘still-frozen' prawns. Sprinkle the parmesan-style cheese over the prawns, dividing it equally between them.

Place under the hot grill - fairly close to the heat source - for 3-4 minutes or until heated through and the cheese has melted into a crispy, golden-brown crust.

Transfer 4 pepper halves per person to individual hot plates, scatter over the remaining tablespoon of chopped parsley and serve immediately with a lightly dressed salad of rocket leaves. 

Pizza Peppers with tuna and prawns ready for the grill

Pizza Peppers with tuna and prawns ready for the grill


Ingredients - for pizza peppers with artichokes and mozzarella (V)

6 medium/large even-sized ‘pointy’ Ramiro/Romano organic red peppers (wider and fatter is better than longer and too thin!)

9 artichoke hearts preserved in olive oil (about 90g), drained and chopped (I used Frutti Bosco Artichoke Hearts)

3 tbsp organic tomato puree (or organic low-sugar tomato ketchup)

90g organic vegetarian Cheddar cheese

6 Kalamata olives, stoned and cut lengthways into slivers

30g nonpareille capers, rinsed in cold water, drained and dried on kitchen paper

3 organic spring onions, finely chopped

3 medium-sized organic tomatoes, finely chopped

125g ball vegetarian mozzarella, drained, dried on kitchen paper and cut into smallish cubes

45g organic pine nuts, lightly toasted

60g vegetarian ‘parmesan-style’ cheese (I use Gran Moravia)

Handful of fresh basil leaves, finely shredded - to serve


Instructionsfor artichoke and mozzarella pizza pepper topping (V)

Pre-heat a grill to its highest setting. Line a large flat baking sheet or the grill pan with a non-stick baking mat or non-stick aluminium foil.

Cut the peppers in half lengthways, then remove the seeds and any white stringy bits. 

Place the pepper halves cut side down - skin side up - on the baking tray and grill fairly close to the heat source for about 4-5 minutes, or until their skins start to blister and slightly blacken. 

Remove from the grill, allow to cool for a couple of minutes then turn them over (be very careful when you do, the steam trapped underneath can still scald!)

Place the artichoke hearts with the tomato paste/ketchup into a medium-sized bowl. Mix together well with a fork.

Add the Cheddar cheese, olives, capers, spring onions, tomatoes and continue to mix with a fork until well combined. Taste and add a little sea salt and freshly ground black pepper if you think it needs it.

With the help of two teaspoons, divide the mixture between the peppers spreading it out evenly along the length of each pepper half.

Top each pepper half with 4-5 cubes of mozzarella. Divide the pine nuts equally between the peppers halves then finally sprinkle over the parmesan-style cheese. Make sure the pine nuts and parmesan-style cheese are divided equally between the peppers and that the final sprinkling of cheese is applied evenly - this cheese topping helps give the pine nuts a little protection from the intense heat of the grill so they’re less likely to burn.

Place under the hot grill - fairly close to the heat source - for about 2 minutes or until the mozzarella cheese is meltingly soft and the pine nuts lightly browned. 

Transfer 4 pepper halves per person to individual hot plates, scatter over the shredded basil leaves and serve immediately with a lightly dressed salad of rocket leaves. 


Notes

Be especially vigilant with the vegetarian pizza peppers during their final grilling - if you leave them too long under the grill the pine nuts can easily burn and the mozzarella starts to release liquid.  

Pizza Peppers are most manageable when they’re being made for ‘dinner a deux'. Insufficient grill space makes it tricky for me to attempt making Pizza Peppers for more than three of us because a) my grill pan isn’t large enough to hold more than 12 halves of peppers and b) too many filled peppers under the grill create steam, which makes for a soggy result rather than a crisp and crozzled pizza-style topping. 

The recipes I’ve posted feed three people (the number I usually cook for) but are easily converted to feed one, two or (if grill space allows) four people. 


Carbohydrate 20g Protein 45g - per serving = 4 pepper halves topped with tuna & prawns

Carbohydrate 25g Protein 29g - per serving = 4 pepper halves topped with artichokes, mozzarella & pine nuts

Vegetarian Pizza Peppers with artichoke and mozzarella

Vegetarian Pizza Peppers with artichoke and mozzarella


Primal No-Oats Porridge

by Susan Smith in ,


As we’re still in the midst of National Breakfast Week, what could hit the spot more on a cold winter’s morning than porridge? 

Whenever I tell people about my Primal diet, often the first question it raises is “What do you do about breakfast?”. People, listen-up! If you think dissing grains means no more cereal-style breakfasts, this Primal No-Oats Porridge is simply going to blow you away. It’s amazing! It looks like porridge, it tastes like porridge and its porridge-like texture (sorry Sarah!) is so authentically ‘porridge’ you might even doubt its healthy credentials. A quick check of the ingredients should reassure you. 

Although there are no high-carb oats in this porridge, it is still relatively high in carbohydrates when you include banana in the recipe. I love the addition of banana - after all, porridge is renowned for being comfort food - but you may prefer to leave it out if you’re trying to lose weight by restricting your carbohydrate intake to 50-100 grams per day and you’re a three-meals-a-day kind of person. 

Personally, I’m not. I only have two meals a day with maybe an occasional snack of nuts, cheese or a little fresh fruit in-between. Anyway, I find this breakfast so satisfying and sustaining that I really don’t need to eat anything else until my second (and last) meal of the day, which I always try to eat late afternoon and definitely before 6pm in line with my body’s circadian rhythms. Eating my breakfast late morning (around 11:30am) and my main meal of the day late afternoon (around 5pm) generally leaves me feeling contentedly full without ever feeling fat. I should add that after our evening meal, come rain or shine, we also do a brisk 2.5 mile walk every day! 

If you still think a 37 grams of carbohydrate ‘hit’ seems excessive for one meal, leave the banana out of the equation altogether and top your porridge with a handful of fresh berries instead. Also, a sprinkling of sesame, sunflower or pumpkin seeds, chopped walnuts or toasted coconut chips would be good to ring the changes. I haven’t tried it yet, but since I love toasted coconut flakes I might just have to knock up some porridge made with coconut milk! There’s lots of opportunity to get creative here! 

Apart from the 15 minute wait for the chia seeds to ‘gel-up’, Primal No-Oats Porridge is a really quick and easy Primal Pronto breakfast to prepare. Whether you like your porridge fruity, nutty or basically pure, sweet and creamy, it’s now a healthy, no-grain option that’s definitely back on our breakfast menu. Enjoy!  

Primal porridge primal breakfast recipes.jpg

Primal No-Oats Porridge (Serves 1)

Ingredients

1 tbsp organic white chia seeds + 3 tbsp filtered water

1 tbsp Sukrin organic almond flour

1 tbsp organic ground almonds

1 tbsp organic tiger nut flour

1 tbsp organic cold-milled golden flaxseed

Small pinch of sea salt

170ml organic almond milk, preferably homemade (or organic raw cow’s milk)

½ large or 1 small organic banana, sliced (I like to cut mine on the slant) - optional

1 tsp pure vanilla extract 

Sukrin Gold (or organic pure maple syrup / organic raw ‘runny’ honey) - to serve

A little extra milk or cream - to serve


Instructions

Mix the chia seeds with the filtered water and set aside in a refrigerator for 15 minutes.

Place the almond flour, ground almonds, tiger nut flour, flaxseed, vanilla extract and sea salt into a medium saucepan with the almond milk.

Bring to the boil over a medium heat, whisking continuously until the mixture thickens.

Take the pan off the heat and gradually whisk-in the chia seed mixture, then the sliced banana (if using).

Re-heat the porridge over a moderate heat whilst stirring for 2-3 minutes more - until the banana slices soften and the porridge is really hot - and then turn into a warm serving bowl. 

Sweeten to taste with Sukrin Gold, organic maple syrup or raw honey, add a splash of creamy milk (either nut milk or full-fat raw organic cow’s milk/cream) and/or decorate with nuts, seeds or fresh fruit (e.g. fresh berries, slices of kiwi, fruit puree etc.). 


Carbohydrate 14g Protein 9g - per serving (without banana, sweetened with Sukrin Gold)

Carbohydrate 37g Protein 10g - per serving (made with banana)

N.B. Please allow extra carbs if serving with other fresh fruits, honey or maple syrup. 


Low-Carb Breakfast Buns

by Susan Smith in , ,


I couldn’t resist the challenge of coming up with something new for National Breakfast Week! Unbelievably, these delicious, light-textured, incredibly moreish, vegan, Low-Carb Breakfast Buns are dairy-free, gluten-free, grain-free, egg-free and refined sugar-free. No slight-of-hand ‘natural’ sweeteners are added to the mix either…even if you don’t have my fave zero-carb Sukrin Gold to hand (although I think you should!), just one single tablespoon of pure organic maple syrup will sweeten the whole job lot nicely!

These really healthy Breakfast Buns are so fast and easy to make that my man thinks I should add another category to Primal Plate…”Not so much Primal Pronto, more like Instant!” 

If you suffer from a nut allergy, you can substitute whole organic pumpkin seeds for the chopped walnuts. The buns still retain the same satisfying ‘crunch’ and with or without nuts both versions are equally as good.  

So good in fact that you don’t need to reserve them for breakfast. I’d be happy having mine at teatime too! Lovely served warm from the oven with a drizzle of maple syrup, you can almost feel these resistant-starch packed beauties doing you good! Definitely something worth getting out of bed for!

Low-Carb Breakfast Buns (Makes 12)

Ingredients

150g organic tiger nut flour 

25g Sukrin reduced-fat organic almond flour 

25g organic cold-milled golden flaxseed

2 tsp gluten free baking powder

40g organic walnuts, finely chopped (if you are allergic to nuts, use whole pumpkin seeds instead)

40g organic sunflower seeds

90g organic coconut oil, melted (or 6 tbsp organic cold-pressed tiger nut oil )

1 tbsp Sukrin Gold (or 1 tbsp organic pure maple syrup)

1 tbsp pure vanilla extract (I use Ndali)

225ml unsweetened almond milk, preferably homemade (or 225ml full-fat, raw, organic cow’s milk)


Instructions

Pre-heat the oven to 200℃ / 400℉ / Gas mark 6

Line a 12-hole bun tin with 12 paper bun cases

Weigh all the dry ingredients directly into a medium sized bowl and, using a fork, mix together well.

Add the maple syrup (if not used Sukrin Gold) and the oil and combine.

Pour in the milk and continue to mix with a fork until the mixture comes together into a thick batter-like consistency.

Spoon into the bun cases (you’ll need a smidgeon over 50g of batter per case) and bake in the pre-heated oven for 15-20 minutes, or until a cocktail stick inserted into the centre comes out clean.

Serve warm from the oven with a little maple syrup drizzled over, if liked. 


Carbohydrate 9g Protein 4g - per breakfast bun (made with maple syrup & cow’s milk)

Carbohydrate 7g Protein 3g - per breakfast bun (made with Sukrin Gold & almond milk)


Cream of Cauliflower Soup

by Susan Smith in , , ,


Back in the 1960s, for one brief year, I attended catering college. During our daily student briefings, prior to lunch service in the college’s public restaurant, I learned culinary French. For example, today’s recipe for Cream of Cauliflower Soup would have appeared on the restaurant menu as Crème Dubarry. 

It’s funny how half a century later the words ‘Crème Dubarry’ kept haunting me when, due to an oversight, I’d defrosted too much milk. A glut of defrosted milk taking up too much fridge space is not a good thing, so I knew I needed to conjure up a ‘cream of something’ soup and do it quickly. A foray into my second fridge (I have one solely dedicated to storing fresh fruit and vegetables!) revealed an organic cauliflower and a couple of leeks left over from last week’s food shop. Clearly my subconscious was trying to tell me something, because at this point cream of cauliflower soup was a foregone conclusion! And, since I really like the story of how cauliflower soup came to be known as Crème Dubarry, so was today’s blog post.

Madame du Barry was a very beautiful, highly desirable courtesan - a high-class prostitute to the men of the French court - before officially becoming King Louis XV’s last mistress. Later she lost her head during the French Revolution and was guillotined in December 1793. Cauliflower was first introduced to the French court during Louis XV reign and having tasted it boiled in stock, flavoured with nutmeg and served with melted butter, the king liked it so much that he dedicated it to his mistress Mme. du Barry. It is said that if she was ever served anything other than cauliflower soup for a starter, she would send it away and demand that it be replaced. Subsequently, cauliflower soup became known as Crème Madame du Barry and, given its origins, it is a veritable ‘upper-class’ soup, to say the least! 

Silky smooth, milky-sweet, almost nutty flavoured, this elegant soup is destined to become another Primal Pronto classic. For a special occasion it can be garnished with sautéed wild mushrooms, pan-fried king prawns or a poached egg, but for a family meal it really is a lovely, luxurious soup that’s best kept simple with a drizzle of melted butter and a dusting of fresh nutmeg. Since it was this simple pairing of nutmeg and butter with cauliflower that so impressed King Louis XV and popularised it in France, I hope it will impress you too!

To make a meal of this soup you need something more that can hold its own against cauliflower’s potency and nuttiness. I thought Cheddar Muffins might do the trick, and they did. Spread with butter and still warm from the oven, Primal Plate’s cheesy, savoury muffins with their ‘crusty’ tops are a cross between a bread roll (they don’t fall to pieces when you spread cold butter on them) and a muffin. Just the thing if you’re on a low-carb diet and haven’t figured out how to satiate your appetite without a slab of bread with your soup. I’ll be posting the recipe soon!

Cream of Cauliflower Soup (Serves 6)

Ingredients

1 medium/large cauliflower, stalks discarded and florets broken into small pieces (about 450g prepared weight)

2-3 medium leeks, white part only, finely sliced (about 165g prepared weight)

20g butter

2 tbsp olive oil

600ml vegetable stock (made with freshly boiled filtered water and 2½ tsp organic Marigold Vegetable Bouillon powder)

500ml full-fat milk

1 bay leaf - optional

sea salt 

freshly ground white pepper

50g raw cashews

100ml double cream

a little melted butter, freshly grated nutmeg and single parsley leaves. to garnish


Instructions

Put the cauliflower florets and leeks into a large saucepan with the butter and the olive oil. 

Gently heat the contents of the pan, stirring the vegetables around in the melting butter and oil until they are evenly coated and they start to sizzle. 

Cover with a lid and sweat over a low heat for about 10 to 15 minutes, stirring from time to time. At the end of this cooking time, the vegetables should be softened but not browned.

Pour in the stock and bring to the boil, then pour in the milk and return gently to a boil. Turn down the heat, season to taste and simmer, uncovered, for 10 minutes.

Take the pan off the heat and add the cashews. Leave to stand for a further 10 minutes - the hot soup will help soften the raw cashews.

Add the cream (if using) then blend everything together in a food processor or blender. 

Pass the puréed soup through a fine metal sieve into a clean pan. Taste and adjust the seasoning if necessary.

When you’re ready to serve the soup, gently re-heat to just below boiling point, stirring occasionally. 

Ladle the hot soup into individual warmed bowls, then spoon or drizzle a little melted butter on top, dust with grated nutmeg and add a parsley leaf to each bowl. 


Notes

If preparing ahead, cool, cover and chill for up to a day.

Primarily a vegetarian, I am in a constant state of flux trying to achieve a balance between fulfilling my nutritional needs (organic, raw milk and cheese is an excellent source of Omega-3, calcium and protein) and pacifying my sensibility towards animals (the cruelty involved in the dairy industry per se breaks my heart). Gentle souls and vegans rejoice! I made a second batch of Cream Of Cauliflower Soup using just almond milk instead of cow’s milk and cream. And, because the flavour profiles of cauliflower and almonds have a natural affinity, it turns out that the finished soup was equally as creamy and delicious as when it was made with full-fat dairy milk and cream! 

However, this does necessitate making your own almond milk before making the soup. I do not recommend shop-bought almond milk that’s been industrially-processed and loaded with stabilisers, emuslifiers, thickeners and sugar! Meanwhile, for all cow’s milk naysayers, the environmental ravages of siphoning off water in California for their almond crops isn’t boding well for the planet either! I don’t pretend to have all the answers!

If you do eat dairy and are not up for making your own nut milk, please seek out the best quality cow’s milk you can buy. By the best, I mean milk that’s good for you, has been ethically produced and is environmentally-sustainable. At Primal Plate we don’t consider purchasing cheap milk from abused cows an option. The cheap, mass-produced, heat-treated (pasteurised) stuff found on supermarkets shelves is not a nutritious health-giving food, furthermore animal welfare is ignored and the environmental cost is too high. 

I buy my milk online from Gazegill Organics’s happy cows because there is simply is no substitute for clean, full-fat, organic, grass-fed, raw milk. The more expensive price you have to pay for real milk is worth every penny. It contains all it’s vital nutrients, tastes more rich and creamy and behaves differently to the watery substance that passes for milk in supermarket chiller cabinets. For months Sarah complained that her chocolate banana milk shakes (made with organic pasteurised milk purchased from a supermarket) didn’t come out nearly as thick and creamy as my Raw Chocolate Banana Milkshake. When I finally realised what was going on, I substituted some of my supply of raw milk for her pasteurised milk and…Voila! No more thin milkshakes! Remember, pasteurisation not only destroys harmful germs but kills off useful bacteria and a high percentage of vital nutrients too. It also makes the calcium contained in raw milk insoluble, so there’s little point in feeding it to your kids to build strong bones!

Then there’s the horrific reality of mass milk production - one of the most exploitative and cruellest industries in Britain today. Sad cows, housed en masse in concrete confinement feeding centres, fed an unnatural diet of corn, soy and other grains that their bodies aren’t designed to eat. Overfed, over-milked and kept alive on a chemical cocktail of hormones and antibiotics, they are pushed to their limits 24/7. When these poor animals are finally worn-out - literally milked-dry of their profit potential by humans - they are dispatched to the abattoir, where their vastly shortened, miserable lives end violently. I have to ask myself, who in hell wants to drink this stuff?

Meanwhile, the oldest, luckiest, milk-producing cow on Gazegilll Organics farm, where she has access to 16 acres all year round and a diet that's kept as natural as possible, is twenty-one years old already! How fabulous is that?  As consumers, we have a choice. Please do yourself and farm animals a favour. Only support dairy farmers that produce organic, grass-fed milk from cows that are treated with this much love and respect. Thank you.  

Carbohydrate 13g Protein 6g - per serving


Poached Pears with Butterscotch Sauce and Almond Shortcakes

by Susan Smith in , ,


Pear and almond is a classy coupling, which is elevated to even greater levels of sophistication when combined with the flavours of toffee and butterscotch. Today’s recipe for Poached Pears with Butterscotch Sauce and Almond Shortcakes is the perfect make-ahead dessert for an elegant dinner party. Right on cue, it made a fantastic finale to our New Year’s Eve dinner party celebrations last night. Hello there 2016!

Pears, butterscotch, shortcake biscuits…it all sounds gloriously indulgent and a bit Fatty Arbuckle doesn’t it? However, as with all Primal Plate recipes, this dessert remains true to the healthy premise of no grains and no added sugar. The joy of eating Primal is that once you’ve reached your target weight (easily achievable it you stick to no more than 50 to 100 grams of healthy carbs each day), occasional indulgences won’t make the blindest bit of difference. No more wodgy, podgy or painful sensations from eating the wrong food, nor the post Christmas angst of feeling fat. Brilliant! The trick is to keep moving (a daily 2-3 mile walk in the fresh air should do it) and to not wander across the 150 grams of healthy carbs per day limit, which still allows you plenty of scope for sweet treats. 

Real food, sustainability and kindliness to all living creatures and the environment is my inspiration for writing this Primal Plate food blog. I hope that in 2016 more people will appreciate the benefits of a low-carb, low sugar, no grain, primarily vegetarian diet so that not only can we renew our own health and vitality but also be kind and mindful enough to allow this beautiful world in which we live the same privilege and freedom.

Wishing everyone a peaceful, healthy and Happy New Year.

Vanilla Poached Pears with Butterscotch Sauce and Almond Shortcakes (Serves 4)

Ingredients - for the poached pears

300ml filtered water

125g Sukrin:1 granulated stevia sweetener

rind of ½ organic lemon

1 dsp pure vanilla extract (I used Ndali)

4 firm, ripe pears (I used Williams)

Bay leaves, to decorate - optional


Ingredients - for the butterscotch sauce

160ml coconut cream

6 Medjool dates

25g raw cashew nut butter

1 tbsp pure vanilla extract (I used Ndali)

1 dsp brandy - optional


Ingredients - for the almond shortcakes

100g organic butter

200g organic ground almonds

60g organic tiger nut flour

50g Sukrin Gold

50g organic flaked almonds, lightly toasted            

1 tsp baking powder                

½ tsp sea salt

1 dsp pure vanilla extract (I used Ndali)


Instructions - to make poached pears

First, check the dimensions of your saucepan to make sure that it is the right size for the pears to fit snugly inside.

Bring the water, Sukrin icing sugar, lemon peel and maple syrup up to the boil then reduce the heat under the pan to a very low simmer.

Peel the pears. Leave them whole with their stalks intact, immediately placing each one into the syrup - turning it to coat - before continuing with the rest. 

Cook the pears with the pan lid on for 20 to 30 minutes or until they’re soft to the point of a skewer or sharp knife. 

Take the pan off the heat and allow the pears to cool in the syrup. When cold, store covered in a refrigerator until needed.


Instructions - to make butterscotch sauce

Remove the stones from the dates and roughly chop. Place in a high powered blender with the remaining ingredients (in the order as listed in ‘ingredients’) and process until smooth.

Serve with poached pears and almond shortcakes

Can be stored in the fridge for up to a week.


Instructions - to make almond shortcakes

Pre heat the oven to 130℃ (fan) / 150℃ / 300℉ / Gas mark 2

Melt the butter in a small saucepan over a low heat. Allow to cool for a few minutes.

Meanwhile, in a large bowl combine ground almonds, tiger nut flour, Sukrin Gold, baking soda, sea salt and flaked almonds.

Using a fork, stir in the cooled melted butter and vanilla essence to bring everything loosely together - then roll up your sleeves and with your hands squash the mixture into a ball of dough - it is a bit sticky and crumbly but don't be worried, be determined! 

Tip the dough onto a large piece of non-stick baking parchment. Place a second piece of baking parchment on top then flatten the dough out a little bit with your hands. 

Use a rolling pin to roll the dough out to about 6 to 8mm (¼ to ½ inch thick). 

Use a 7.5 cm (3 inch) plain cutter to cut out the biscuits. Once you are only left with scraps from the cutouts, bring the pieces together to create a ball, then roll it out again to the same thickness and continue cutting the biscuits out.

Place the biscuits onto a lined baking sheet, about one inch apart. Bake for 35-40 minutes until golden.

Cool on the baking tray for 5 minutes, then transfer the biscuits to a wire rack to cool completely. 

These shortcake biscuits will keep for up to a week in an airtight container.


Notes

The poached pears will keep for up to 5 days in a covered container in the refrigerator.

I love the intense toffee flavour of the Butterscotch Sauce and, when chilled, it's the perfect consistency for piping around the pears. However, if you want a simpler presentation, it can also be formed into elegant looking quenelles (oval scoops of cream formed between two dessert spoons) and served alongside the pears. Alternatively, if you're okay with diluting the butterscotch flavour, thin the sauce down with a little milk, whipping cream or even water until a pouring consistency is achieved, then spoon over or around the pears.

A list of suppliers for Sukrin sweeteners and grain-free flours can be found on Sukrin’s Home page


Carbohydrate 20g Protein 1g - per serving of butterscotch sauce

Carbohydrate 15g Protein 0g - per pear

Carbohydrate 6g Protein 4g - per shortcake biscuit


Red Pepper Rolls with Goat’s Cheese

by Susan Smith in , ,


Make a statement with this bright red and green Christmas Day starter of Red Pepper Rolls With Goat’s Cheese that looks like Christmas on a plate! Tasty and nutrient dense, I think the red pepper rolls are a luxed-up vegetarian version of smoked salmon! Though brought together with a goat’s cheese filling, a fresh tomato vinaigrette, basil pesto and watercress, I suspect this fresh-tasting, light introduction to the main event will do you more good!

Packed with the great flavours of Provence, these delicious red pepper rolls seem to hark back to warmer days. But for now, open a bottle of chilled Champagne or a crisp, grassy, Marlborough Sauvignon to cut through the flavour of the goat’s cheese, and you have a fantastic festive beginning to your foodie celebrations. 

As with the rest of Primal Plate’s vegetarian Christmas day menu, most of the preparation for this dish can be done in advance of the big day. Then just before you sit down to eat, simply bring the different components together on pure white porcelain plates. Absolutely stunning to look at, this light and flavourful starter will still leave plenty of room for what is to follow.  

Red Pepper Rolls With Goat’s Cheese (serves 4)

Ingredients - for the pepper rolls 

4 red Romano peppers (the long, pointy ones!)

140g full-fat, soft, vegetarian goat’s cheese, without rind (I used Rosary Goat’s Milk Cheese)

2 tbsp extra virgin olive oil

1 tbsp chopped fresh chives

20g pine nuts, toasted

Freshly ground black pepper

1 tbsp Nonpareille capers, well rinsed - to garnish

Watercress sprigs, washed - to garnish

Whole fresh chives - to garnish


Ingredients - for the tomato vinaigrette

120g ripe tomatoes, chopped

2 tbsp red wine vinegar

2 tbsp low sugar tomato ketchup

1 tsp tomato paste

4 tbsp extra-virgin olive oil

sea salt and freshly ground pepper, to taste

1-2 drops liquid stevia (alternatively, ½ - 1 tsp maple syrup), to taste - optional


Ingredients - for the basil pesto

50g fresh basil leaves

25g vegetarian Parmesan-style cheese

25g pine nuts, very lightly toasted (in a dry frying pan over a low heat)

4-6 tbsp extra virgin olive oil (just enough to bind everything together into a thick, slushy sauce) 

1 small squeeze of fresh lemon juice - optional (but it helps the basil to keep its green colour)

sea salt and freshly ground black pepper, to taste


Instructions for the red peppers and cheese filling

Pre-heat a grill to High. Line a large flat baking sheet or the grill pan with a non-stick baking mat or non-stick aluminium foil.

Cut the peppers in half lengthways, then remove the stalk end, seeds and any white stringy bits. 

Place the pepper halves cut side down - skin side up - on the baking tray and grill fairly close to the heat source for about 6 minutes, or until their skins blister and start to blacken. 

Remove from the grill. Lay a sheet of cling-film over the top of the peppers and allow to cool completely.

Meanwhile, in a bowl mix the goat's cheese and olive oil together with a fork until softened. Add the chopped chives, pine kernels and season with pepper. Set aside.

Carefully peel the cold peppers and place skinned side down onto a large clean plate.

If you're working in advance, the peppers and cheese can now be covered and refrigerated until needed.

Instructions - to make the basil pesto 

The easiest way to make pesto is to process the basil, cheese, toasted pine nuts and 4 tablespoons of olive oil in a food processor or blender - or use a hand-held stick blender - until it comes together into a thick, smooth, fragrant, bright-green sauce (scraping down the sides of the bowl as required). 

Tip the mixture into a bowl, stir in an extra tablespoon or two of olive oil if you think more is needed to make an oozy consistency, then season the pesto to taste with salt and pepper, adding a small squeeze of lemon juice, if liked.

Alternatively, you can pound the ingredients together in a pestle and mortar, gradually adding the olive oil until it is the right consistency.

Cover and refrigerate until needed.


Instructions - to make the tomato vinaigrette

Blend all the ingredients in a small food processor or blender, or with a hand-held stick blender, for 30 seconds until fully amalgamated.

Strain through a fine sieve into a small bowl. Taste and adjust seasoning to taste, then cover and refrigerate until needed.


Instructions - to assemble the dish

When you’re ready to serve the pepper rolls, lay the peppers out onto a cutting board - trim off any straggly edges, if necessary. 

Fill with the goat’s cheese mixture - about 1 generous tablespoon per pepper half. Spread the mixture evenly along the length of the peppers, leaving about 5mm clearance around the edges. Roll each half up into a neat roll.

Arrange the pepper rolls on individual plates. Garnish with sprigs of fresh watercress and whole chives (see picture). Drizzle the tomato vinaigrette around the edges of the plates and add 3 to 4 small dollops of the basil pesto. Finally, randomly scatter a few of the capers over and around. 

Serve with aplomb! Wowzers!  You’ve surpassed yourself!


Notes

The pesto will keep 3-5 days in a sealed jar in a fridge - it’s best to cover its surface with a little more olive oil if storing for more than a couple of days.

The tomato vinaigrette will keep for 2-4 days, in a sealed jar in a fridge.