Spiedini - Two Ways

by Susan Smith in , , ,


Once you’re committed to a low-carb/high fat, Primal, predominantly vegetarian diet, the option of eating-out well often requires imagination, ingenuity and well-developed interpersonal skills! Whatever you do, don’t over-indulge at the bar before ordering your meal because you’re still ‘on-duty’ until you’ve successfully managed to cut through the swathe of waiting staffs’ confusion when you tell them that you don’t eat any grains, potato, meat, legumes, pulses or sugar! I can’t tell you how many times I’ve patiently explained that pasta counts as grain and it’s dried legumes e.g. chickpeas, lentils, beans - not fresh beans and peas - that are off limits. I’ll even re-jig the menu in advance so they can ask Chef if we can mix and match elements from several different dishes already listed to create just one meal that we can eat! That done, there are still numerous occasions when the bread basket appears, even after our in-depth discussion! 

Happily, there are three notable restaurant exceptions in our locale - namely, Hart’s, World Service and Piccolino - that without any fuss are still able to feed us ‘body and soul’. Thanks guys! In fact, the inspiration for this Primal Plate Valentine’s day main course of Spiedini (the Italian for ‘skewer’) is an almost copy-cat version of our favourite dish on Piccolino’s menu - skewered scallops, tuna and prawns. As with previous Primal Plate recipes, I felt compelled to conjure up a vegetarian equivalent and, as you can see in the photographs, swapping vegetables and Halloumi cheese for fish doesn’t compromise on its looks or yumminess. 

As this is a Valentine’s day celebration dinner for two, I’ve gone all fanciful and Italianesque when naming the recipes. After all, fish skewers or vegetarian skewers doesn’t do either justice, whilst Spiedini Di Pesce and Spiedini Vegetariani sound altogether more romantic and enticing…you can always trust the Italians on this score! 

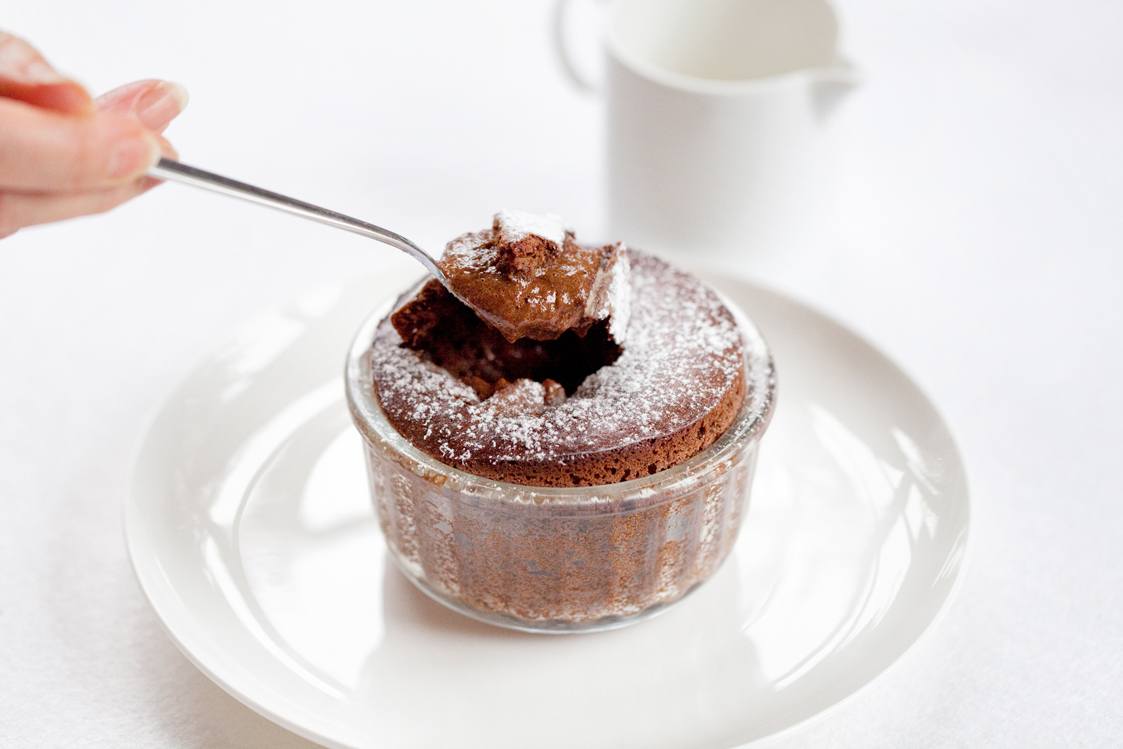
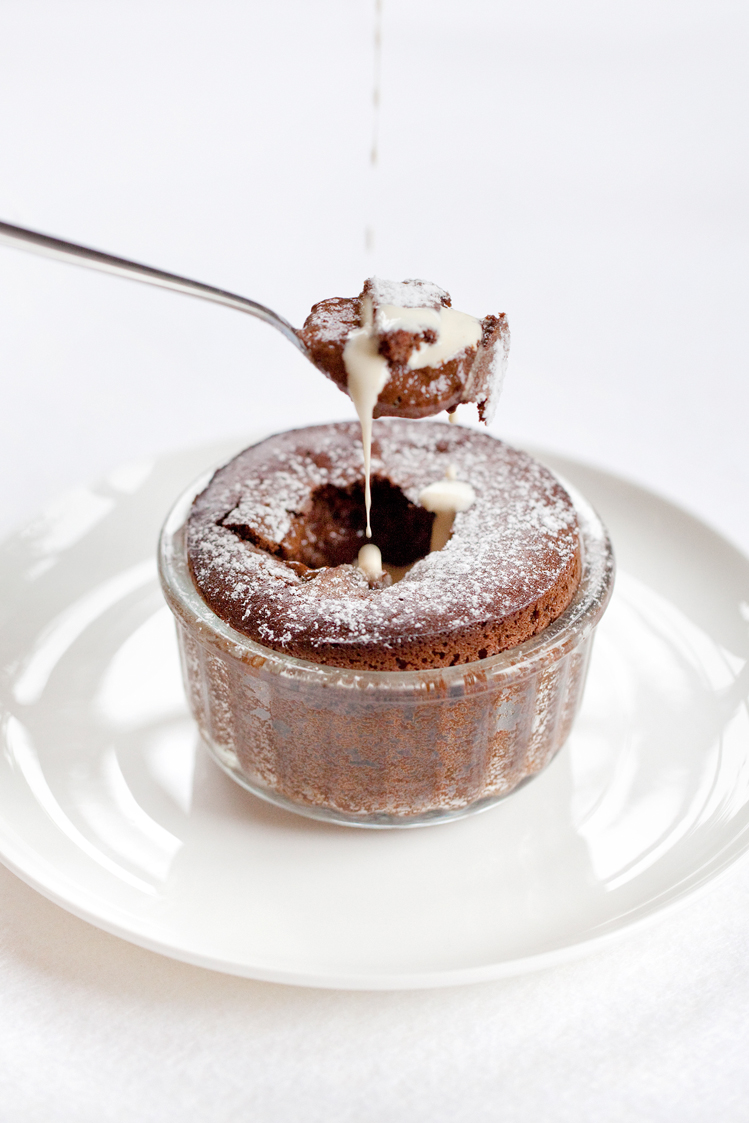
However, in case you’ve not already picked up on my last blog post, the pièce de résistance of this special occasion meal is dessert. I think Feeling Fruity Sweet-Hearts is probably my best creation on this blog to date! Not only does this bold, colourful, sassy dessert say “I love you”, it tastes absolutely divine. It's a sweet treat that takes no more than 30 minutes hands-on time in the kitchen - but looks like fine restaurant dining at its best. A stunning, creamy, dreamy, fruity pudding that offers up pure pleasure by the mouthful. Talk about swoon! 

And as if this wasn’t enough to make you feel truly cared for, can you believe that this healthy, low-carb, two course dinner à deux boasts no more than 40g carbohydrate per person with Spiedini Di Pesce and just 44g with Spiedini Vegetariani?

When all you need is love, this amazingly simple, seriously impressive food served with a decent bottle of wine (I think Champagne’s obligatory) makes for a romantic, not-so-sober evening at home that has all the potential for this year's Valentine celebration being one to remember.

Spiedini Di Pesce

Spiedini Di Pesce

Spiedini Di Pesce (Serves 2 - Makes 6 skewers)

Ingredients

325g thick lean fresh tuna steak (sustainably sourced, MSC certified)

6 king scallops (sustainably sourced, MSC certified)

6 large peeled prawns (sustainably sourced, MSC certified)

24 ripe cherry tomatoes on the vine

50g organic butter, melted

3 tbsp parsley, finely chopped

Juice of ½ large organic lemon

sea salt and freshly ground black pepper

Olive oil - for cooking

1 organic lemon, halved - to serve

Sprigs of flat-leaf parsley - to serve

Organic Romaine lettuce, finely shredded - to serve

6 bamboo skewers - soaked in cold water for 30 minutes

Raw, marinated Spiedini Di Pesce ready for cooking

Raw, marinated Spiedini Di Pesce ready for cooking

Spiedini Di Pesce is delicious served simply with crispy lettuce and a wedge of lemon

Spiedini Di Pesce is delicious served simply with crispy lettuce and a wedge of lemon

Instructions 

Cut the tuna steak in to 6 even-sized pieces.

Thread a tomato, a prawn, a tomato, a scallop, a tomato, a tuna chunk and finally a tomato (in that order) on to 6 skewers and place them on to a large flat plate.

Combine the melted butter, parsley and lemon juice together and season with sea salt and freshly ground black pepper. 

Liberally brush the Spiedini di Pesce with the butter mixture and set aside.

Pre-heat the oven to 220℃ / 425℉ / Gas mark 7

Line a large baking tray with non-stick foil or a silicon baking sheet. 

Lightly oil a griddle pan with olive oil and set it over a medium/high heat. When the pan is really hot - you should see a slight haze rising - place the spiedini in to the griddle pan, buttered side down. Cook over a high heat for about 1-2 minutes, without moving.

Whilst they’re cooking, brush more of the butter mixture over the top of the spiedini. Once the underside is starting to lightly char, gingerly lift the ends of the skewers up with your fingers and turn them over. Cook for another 1½ minutes or so, then frequently turn the skewers thereafter making sure the surface of the fish stays in contact with the griddle pan - gently press it down once or twice with the back of a flat spatula if it doesn’t seem to be cooking evenly.

The process of griddling the spiedini should take no longer than 5-6 minutes, by which time the pieces of fish will be attractively and lightly charred and the prawns just turning pink. N.B. At this stage, the fish doesn’t need to be cooked all the way through but it does need to have taken on some stripes of gold from the grooves in the pan. This will likely mean cooking the spiedini in two batches. An overcrowded pan causes food to release too much moisture and you don’t want the fish to end up steamed rather than griddled.

Transfer the griddled spiedini to the baking tray and place in the hot oven for a further 3 minutes until sizzling hot.

Arrange three Spiedini di Pesce on each of two serving plates lined with shredded lettuce and garnish with lemon halves and flat leaf parsley. 

Serve immediately. 


Carbohydrate 12g Protein 62g - per serving (3 skewers per person)


Spiedini Vegetariani (Serves 2 - Makes 6 skewers)

375g (1½ 250g packs) Halloumi cheese, cut into 18 pieces (approx 4cm x 4cm x 2.5cm each)

24 ripe cherry tomatoes on the vine

12 marinated baby artichoke hearts, drained

12 large fresh basil leaves

1 medium/large organic courgette, cut lengthways into 12 very thin slices (best done on a mandolin or with a vegetable peeler)

50g organic butter, melted

3 tbsp fresh mint, finely chopped

Juice of 1 lime

sea salt and freshly ground black pepper

Olive oil - for cooking

Organic Romaine lettuce, finely shredded - to serve

1 lime, halved - to serve

sprigs of bay leaf or mint leaves - to serve

6 bamboo skewers - soaked in cold water for 30 minutes

Raw, marinated Spiedini Vegetariani ready for cooking

Raw, marinated Spiedini Vegetariani ready for cooking

Instructions

Cut the halloumi in to 18 even-sized pieces.

Roll-up a single basil leaf and a baby artichoke heart inside each slice of courgette. Repeat until you've made 12 courgette and artichoke rolls.

Thread a tomato, a piece of halloumi, a tomato, a courgette/artichoke ‘roll’, a piece of halloumi, a tomato, a courgette/artichoke ‘roll’, a piece of halloumi and finally a tomato (in that order) on to 6 skewers and place them on to a large flat plate.

Combine the melted butter, mint and lime juice together and season with sea salt and freshly ground black pepper. 

Liberally brush the Spiedini Vegetariani with the butter mixture and set aside.

Pre-heat the oven to 220℃ / 425℉ / Gas mark 7

Line a large baking tray with non-stick foil or a silicon baking sheet. 

Lightly oil a griddle pan with olive oil and set it over a medium/high heat. When the pan is really hot - you should see a slight haze rising - place the spiedini in to the griddle pan, buttered side down. Cook over a high heat for about 1-2 minutes, without moving.

Whilst they’re cooking, brush more of the butter mixture over the top of the spiedini. Once the underside of the cheese is turning golden, gingerly lift the ends of the skewers up with your fingers and turn them over. Cook for a further minute or so then frequently turn the spiedini thereafter until all the pieces of halloumi are attractively and lightly charred and striped with gold from the grooves in the pan. N.B. This will likely mean cooking the spiedini in two batches. An overcrowded pan causes food to release too much moisture and you don’t want steamed spiedini instead of griddled! The total griddling time for each batch of skewers should not exceed 5-6 minutes.

Transfer the griddled spiedini to the baking tray and place in the hot oven for a further 3 minutes until sizzling hot.

Arrange three Spiedini Vegetariani on each of two serving plates lined with shredded lettuce and garnish with lime halves and sprigs of bay leaves or mint.

Serve immediately. 

Spiedini Vegetariani with crisp lettuce and a squeeze of lime

Spiedini Vegetariani with crisp lettuce and a squeeze of lime

Notes

Threading halloumi on to skewers can be quite a challenge because the cheese has a tendency to split. My man watched me get quite frustrated before suggesting that maybe he could literally drill a hole in the cheese first! I told him that this wasn’t something I could specify as part of a food recipe. Nevertheless, he proceeded to find a fine metal implement (actually the end of a very fine screwdriver - clean of course!) and gently rotated it back and forth into the centre of the cheese to ‘carve’ out a small hole, which actually meant it didn’t fall apart when I pushed the skewers through. I was gobsmacked! Needless to say, he’s voted himself for the job in future!

Furthermore, it does seem to matter what type of halloumi cheese you’re using. I found that Waitrose’s Hand Folded Halloumi With Mint performed best for taste, texture and skewering.

If the halloumi does fall off the skewers whilst griddling just carry on with the cooking process - they can easily be put back together on the plate and no-one will notice! 


Carbohydrate 16g Protein 47g - per serving (3 skewers per serving)


Christmas Baked Apples in Clementine Syrup

by Susan Smith in ,


Ta-dah! Here is Primal Plate’s festive finale to your Christmas lunch or dinner, which was Inspired by Michel Roux Junior’s great food demo at the BBC Good Food Show, November 2015. 

This recipe is my interpretation of Michel’s alternative Christmas dessert: Mincemeat Stuffed Apples served with Muscovado Ice Cream. Obviously, for people following a low-carb, Primal lifestyle, this meant I needed to replace the sugar-laden ice cream and traditional mincemeat with something much healthier. 

Nevertheless, Mr Roux and I were always on the same page - as referenced in my blog post dated 20th November 2015. Baked apples are a delicious, easy-to-make, classic, seasonal treat at this time of year, but when combined with the sweet spices of Christmas, it’s a ‘pud’ to die for! Better still, my baked apples are cooked in fresh clementine juice - orange juice would do just as well - which, when the apples are cooked, can be quickly made into a tangy syrup to accompany them. Served with cinnamon and nutmeg spiced Horchata Ice Cream, this is truly a marriage of festive flavours made in foodie heaven!

Quite sophisticated and not too sweet, these really yummy Christmas Baked Apples in Clementine Syrup are a much lighter option than traditional Christmas pudding. I hope you like them.

Merry Christmas everyone!

Christmas Baked Apples in Clementine Syrup

Ingredients

4 largish eating apples e.g. Cox’s, Braeburn or Granny Smith’s

180g-200g low-sugar mincemeat 

2 tsp Sukrin Gold

½ tsp cinnamon

40g unsalted butter, cut into eight pieces

Juice of 6 clementines (or 2 oranges)

Fresh bay leaves, to decorate

Instructions

Pre-heat the oven to 160℃ / 325℉ / Gas mark 3

Core the apples - sit the apples on a chopping board and push an apple corer into the centre of each one. Make sure each apple stands upright of its own volition and, if not, take a tiny sliver off the bottom to ensure it will! 

Using a small sharp knife, lightly score the apples around their circumference - this will stop them from bursting.

Stand the apples, side by side in an ovenproof dish. Using your fingers, push spoonfuls of the mincemeat tightly into each apple. Be generous - you’ll need between 40g to 50g mincemeat per apple - create a nice dome of mincemeat so it stands proud on top!

Push two wedges of butter into the mincemeat on top of each apple, then add ½ teaspoon of Sukrin Gold and a good pinch of ground cinnamon in-between the butter wedges. Pour the clementine (or orange) juice around the base of the apples.    

Place on the middle shelf of a pre-heated oven. Bake for 45 to 50 minutes until the apples are soft but not collapsed.

Remove from the oven and carefully place one apple on each of 4 serving plates.

Press the remaining juices through a small fine strainer into a saucepan and boil rapidly over a high heat until reduced down to a syrup (this shouldn’t take much more than a minute or so) 

Spoon the clementine/orange syrup over and around the apples, dividing it equally between them. Serve with a scoop of Horchata Ice Cream on the side and decorate with sprigs of bay leaves.  

Notes

If you haven’t any Horchata Ice Cream, these Christmas Baked Apples are still very good served with whipped cream flavoured with a little Sukrin icing sugar and Calvados brandy or simply a dollop of crème fraîche.  

It’s Christmas, so ’tis the season to be jolly. This means I’m not going to declare the carbohydrate count of this dessert! Suffice to say, whilst most fruit, especially dried fruits, contain a lot of natural fruit sugar, these stuffed apples have approximately 40% less carbs than a portion of luxury Christmas pudding. If you’re worried (and I wouldn’t be since this is a celebration!) opt for a dollop of almost zero-carb luxury crème fraîche rather than the Horchata Ice Cream. Above all, enjoy!


Make Ahead Christmas Vegetables

by Susan Smith in ,


On Christmas Day this year I don’t intend spending more than an hour of ‘hands-on’ time in the kitchen. Nevertheless, I want it to be our most delicious Christmas ever and, as much as I can know, completely cruelty-free (oh my, the dairy industry is so tricky!) 

This means much of our vegetarian food celebration has to be planned-ahead and cooked-ahead. So far so good. Writing a food blog certainly helps focus the mind! The Horchata Ice Cream is already in the freezer and by this weekend the Cranberry Sauce, Mince Pies, Port Wine Gravy and today’s recipe for Spiced Red Cabbage will all be done. I then have four days left to pre-prepare the ingredients for the starter, make the Cheese Cocktail Biscuits and assemble the Parsnip, Cranberry and Chestnut Loaf. 

Which leaves me just about enough time to blog the starter of Red Pepper Rolls With Goat’s Cheese and the dessert of Mincemeat Stuffed Baked Apples before D-day (recipes coming soon). If you’re still with me, my Christmas cooking schedule is in the Notes section below!

Meanwhile let’s get cracking on the veg. Spiced Red Cabbage and Brussels Sprouts are classic Christmas fare (red and green at this time of year is good) and both are easy, make-ahead vegetables. 

Spiced Red Cabbage (Serves 6-8)

Spiced Red Cabbage is another easy-going Christmassy recipe that can be made in advance and reheated. Perfect! 

A mixed spice combination - typically, a mixture of allspice, cinnamon, nutmeg, mace, cloves, coriander and ginger - is generally used for sweet baking such as in cakes and biscuits. It’s the sweet warmth of these spices in autumnal-inspired baked goods that invite us to gear up to the prospect of winter, and are a timely reminder of Christmas recipes to come. 

In this savoury recipe, it’s all about the interplay between sweet and sour. A wonderful mix of slow-cooked cabbage’s slight mustardy-flavour combined with the sweet, warming notes of pungent spices, the fruitiness of apples with a touch of sweetness and the sour of vinegar. Get it right and spicy braised red cabbage is one heck of a useful side dish to complement the rest of your Christmas table.

Spicy Red Cabbage doesn’t take very long to prepare; then it can be left alone to do its ‘thing’ for 1½ hours of gentle cooking. It also keeps warm without spoiling. 

This recipe actually improves with age, so it’s almost better to make it now and freeze for later. Alternatively, make it a couple of days before Christmas and store in the refrigerator. 


Ingredients

I small red cabbage (about 750g)

1 red onion, finely chopped

2 medium Bramley apples (or use Cox’s or Granny Smith’s)

zest 1 organic orange

1 tsp mixed spice

40g Sukrin Gold

sea salt and freshly ground black pepper

2 tbsp raw cider vinegar

150ml pure, no added sugar apple juice or still dry cider (I used Coldpress Granny Smith Apple Juice)

25g butter

Orange rind (without the white pith), cut into very fine strips - optional


Instructions

Peel the outer leaves from the cabbage and discard. Cut the cabbage into quarters and remove the core. Slice thinly into shreds (I used a mandolin)

Finely chop the onion. Using a fine grater, remove the zest from the orange. Peel, core and chop the apples. 

Arrange a layer of cabbage on the bottom of a large deep pan. Add a layer of onion, apple, orange zest, mixed spice, Sukrin Gold, sea salt and black pepper. Continue layering the ingredients in this way until they are all used up.

Finally, pour over the vinegar and apple juice (or cider) and dot with the butter. 

Bring to the boil, then turn the heat down to very low, cover with a tight fitting lid and allow to gently simmer for 90 minutes until tender. 

Brussels Sprouts

I’ve never had a problem with Brussels sprouts. In fact the opposite is true. When they’re In season (October through to March), I actually crave them and can happily scoff up to a dozen in one sitting. In fact, I don’t even bother weighing out Brussels sprouts in the supermarket. I simply count how many people are joining me for dinner and for each of them select 10-12 of the smallest, tightest, firmest, fresh-green sprouts I can find - though it can sometimes take ages to locate the perfect ones! If it turns out that there aren’t enough that measure up, I’ll just put them all back and choose a different vegetable for dinner! However, when they’re perfectly formed, these bright green, marble-sized globes of goodness, cooked to retain a bit of ‘bite’ and liberally doused in melted butter (sprouts love butter!) and freshly ground black pepper, are the quintessential Christmas vegetable. 

Surely the reason that beautiful Brussels sprouts have been so reviled is because many people were forced to eat stinky, soggy, bitter-tasting, ‘overblown’ sprouts as children. But there is a way to turn these mini ‘cabbages’ into desirable vegetables…don’t overcook them! 

Cooked quickly and al denté (still slightly firm to bite into), Brussels sprouts hold on to their healthy, green credentials. Overcooked, they’re really quite unpleasant - soggy, smelly and khaki-yellow - with a taste reminiscent of rotten eggs! 

Let’s not go there. My way of cooking Brussels sprouts without tears is:

  • Choose small, compact, ones - no bigger than an inch across and all the same size.
  • Take off the outer leaves (only if they’re damaged or discoloured) and trim the stalk ends. To ensure fast, even cooking, use a small sharp knife to cut a small shallow cross in the stalk end - some say it’s not necessary, but I always do!
  • Bring a large pan of salted water to the boil. Steam or boil the Brussels for 5 to 10 minutes - or perhaps only 4 minutes if they’re very tiny - with the pan lid on. After 5 minutes, check their progress by inserting the point of a small sharp knife into one of the Brussels (or just eat one if you think it’s cooked!). If they’re still too hard, you’ll need to keep checking them every 1-2 minutes until they’re done. Whatever you do, do not allow them to overcook
  • Brussels sprouts are cooked properly when they’re still bright green, have a little bit of resistance when you insert the tip of a sharp knife into them but can still be easily cut through without falling apart. If you’re taste-testing one, it should feel firm between your teeth when you first bite into it, but hot all the way through, and fully tender. If in doubt, they’re better slightly undercooked!
  • If you’re eating them straight away: drain well, then tip them into a warm serving dish with a generous knob of butter and a good grinding of fresh black pepper. 
  • If you’re preparing them in advance of your meal: drain the cooked Brussels then immediately plunge them into ice cold water to stop the cooking process (or continuously run cold water directly from the tap over them until they’re cold). This will set their bright green colour. When cold, drain well, cover with cling film and set aside.
  • To re-heat: put a large knob of butter and 2 tablespoon of water info a large frying pan. Set the pan over a medium heat. As soon as the butter starts to melt and the water bubbles to a simmer, throw in the Brussels and spread out into a single layer. Stir, shake, or agitate the contents of the pan for a couple of minutes until the water has evaporated and the Brussels are heated through and glazed in butter. Do not overcook! Season with freshly ground black pepper and serve immediately.

Bright Christmas green, fresh-tasting and good for you - what could you possibly not love?

Notes

The Spiced Red Cabbage can be stored in a refrigerator for 2-3 days or in the freezer for up to 1 month, then gently re-heated in a pan or microwaved. 

There’s a sort of rule for prettying-up a finished dish…if it’s gone in it, it should go on it! So if you want to ‘fancy-pants’ up the presentation of your Spiced Red Cabbage, use a vegetable peeler to remove long strips of orange peel from half an organic orange, then cut into very fine slivers with a small sharp paring knife and blanch in a pan of boiling water for 30 seconds. Refresh in cold water, then drain and dry on paper kitchen roll before arranging on top. Nice, but not necessary.    

Brussels sprouts stay fresher for longer if you buy them on the ‘wand’ they grow on, although you’ll only get very small ones at the top (you want small because they taste sweeter than their big brothers!)

Steaming is the easiest method of cooking Brussels sprouts because when you’re regularly having to check their degree of ‘doneness’ you don’t want to be chasing one around a pan of boiling hot water trying to stab it with a fork i.e. they’re safely and conveniently sat in the top of a steamer and easily accessible! 

Christmas is one of the rare occasions when I might use my microwave to re-heat vegetables because there’s not enough room on the hob. Prepare the Brussels in advance as directed above (cooking, blanching, draining) then tip the Brussels directly into a microwave-proof serving dish. Dot with butter, season with black pepper then cover with cling film. Don’t chill, they’ll be perfectly okay for a couple of hours at room temperature. When you’re ready to serve them, pierce the cling film covering the sprouts a couple of times to allow steam to escape, then microwave on High for about 45 - 60 seconds until piping hot. Be careful not to overcook them or burn yourself when removing the cling film - also don’t put one straight into your mouth to test! Instead, cut one of the Brussels sprouts in half on a chopping board to make sure they’re heated all the way through. If they need a little extra time, continue microwaving in 10 second cycles until really hot. 

My Christmas 2015 cooking schedule looks like this:  

2 weeks before: 

Make Horchata Ice Cream and Spiced Red Cabbage - freeze.

1 week before: 

Make Mincemeat (for mince pies & stuffed apples) and Cranberry Orange Relish - refrigerate

3-5 days before: 

Make Port Wine Sauce, Cheese Cocktail Biscuits and Mince Pies - refrigerate the gravy, store the biscuits, freeze the mince pies - to be topped and cooked on Xmas day (if required)

2 days before:

Prepare (skin) the red peppers, toast the pine kernels, make the tomato vinaigrette and basil pesto - refrigerate

Prep the Brussels sprouts - store in a freezer bag in the fridge

Christmas Eve: 

Defrost the mince pies

Make the crumble-topping for the mince pies and bake (or leave until tomorrow?)

Make Parsnip Cranberry & Chestnut Loaf - refrigerate

Defrost red cabbage

Make celeriac puree

Christmas Day: 

Cook the nut loaf

Bring cranberry sauce back to room temperature

Cream the goat’s cheese and assemble red pepper rolls

Decorate the red pepper rolls immediately before serving

Re-heat the spiced cabbage

Re-heat celeriac puree

Re-heat the gravy

Cook the Brussels sprouts

Make the sage butter

Pretty-up the nut loaf - decorate with sage, parsley and cranberries

Core and stuff the apples and bake


Parsnip, Cranberry and Chestnut Loaf with Port Wine Sauce

by Susan Smith in , ,


In just three weeks time we’ll all be sitting down to (or feeling replete from) one of the most planned-for meals of the year; Christmas Day. I love it!  I especially love it now I’m fully committed to eating vegetarian. 

Notwithstanding that I’m not getting the goodwill vibe of the ritualistic killing of 10 million factory-farmed UK turkeys immediately before Christmas, I’m actually somewhat bewildered by people’s obsession with eating a traditional turkey dinner. If you’re not an experienced cook (and all the feedback I get tells me they’re few and far between) roast turkey has to be be one of the trickiest, most labour intensive, time consuming meals to get right. Then there’s the expense of putting a decent, organic, free-range turkey on the Christmas table (albeit, in my opinion, nothing less will do).

Putting my money where my mouth is, four years ago I blew almost an entire week’s housekeeping (£120) on a medium-sized (6kg) organic Kelly Bronze turkey for our celebration meal. To meet my self-imposed lunchtime deadline of 1pm, I set my morning alarm call for 7:30am so I could switch the oven on at 8:00am. A pre-prepared bird that size (firstly you have to stuff it and lubricate it up-to-the-nines, inside and out, in butter) takes 4.5 hours to cook, including five essential clock-watching interruptions of rather more pleasant social interactions, such as opening presents and drinking Champagne, if you want to be certain of a ‘tah-dah’ moment and gasps of appreciation when you present your perfectly roasted and dressed bird at the table. In retrospect, all the effort required now seems a bit passé and Bah Humbug for my taste! 

This year I will not be found up to my elbows in turkey early on Christmas morning, nor will I be on tenterhooks waiting for the kitchen buzzer to repeatedly call me to my basting duties. Instead, I will have pre-prepared for our delectation a leisurely, spectacular-looking, vegetarian lunch full of the flavours of Christmas, without the fuss. 

The star of the show, a Parsnip, Cranberry and Chestnut Loaf, isn’t altogether my idea. The original recipe for Parsnip, Cranberry and Chestnut Loaf first appeared in Good Food Vegetarian Christmas magazine, December 2009 and, as you can see, I’ve borrowed its presentation (sort of!). However, being a Primal-phile, my version had to be grain-free (no breadcrumbs allowed), refined sugar-free (found lurking in their cranberry sauce) and, for my taste, much more umami-savoury. Without the addition of the mature Cheddar that I’ve added to my recipe, the original seemed boringly bland. I believe that this is why many people eschew eating vegetarian, especially on special occasions, because all too often what you end up with is second-rate stodge - pastry, pasta, potato or rice and other grain-based dishes - that in their mundanity simply don’t sing-out ‘celebrate’, or entice you to eat them, even if you could. Which, being staunchly Primal I can’t - though sometimes I could kill for a decent roast potato!

In reality, vegetarians do not need to be short-changed. Even followers of the Primal/Paleo diet, who don’t eat grains or potatoes and, for compassionate reasons are reluctant to eat meat, can feast just as well, if not better than, their carnivore counterparts. This is how Primal Plate’s Christmas lunch is shaping up (although the starter and dessert may still yet be subject to further flights of fancy!): A red, green and white starter of Red Pepper Rolls with Goats Cheese, which looks like Christmas on a plate. Then, today’s amazing recipe for Parsnip, Cranberry and Chestnut Loaf with Port Wine Sauce, accompanied by Braised Red Cabbage, Creamed Celeriac and Baby Brussel Sprouts. Followed by cinnamon-laced Horchata Ice Cream with Stuffed Baked Apples in Clementine Syrup. Maybe, a platter of cheese with seasonal fruit and finally, coffee and mince pies. 

All this fabulous food with absolutely no added sugar, no grains, no legumes, no potato, no meat and, if everything goes according to my ‘get-ahead’ menu plan, definitely nothing to drive me into a cook’s frenzy on Christmas morning. In fact, I intend to spend less than an hour doing hands-on cooking on the day itself, and even that will largely involve primping the food so it looks its best on the plate! 

This should help to make Christmas everything it promises to be - a happy, food-filled celebration that everyone, including the cook, can enjoy. Almost every component of this lavish, rainbow-coloured, festive vegetarian feast can be made oven-ready and/or stashed in the fridge/freezer and ready-to-go by Christmas Eve and, in most instances, well before. By my reckoning, that means the most exacting thing I’ll have to do on Christmas day is core and stuff the apples through a Champagne-induced haze of alcohol! As much as I love cooking, not spending almost the entire day in the kitchen sounds like the best-ever Christmas to me!

Parsnip, Cranberry and Chestnut Loaf (Serves 8)

Ingredients

45g butter, plus a little extra for greasing

3 onions, finely chopped

15g pack sage, 8 leaves reserved, the rest finely chopped

180g pack cooked chestnuts

120g walnuts

100g ground almonds

1 tsp ground mace

100g good quality vegetarian Cheddar cheese, finely grated

2 eggs, beaten            

600g baby parsnips, trimmed, peeled and cut in half lengthways (or choose standard parsnips - long, thin ones if you can - peeled then halved lengthways) 

1 tbsp honey

sea salt and freshly ground black pepper

180g Low-Sugar Cranberry & Orange Relish

Fresh cranberries and flat leaf parsley - to decorate 


Instructions

Boil a kettle of water. Grease a 900g (2lb) loaf tin with some butter, line with a long strip of non-stick baking parchment to cover the bottom and the two ends of the tin.

Melt 15g butter in a non-stick pan, add the onions and gently cook with the lid on the pan for 10-15 mins over a medium low heat until very soft and just starting to turn golden. Stir in the chopped sage, cook for a further 1 minute, then tip into a large mixing bowl. 

Pulse the chestnuts in a food processor until chopped into small bits, then tip these into the bowl with the onions and repeat with the walnuts. Now add the ground almonds, cheese, mace, beaten eggs, 1½ tsp salt and a generous amount of freshly grated pepper and mix everything together well.

Pour the boiling water from the kettle into the bottom half of a steamer. Put the halved parsnips in the top of the steamer, put the lid on and steam for 3 minutes.

Tip the parsnips onto a clean dry tea towel and pat them dry. Line up the best looking halves of parsnip (you’ll need about 10 halves) and lay them widthways, cut side down, along the bottom of the loaf tin. You will need to alternate the parsnip halves ‘thick ends to thin’ and pack them tightly side-by-side, so they fit snugly in the base of the tin. N.B. If you’re using normal-sized parsnips, cut off lengths of parsnip from the thinner ends and fit across the base of your loaf tin in the same way. Keep going until you have enough parsnip halves to snugly line the base of the tin. 

Take the parsnip halves back out of the loaf tin and set aside. Chop all the leftover parsnip into small neat dice and mix into the nut mixture. 

Melt the remaining 15g of butter in a heavy based frying pan over a medium heat. When it starts to foam add the honey and the reserved parsnip halves laying them cut side down in the pan. Fry gently in the butter (on the cut side only) for about 5 minutes or until they are lightly browned - they should be just turning golden. Take off the heat and set aside to cool. 

Heat oven to 180℃ (160℃ fan) / 350℉ Gas mark 4

When the fried parsnip are cool enough to handle, fit them back into the loaf tin, as before (cut and browned side down). Top with ⅓ of the nut mixture – pack it down well and smooth the surface. 

Spread the cranberry and orange relish on top, leaving a small space around the edges. 

Top with the remaining nut mixture and pack down as before. Cover with tin foil. 

The loaf can be made up to 24 hrs ahead, then covered and chilled, before continuing. 

Bake in the pre-heated oven for 1 hour. Take the loaf out of the oven and remove the foil, then put back in the oven for a further 10 minutes. 

Remove from the oven and allow to stand for 10 minutes.

Meanwhile, melt the remaining 15g butter in a small frying pan and sizzle the reserved sage leaves for 1 minute. 

Loosen around the sides of the loaf with a round-bladed knife if you need to, then turn the loaf out onto a warm serving platter. Peel off the parchment paper. 

Brush the top of the loaf with the hot sage butter then decorate with cranberries, fried sage leaves and sprigs of flat-leaf parsley.  

Serve in slices with extra Cranberry Orange Relish and Port Wine Sauce.


Carbohydrate 30g Protein 12g - per portion

Port Wine Sauce (Serves 6)

Ingredients

2 tbsp olive oil

1 medium onion, finely chopped

600ml (1 pint) soft, fruity red wine (I used McGuigan Estate Merlot)

1 dsp Marigold organic vegetable bouillon powder

2 tsp arrowroot powder 

3 tbsp port wine

1 dsp sugar-free redcurrant jelly

sea salt and freshly ground black pepper

25g cold butter, cut into small pieces


Instructions

Heat the oil in a medium saucepan, add the onion, cover and fry over a low-medium heat for 10 minutes until it is tender but not browned. 

Stir in the bouillon powder and then pour in the wine, bring to the boil, and leave to simmer, without a lid, for about 15 to 20 minutes, or until it has halved in volume i.e. reduced to 300ml (½ pint). Take off the heat and strain through a sieve into a small clean saucepan

Put the arrowroot into a small bowl and mix to a paste with the port. Add a tablespoon of the hot wine mixture, stir, then quickly pour the slaked arrowroot into the saucepan with the rest of the wine mixture and stir briefly until it has thickened slightly (just below boiling point). 

Stir in the redcurrant jelly. Taste, then add salt and pepper, if necessary

You can make the sauce up to this point in advance. Either freeze and defrost overnight the day before you need it, or keep in the fridge until you want to serve.

Just before you want to serve the sauce, re-heat in a small saucepan to just below boiling point, then quickly whisk-in the cubes of cold butter to make it glossy.


Carbohydrate 5g Protein 0g - per portion


Chocolate Fondants

by Susan Smith in , ,


If you’ve ever watched Masterchef you’ll have seen contestant after contestant being warned by Messrs John Torode and Gregg Wallace how tricky it is to make perfect gooey-centred chocolate fondants. Some contestants go ahead anyway (let’s face it, by the time they’re being filmed, they’re already committed!) and get their timings just right so their fondants come out beautifully cooked on the outside and runny in the middle - but many don’t. Today's recipe is a sure-fire way to ensure that you can make chocolate fondants without any of the brouhaha, giving everyone the impression that you’re an absolute genius in the kitchen! (Psst! you can even make them 24 hours before you want to eat them)

Love chocolate? You’ll love these luxurious hot chocolate fondants. Better still, they’re not the ‘unhealthy' indulgence you might have pre-supposed. On the contrary, eaten in moderation, dark chocolate (at least 70% cocoa solids) is very good for you because it’s chock-full of phytonutrients (specifically cocoa flavanolds) that are scientifically proven to be beneficial for the heart, circulation and brain.

Still feeling some parental guilt about consuming chocolate? More information is available in this extensive blog post that fully explains chocolate’s effects on health, its potential benefits and downsides, and the effects of chemical components such as caffeine and theobromine. In summary, don’t gorge on chocolate, but it’s really more than okay to allow yourself to deeply appreciate its wickedly delicious allure.

As part of a Primal lifestyle, best quality dark chocolate does not make you fat. Typically, I eat 2 or 3 squares (up to 15 grams) every day with my morning Nespresso (a double-whammy for the senses which reminds me that life is really worth living) but at least one scientific study found that young people consuming 42.6g of chocolate a day had slimmer waists and lower BMIs than those eating less. 

Nice but not naughty after all, dark chocolate has finally achieved superfood status. I suggest you grab a spoon and get stuck in! 

Chocolate Fondants (Makes 4 large or 6 small fondants)

Ingredients

125g unsalted butter + extra for greasing 

3 whole large organic eggs 

2 organic egg yolks (in addition to the the eggs above)

25g raw organic ‘runny’ honey

8 drops organic liquid stevia 

125g dark chocolate - I used Callebaut Finest Satongo dark chocolate chips

25g tiger nut flour

Good quality chocolate bar, broken into squares (I used Michel Cluizel’s Maralumi dark chocolate bar)

Sukrin icing sugar, for dusting

Organic double or pouring cream, for serving


Instructions

Grease either 4 large or 6 small ramekin dishes.

Melt together the butter and chocolate in a bowl over a pan of hot (not boiling) water on the hob.

Whilst the chocolate/butter mixture is melting, whisk the eggs / egg yolks / honey and liquid stevia together for about 5 minutes until pale and very thick (it should hold its shape for a few seconds when a little of the mixture is flicked over the surface) - you really need an electric whisk for this. 

With a balloon whisk, whisk the tiger nut flour into the chocolate/butter mixture. 

Cool the chocolate mixture and then pour into the whisked egg mixture.

Using a metal spoon, fold gently to combine the two mixtures. 

Divide the mixture equally between the ramekins. 

Leave in the fridge for up to 24 hours before they are required.

Just before cooking, press a square of chocolate into the centre of each ramekin.

Cook for 12-15 minutes at 200℃ / 400℉ / Gas mark 6

Sprinkle with icing sugar and serve immediately.


Notes: 

These chocolate fondants are foolproof because you’re not relying on precise cooking times to ensure that the middle of the fondants are soft and runny - instead the melted chocolate squares create a yummy pool of hot chocolate at their centre. 

The mixture will carry on cooking in the ramekins, so eat immediately. 

Sukrin sweetener is produced via a natural fermentation process from the glucose naturally occurring in pears, melons and mushrooms. The powdered form of Sukrin I’ve used for dusting the chocolate fondants looks, tastes and behaves in exactly the same way as normal white icing sugar made from sugar beet/cane. And, I’m pleased to report, it has no bitter after taste. 


Carbohydrate 16g Protein 9g - per small chocolate fondant

Carbohydrate 25g Protein 14g - per large chocolate fondant


Sweet Potato Hash With Crispy Fried Eggs

by Susan Smith in , ,


If there was one word to describe my life right now it would be “overwhelming”. Nearly four months ago it seemed like a good idea to order a large quantity of new self-build furniture to grab a seventy-per-cent-off deal at Laura Ashley. In retrospect, an odd choice given that DIY is not our forte. Since delivery, half our bedroom space has been relinquished to twenty-two enormous and very intimidating boxes.

Now (subject to us finding a competent joiner!), they’re not going to be gathering dust for much longer. The re-vamp of our living/bedroom space, which has been overdue for the past ten years has finally begun and we, with all our clothes and personal possessions, have been displaced throughout the rest of the house whist the work is carried out. I hate the disruption, but at least the financial liability of a large, cold Edwardian property that’s a nightmare to heat and maintain is offset by having space! Perhaps we should have considered moving when my two daughters flew the nest, but the prospect of a new owner coming in and cutting down the trees and destroying the habitat of numerous squirrels and birds that have made our garden their home, prevents us. So given that we feel we have to stay, we're stuck with the ongoing commitment and upheaval of one costly home improvement after another.

With all the chaos going on around me, what I don’t have too much time for is cooking, food shopping and devising new recipes for this blog! Hence, for the next few weeks, I’ll be in the same boat as most people who prefer to eat ‘fast’ food. However, in my world, fast food can never mean processed, ready-made or take-aways. Simplicity is key to making healthy meals that are quick and easy to get to the table, which also means me relying heavily on my family’s co-operation and team work. My husband John is my brilliant commis chef that does most of the chopping and slicing, whilst Sarah is a dab-hand at making perfect fried eggs for this comforting Sweet Potato Hash With Crispy Fried Eggs. 

A delicious, nutritious, inexpensive meal that really works, it is one of my all-time favourites for an uncomplicated supper.

Sweet Potato Hash With Crispy Fried Eggs (V) (Serves 3)

Ingredients

750g organic sweet potatoes, cut into small (about 2cm) cubes

1 small organic Savoy cabbage, stem and stalks removed and thinly sliced

3 tbsp olive oil 

1 organic red onion, finely chopped

30g butter

1 dsp cumin seeds

Sea salt and freshly ground black pepper

6 organic medium eggs

Large handful of fresh parsley, finely chopped


Instructions

Boil a kettle of water. Put the boiling water into the bottom pan of a steamer and the sweet potato cubes in the top of the steamer.

Steam the sweet potato cubes with the pan lid on for about 10 minutes, until almost tender. Use a draining spoon to scoop the potato cubes out of the steamer into a large bowl. Season well with sea salt and black pepper and add the cumin seeds, being careful not to break the potato cubes up. Set aside. 

Add the cabbage to the steamer, put the lid back on and cook for 2 minutes until tender. Tip the cooked cabbage into a separate bowl. Season with a little sea salt and a good grinding of black pepper. 

Heat 1 tablespoon of olive oil in a large deep frying pan over a moderate heat and fry the onion for 3 minutes or until just softened. Turn the heat up to medium/high, add half the butter and the sweet potatoes and fry, stirring frequently, until the potatoes and onions start to caramelise and turn golden brown.

Add the cabbage and the rest of the butter to the sweet potato mixture and continue frying, stirring from time to time, whilst you simultaneously cook the eggs.

Take a second large frying pan and heat the remaining 2 tbsp of olive oil until the surface seems to slightly shimmer. Crack each egg into a small bowl or cup then carefully pour into the hot oil. After 1 minute reduce the heat to medium and continue to cook until underneath the whites of the eggs are crispy and golden.

While the yolks are still runny, use a fish slice to transfer the eggs to a plate lined with kitchen paper to drain off any excess oil. 

Pile the sweet potato hash on to three warmed plates and gently place two fried eggs on top of each. Season the eggs with a little sea salt and black pepper then scatter over the chopped parsley to serve. 


Notes:

Sweet potatoes are naturally sweet-tasting but their natural sugars are slowly released into the bloodstream, helping to ensure a balanced and regular source of energy, without the blood sugar spikes linked to fatigue and weight gain. 

If the eggs stick together in the frying pan, use a non-stick flat ended spatula to 'cut' and separate them. Do not try to dowse the egg yolks in hot oil - they should be cooked to perfection (soft and runny) if you leave the eggs alone in the frying pan until the edges of the whites are a lacey, crisp and golden.

Wear a bibbed apron to fry the eggs - they can spit and splutter in hot oil!


Carbohydrates 58g Protein 23g - per serving