Lemon Courgetti With Summer Vegetables & Tomato Salad

by Susan Smith in , ,


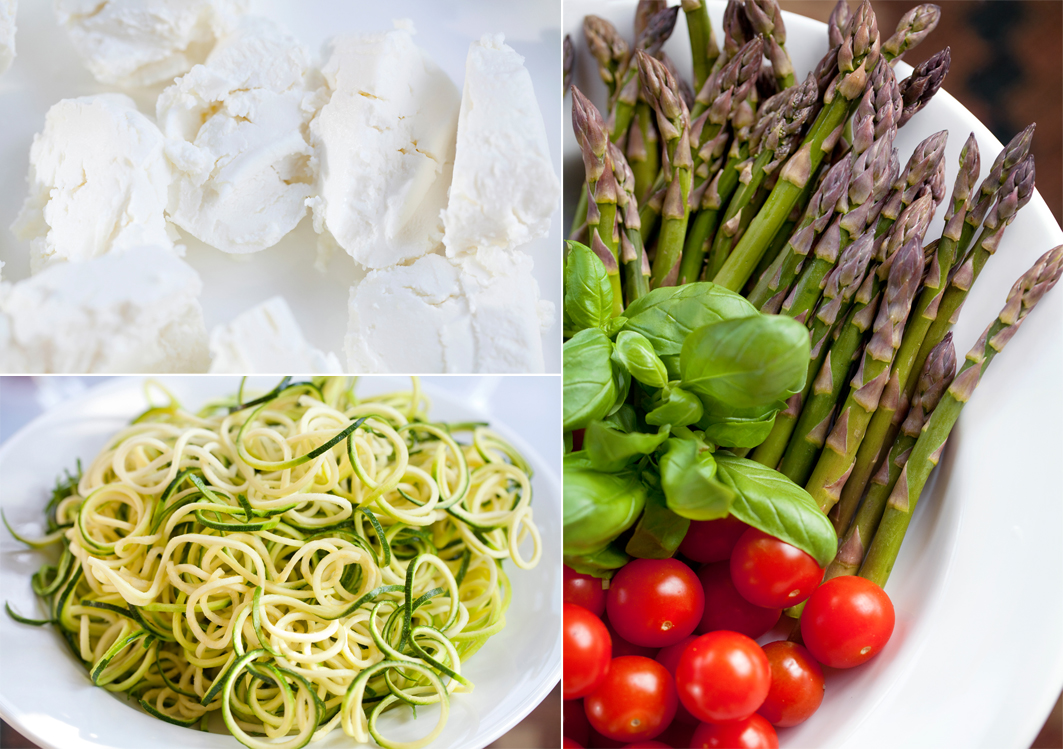
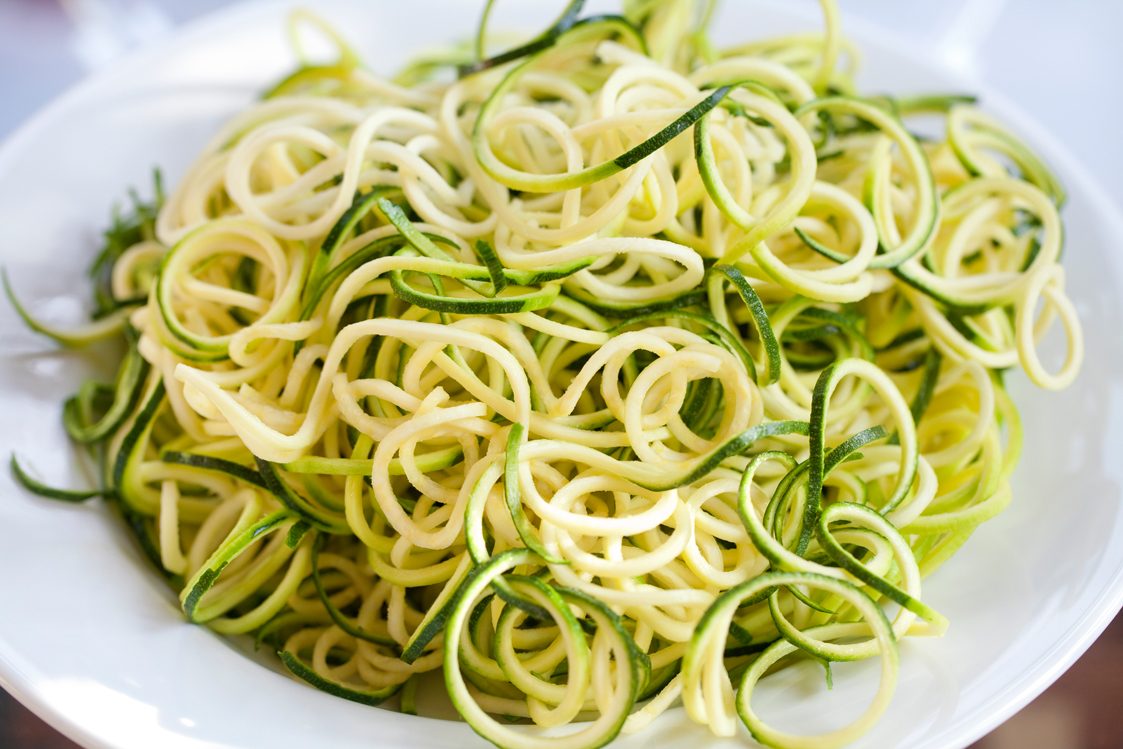
Celebrate summer, when it shows up, with an ‘Italian-style’ meal of healthy, seasonal deliciousness. The shops are filled with a cheap and plentiful supply of courgettes in July and August, so now is the time to make them into the brilliant, low-carb, pasta substitute popularly dubbed “courgetti”. This fresh, healthy and surprisingly substantial dish accompanied by a selection of the most vibrant of summer fruits - sweet tomatoes - is an amazingly flavourful way to enjoy a taste of Italy without the high-starch hit you get from eating regular pasta.  

My eldest daughter Elizabeth provided the inspiration for Primal Plate's tomato salad recipe. Last weekend she served up something very similar at an impromptu family BBQ and it tasted so fresh and looked so colourful that I was reminded how versatile a simply prepared and beautifully presented plate of tomatoes can be. This salad is a great way to lighten-up all manner of dishes, or perhaps to eat on its own with some fresh goat's cheese with grain-free bread to mop up the juices.

Quick, light and super-easy to make, this lovely combo is my idea of summer on a plate!

Ingredients - for the Lemon Courgetti with Summer Vegetables

300ml organic double cream

1 organic lemon, juice and finely grated zest

80g organic full-fat cream cheese

100g Parmesan-style cheese, finely grated

200g frozen peas

200g frozen baby broad beans

200g fresh asparagus tips

4 medium-large, firm, flat (not curved) chunky courgettes - size and shape matters!

small bunch of basil

sea salt and black pepper


Ingredients - for the Tomato Salad

600g ripe vine tomatoes - for interest and sheer good looks, choose from a selection of red or yellow cherry tomatoes, heirloom golden-orange, red and green vine tomatoes, baby plum tomatoes or the beautiful red and green Tigerella varieties

2 tbsp organic cold-pressed olive oil

2 tsp best-quality Balsmanic of Modena vinegar

sea salt and freshly ground black pepper

fresh basil leaves - to decorate

Instructions

Boil a kettle-full of fresh water. Pre-heat 4 individual pasta bowls.

Measure the frozen peas and broad beans into two separate heat-proof jugs or bowls. Pour the boiling water from the kettle equally over the peas and broad beans and allow to stand until they’re defrosted. 

Prepare the courgettes by washing them and spiralising into long thin spaghetti-like shreds - alternatively, this can be done with a knife by cutting them into long, thin strips.

Drain the defrosted peas through a sieve and tip them into a clean bowl. When the broad beans have cooled down, drain them too before popping them out of their tough outer skins between your finger and thumb straight into the bowl with the peas. 

Trim the bottom of the asparagus tips - it’s not necessary, but I also like to peel the bottom third of the stems with a potato peeler. Boil a second kettle of water.

Heat the cream with the lemon zest in a medium-large saucepan over a medium heat until it comes to the boil. Turn the heat down to simmer and continue cooking for 3 minutes. Cover and set aside.

Meanwhile, pour the boiling water into the bottom of a steamer, then put the asparagus tips into the steamer basket, cover and steam for just 1 minute. Remove the asparagus tips from the steamer with a slotted spoon into a bowl of cold water (or put into a sieve and run under the cold tap) to ‘set’ their bright green colour. Drain and dry on kitchen paper. Cut the asparagus into 3 centimetre pieces (or in half) and then add them to the bowl of peas and broad beans.

Reserve 4 sprigs of basil then strip the leaves off the rest of the basil stems and tear them into small pieces. Set aside.

Whisk the cream cheese, 80g of Parmesan and 30ml of lemon juice into the lemon infused cream and then over a medium heat bring the sauce back to just below boiling point. Taste, then season with sea salt and a good grinding of black pepper. Taste again and add a little more lemon juice if you think it needs it. 

Add the asparagus, broad beans and peas to the cream sauce and then over a low/medium heat, allow the vegetables to gently warm through - make sure the sauce gets nice and hot but don't let it boil.

Bring the water in the steamer back to the boil, add the courgetti to the steamer basket, cover and steam for just 1½ minutes - no longer. They need to cook just long enough to lose their raw-edge and get hot but not so long that they become limp and soggy. 

Immediately tip the courgetti out of the steamer basket onto a dry, clean tea-towel. Wrap them up in the tea towel to absorb as much water as possible.

Divide the drained courgetti equally between the 4 pre-heated serving dishes. Stir the torn basil leaves into the cream sauce and vegetables then ladle or spoon this on top of the courgetti - distributing the vegetables and sauce evenly. Sprinkle the rest of the grated Parmesan-style cheese over each serving and finish with a good grinding of black pepper and a sprig of fresh basil.

Serve immediately with tomato salad.   


Instructions - to make Tomato Salad

No need to peel or remove the seeds from the tomatoes. Wash and slice the larger tomatoes, removing the core at the stem end by cutting out a small ‘v’ at the centre of the bigger slices with the point of a small, sharp knife. Halve the cherry tomatoes.

Layer all the tomatoes attractively on a large platter. Lightly season with sea salt and then drizzle over the olive oil and balsamic vinegar. Add a grinding of freshly ground black pepper and decorate with green and/or purple basil leaves. 

Serve at room temperature for a simply delicious way to enjoy all the nutritional benefits of sweet, fragrant tomatoes. Yum!

Notes

If you prefer, you can substitute the frozen vegetables with 500 grams each of fresh peas and broad beans (weight before podding). Pod them, then cook in boiling water (or steam) for 3 minutes before draining well and adding to the cream sauce to keep warm. 


Carbohydrate 14g Protein 19g - per serving of lemon courgetti with summer vegetables

Carbohydrate 7g Protein 1g - per serving of tomato salad


Mushroom & Three-Cheese Pizza

by Susan Smith in , , ,


Last week, when Sukrin tweeted the idea of making pizza with their ‘just add water’ Chia & Hemp bread mix I couldn’t resist giving it a go! 

Notwithstanding that low-carb practitioners and the gluten intolerant are particularly susceptible to temptation, we all seem to get cravings for pizza. Unfortunately, I also know far too many other people who complain they’re fat and unwell but won’t give up eating grains (bread, pasta, rice and pizza) and doggedly refuse to cook for themselves at home. In a last ditch effort to convince them that not everything that looks stylish and tastes delicious is laboriously difficult to prepare and cook, this Mushroom & Three-Cheese Pizza recipe should be universally appealing! 

Though probably not strictly Primal or indeed ‘proper’ pizza - because I’ve deliberately left homemade tomato sauce out of the equation to save you the bother of making one! - it is nevertheless an extremely low-carb, satisfyingly healthy, cheesy pizza ‘fix’ that everyone can enjoy. We love it with a glass of Chianti or icy-cold Pinot Grigio.  

Mushroom & Three-Cheese Pizza (Serves 4)

Ingredients - for the base

210 g pack of Sukrin Chia & Hemp Mix

250 ml cold filtered water

1 dsp fresh rosemary leaves, finely chopped


Ingredients - for the topping

225 g organic chestnut mushrooms

30 g organic unsalted butter

sea salt 

freshly ground black pepper

2 dsp fresh rosemary leaves, finely chopped

120 g soft goat’s cheese, without rind (I used Sainsbury’s Taste The Difference Goats Cheese and removed its rind before dicing into small pieces)

125 g organic vegetarian mozzarella

50 g vegetarian Parmesan-style cheese (I used Gran Moravia)


Ingredients - to serve

40 g organic wild rocket 

8 large fresh basil leaves 

1 dsp organic, cold pressed, extra virgin olive oil

Balsamic vinegar of Modena - for drizzling

The part-cooked, grain-free pizza bases, topped with mushroom and cheese, before returning to the oven 

The part-cooked, grain-free pizza bases, topped with mushroom and cheese, before returning to the oven 

Instructions

Cut the base of the stems off the mushrooms and wipe them clean with a damp paper towel. Cut the mushrooms into thick slices.

Warm the butter in a large non-stick frying pan over medium-high heat. Add the mushrooms and cook, stirring occasionally, until tender and tinged golden-brown and the majority of the juices in the pan have evaporated (about 5 minutes). Take off the heat, season the mushrooms to taste with sea salt and freshly ground black pepper. Cover and set aside.    

Preheat an oven to 200℃ /  400°F / Gas mark 6.

Tip the Chia & Hemp mixture into a medium sized bowl and add the filtered water and the finely chopped rosemary. Stir everything together well with a fork and allow to stand for 3 minutes (as directed on the packet)

Form into 4 x 15 cm / 6” ‘mini’ pizzas. The best way to do this is to divide the bread mixture into 4 equal portions (weighing approximately 105 g - 110 g each) before placing each piece of dough in the centre of a 15 cm / 6” non-stick baking parchment circle (4 baking parchment circles in total).

Using a sheet of cling film placed on top of the dough to stop it from sticking to you or the rolling pin, flatten it down - first with the palm of your hand and then rolling out evenly - into a round pizza shape that just comes to the edges of the parchment circle. Lift or slide the pizza, still on its parchment paper, onto a baking tray.  Repeat to make 4 pizzas.

Bake in the pre-heated oven for 15 minutes.

Meanwhile, grate the Parmesan-style cheese and crumble or cut the goat's cheese into small pieces. Lastly, drain the mozzarella cheese, then coarsely grate it onto a plate lined with paper kitchen towel (this soaks up any milky liquid that may ooze from the cheese when it’s left to stand). If not using immediately, keep the prepared cheeses covered and refrigerated on 3 separate plates. 

After the pizza bases have had their first baking, remove from the oven. Whilst they're still sat on the baking tray, top the pizzas evenly with grated mozzarella, goat’s cheese and mushrooms. Don’t take the topping right to the edges of the pizza bases - leave a 1.5 cm gap all the way round to allow the cheese to melt and spread out in the heat of the oven without it running off the top of the pizzas. Sprinkle over the rest of the chopped rosemary and finally, add an even layer of Parmesan-style cheese divided equally between each pizza.

Put the baking tray back into the oven and bake the pizzas for a further 10-12 minutes until the cheese is meltingly hot and bubbly and the edges of the pizza tinged golden-brown. 

During this final cooking time, finely slice the basil leaves and mix them with the rocket. Dress lightly with olive oil. 

Remove the pizzas from the oven. Wait for 1-2 minutes then, with the aid of a flat spatula, carefully remove the pizzas from their paper circles. Put the pizzas onto 4 warmed serving plates. 

Pile equal quantities of the dressed rocket and basil leaves on top of each pizza and drizzle over a little real Modena balsamic vinegar before serving. 


Carbohydrate 5.5 g Protein 16g - per pizza


Tiramisu

by Susan Smith in , ,


Here’s a novel way to spoil your mum with anti-ageing skin care this Mother’s day - treat her to tiramisu! You are what you eat, and this skin-loving dessert is rich in Vitamin E and healthy oils that are sure to get her skin glowing from the inside!

A fantastic confection made with a light tiger nut and almond sponge cake layered with sweet-tasting macadamia nut cream and a rich coffee/chocolate flavoured ‘ganache’, this is tiramisu re-invented - without sugar, dairy or grains.  

Boasting a wealth of antioxidants, essential vitamins, minerals and healthy fats from the ‘darlings’ of the nutritionally-aware foodie brigade - avocados, coconut oil/milk, raw cacao, tree nuts, tiger nuts and a little raw, unpasteurised organic honey (because I simply couldn’t ignore the skin-enhancing benefits of honey!) - this isn’t just tiramisu, it’s superfood! An unrecognisably healthy retro dessert so choc-a-block with nutrients you won’t believe it’s not the luscious (though sadly off the carbohydrate richter-scale!), Italian classic.

Primal Plate’s ‘light as a feather’ Tiramisu is part of my stay slim and gorgeous action plan to make low-carbohydrate/high fat eating (LCHF) a way of life even when the occasion calls for some sweet-toothed indulgence. Not only is this impressive dessert relatively low in carbs, you are nourishing your skin from the inside out by eating Vitamin E packed tiger nuts, almonds, avocado and coconut oil. Vitamin E is widely used in the cosmetics industry to help slow down the ageing of the body cells, improve the elasticity of the skin and reduce skin wrinkles. 

Whilst I maintain that you should never put anything on to your skin that you’re not prepared to put in to your mouth, It’s good fun to turn this beauty maxim on its head with a deliciously decadent dessert that can help every woman channel her inner goddess. Ingenious…the perfect solution to having your cake and eating it! Happy Mother’s day girls!

Tiramisu (makes 4-6 servings)

Ingredients - for the sponge layer            

45g unsalted butter    

60g organic tiger nut flour 

40g organic ground almonds 

1 tbsp raw cacao powder

pinch of sea salt

3 large eggs                            

75g Sukrin:1                             


Ingredients - for the nut cream layer            

125g macadamia nuts, soaked overnight in cold filtered water

250g full-fat coconut milk

20g raw organic honey

4 drops organic liquid stevia

1tsp pure vanilla extract (I use sugar-free Ndali)

25g coconut oil                


Ingredients - for the coffee/chocolate ganache layer            

2 ripe medium avocados (approx 350g unpeeled weight)

20g raw organic cacao powder

50g raw organic honey                                     

10-12 drops organic liquid stevia                 

1 tsp pure vanilla extract (I use sugar-free Ndali)                        

80ml espresso-strength coffee        


Ingredients - to assemble the tiramisu            

100ml freshly brewed expresso-strength coffee                

40 ml malt whisky                    

30g Sukrin Gold               

raw cacao powder, sifted                    

Sukrin no-sugar milk chocolate


Instructions - to make the sponge

Pre-heat the oven to 180°C / 350℉ / Gas mark 4

Melt the butter gently and leave to cool slightly. Use a little of it to grease a 23cm x 30cm (9” x 12”) swiss roll tin, then line the base and sides of the tin with a single sheet of baking parchment (cut down into the corners so that the paper lies flat against the sides of the tin).

Sift the tiger nut flour, salt and cacao powder in to a medium sized bowl. Stir in the ground almonds and set aside. 

Put the eggs and Sukrin:1 in a large heatproof bowl that will sit snugly over the top of a saucepan. Pour boiling water into the saucepan and sit the bowl on top. The hot water must not actually touch the bowl. Set the pan over a low heat so that the water is barely simmering. The steam will help dissolve the Sukrin and the mixture to thicken slightly.

Using a hand-held electric beater set on High, whisk the eggs and Sukrin sweetener together for about 6-8 minutes, or until the mixture is very pale, thick and mousse-like and has at least tripled in volume. It should hold its shape for a few seconds when it’s flicked across the surface of the rest of the mix.

Add one-quarter of the sifted flour/ground almond mixture into the egg and Sukrin mixture and very lightly and gently fold it in with a large metal spoon. Repeat 3-4 times more with the remaining flour/ground almond mixture - folding it in gently each time. When all the flour/ground almonds have been incorporated into the mix, carefully pour in the melted butter and gently fold this in too. N.B. Don’t be in a rush to do this and try not to be too heavy-handed - the idea is to retain as much air as possible inside the mix whilst at the same time bring everything uniformly together. 

Quickly pour the mixture into the tin - tilting the tin this way and that until the cake mixture has levelled itself out evenly in to all four corners of the tin - then bake in the oven for 20-25 minutes, until golden brown and firm to the touch. 

Leave to cool in the tin for a few minutes and then turn it out on to a wire rack to cool completely.

Once cooled, peel off the parchment paper and slice the cake into fingers or squares for making tiramisu or trifle.


Instructions - to make the nut cream layer

Rinse the macadamia nuts in fresh water then blitz all the ingredients together to form a smooth cream. Place in the fridge to set.


Instructions - to make the coffee & chocolate ganache layer

Blitz all the ingredients together to form a rich, smooth, chocolatey cream.


Instructions - to assemble the tiramisu

Make a fresh batch of espresso strength coffee, add the whisky and liquid stevia and pour into a shallow dish.

Cut the cold sponge into suitable sized cubes or fingers (whatever best fits your serving dish).

Layer 1: very briefly (2-3 seconds!) dip the sponge pieces into the coffee mixture until you can see that the liquid has risen about half-way up the depth of the sponge and lay the pieces one at a time as you go into the base of your serving dish(es) (I used 2.5cm / 1” squares for the base layer in 4 x 225ml martini glass)

Layer 2: Spoon over the nut cream layer and spread out evenly

Layer 3: Add a second layer of coffee-soaked sponge

Layer 4: Spoon over a second layer of nut cream and spread out evenly

Layer 5: Spoon or pipe over the coffee & chocolate ganache and spread out evenly

Cover and chill for 1-2 hours in a refrigerator. Then, when you’re ready to serve the tiramisu...

Layer 6: Sift over a fine layer of raw cacao powder

Layer 7: Use a small spoon to carefully transfer a generous, even layer of Sukrin sugar-free milk chocolate (straight off the plate it was grated on to) directly on to the top of each tiramisu - don’t try to sprinkle over the grated chocolate with your fingers as it will melt instantly!


Notes

The best diet for weight loss and maintenance is one that you can easily stick to. A low-fat/low calorie diet requires Herculean willpower because food without fat doesn’t taste good and oftentimes you still feel hungry. The joy of a low-carb/high fat diet is that you don’t count calories and the food you can eat is deliciously satisfying. Nevertheless, Primal Plate desserts and other sweet treats are delights to be enjoyed occasionally, not every day. You can achieve steady, effortless weight loss by limiting carbohydrates to between 50 grams and 100 grams per day - unless you are morbidly obese, in which case you may need to kick-start your body into burning fat by eating less than 50 grams of carbohydrate per day and avoiding tiramisu for the time-being! You can keep a tally of your carb intake at MyFitnessPal. If you then cross the line from time to time (without exceeding 150 grams of carbohydrate) a long, brisk walk should sort things out!

There is enough sponge cake in this recipe to make 6 tiramisu (or to have leftovers). The rest of the ingredients will make 4 very generous servings (it’s deliberate!). If you’re cutting carbs, have a small appetite or just more mouths to feed, simply divide the recipe between 6 smaller (150ml) serving dishes.

All the individual components of this dish can be made separately in advance. The sponge-cake will keep for up to 3 days in an airtight container, and both the nut cream and coffee/chocolate ganache will keep for several days in the refrigerator. You can also assemble the tiramisu up to and including layer 5, twenty-four hours before you want to eat it - finishing with the final flourish of raw cacao and grated chocolate just before serving. 

Although organic liquid stevia is a zero-carb, natural alternative to sugar, it can leave a slight aftertaste. To minimise this and to not miss out on the skin-enhancing benefits of honey, I’ve used a combination of stevia and honey to sweeten both the nut and coffee/chocolate creams.

I do not like overly sweet food, so this sophisticated, not-too-sweet dessert with a touch of alcohol is definitely one for the grown-ups. However, it can easily be adapted for children (or tomorrow’s breakfast!) by substituting a small/medium sliced banana (per serving) for the coffee/whisky soaked sponge and layering it with the nut and coffee/chocolate creams in the same way as described above. You may also want to add a little extra honey to the coffee and chocolate cream to make it more child-friendly. 

The cake mixture rises just enough to make it nicely spongy without being too thick. Firm yet really light in texture, it’s just made for soaking up the boozy coffee in this recipe and for making trifle generally. Once cold, it’s easily cut into neat fingers or cubes (Sarah loves to eat these plain) and is a brilliant substitute for those nasty trifle sponge fingers you can buy in the shops. 


Carbohydrate 25g Protein 11g - per serving (6 people)

Carbohydrate 36g Protein 15g - per serving (4 people)


Courgetti with Cherry Tomatoes & Asparagus

by Susan Smith in ,


It’s taken nearly two months for me to get my Lurch Spirali out of its box! A quick mid-week peek inside my refrigerator was the inspiration. Apart from organic courgettes, cherry tomatoes, a couple of bunches of asparagus that were begging to be eaten, half a raw cauliflower, eggs and several different cheeses, there wasn’t much else to speak of that could be converted into a substantial meal for three. Since we’d already succumbed to staving off our appetites with salted nuts and a large glass of wine, I knew I had to get something on the table sooner rather than later.

Besides which, I thought that at least making vegetable ‘spaghetti’ might distract us from our hunger pangs. And It did. Not that Courgetti with Cherry Tomatoes & Asparagus took very long to make. In fact, I think it was on the table in less than thirty minutes in spite of there being minimal instructions in or on the box and, according to my husband, not much more information on the internet! 

Anyway, vegetable spaghetti, for the purposes of this recipe we call it courgetti, was fascinatingly simple and quick to make. We were all quite excited to see these long beautiful green pasta-type spirals falling effortlessly from this genius little gadget (kids, especially those who find vegetables unappealing, will just love it!). Plus, we think the result is even better to eat than conventional pasta - altogether tastier, healthier and lighter - which lets your choice of pasta sauce sing even more loudly! 

My ‘sauce’ is an adaptation of a similarly entitled recipe in Rose Elliot’s book, Fast, Fresh and Fabulous. and, as well as befooling veggie-reluctant children (you might just change their minds by getting them involved in making the courgetti!), this low-carb, really healthy recipe is a slimmer’s delight - because who would not like to lose a little bit of excess weight in contemplation of baring all in the heat of summer? Or if that’s not your concern, when the sun starts to rise in the sky, you might just prefer spending more time outside rather than in the kitchen! 

A cross between a pasta dish and a warm salad, this is so quick and easy to make it’s practically convenience food! I’ve used slender asparagus spears here because they need very little preparation. Just snap off the bottoms, wash and cook. They also cook so quickly. Happily this means you can leave the ‘sauce’ to make itself under the grill whilst you attend to the courgetti, which is cooked al dente in just 3 minutes flat!

The images of the raw ingredients I’ve used for Courgetti with Cherry Tomatoes & Asparagus are not just for show! This is how I get organised when making any meal or recipe. I collect all the ingredients together and prep them first, i.e. before I even start the cooking process. 

This is a lovely, fresh way (looks so very Italian!) to eat young, thin spears of asparagus and get a healthy quotient of other fresh vegetables on your Primal Plate too. I’ve used soft goats cheese and some Gran Padano to add more depth of flavour and texture to the dish, but if you prefer, you could get your protein fix by substituting grilled meat, chicken or fish for the cheese.

Courgetti with Cherry Tomatoes & Asparagus (V) (Serves 2)

Ingredients

300g (10½oz) cherry tomatoes

250g (9oz) thin asparagus spears (about 12 thin spears per person, or if not available, 7 thicker ones see Notes below)

2 tbsp olive oil

Basil leaves, about 8 large ones, finely shredded

3 medium-large, firm, flat (not curved) chunky courgettes (size and shape matters!)

Sea salt 

Freshly ground black pepper

100g (3½oz) full-fat soft goat’s cheese

25g (1oz) Parmesan (or Gran Padano, or Vegetarian parmesan-style cheese), finely grated

Instructions

Boil a kettle of water. Set the grill to high.

Cut off both ends of the courgettes. Put the centre of the courgette into the centre of the Spirali vegetable support and holding the machine steady with one-hand, turn the crank clockwise with your other hand whilst pushing the vegetables tight up against the blades. - the courgettes are easily and quickly sliced twice into fabulous long julienne strips. What fun! Set aside whilst you prepare the ‘sauce’ ingredients.

Place the cherry tomatoes in a single layer on a grill pan. Put the washed and dried asparagus into a large bowl with half the olive oil and mix together with you hands until evenly coated. Put these on the grill pan too and season everything well with sea salt and freshly ground black pepper. 

Put under the grill and cook for about 6-8 minutes or until the tomatoes are on the point of collapse and the asparagus just tender to the point of a knife, and perhaps tinged golden brown.

Once the tomatoes and asparagus are about half-way through their cooking time (after about 3-4 minutes) put the courgetti into the top half of a steamer and pour the boiling water from the kettle into the bottom half of the pan. Put the pan lid on and steam for 3 minutes. Keep your eye on the asparagus and tomatoes whilst the courgetti cooks.

Drain the courgetti well, then pour over the rest of the olive oil and season with sea salt and freshly ground black pepper to taste.

Divide the courgetti between two warm pasta dishes (large shallow bowls). Add the tomatoes and asparagus to the vegetable pasta and top with goats cheese, shredded basil and a sprinkling of Parmesan, if liked. Buon appetito!


Notes:

Select the finest (3mm blade) out of the 3 cutters supplied with your machine - this makes thin ‘spaghetti’ spirals out of your vegetables that not only look fantastic, they only need a very short period of time to cook. Assemble your Spirali machine on a clean flat surface and place a large container underneath to catch the prepared courgetti as it falls from the machine.

If you want to, you can peel the courgettes first so it comes out white, like pasta.

If you can’t get thin whole asparagus, use asparagus tips. Alternatively, first cut the tips off thicker asparagus and then split the stems vertically in half. 

For vegans, omit the cheese and try adding other finely chopped herbs to the basil - perhaps tarragon and chives. Serve the vegetable pasta with freshly chopped herbs and perhaps a good handful of toasted pine nuts scattered over.

You can make this dish completely fat-free by omitting the olive oil (although ‘low-fat’ isn’t a concern for people who follow a Primal or Paleo diet) 


Carbohydrate 16g Protein 22g - per serving