Primal No-Oats Porridge

by Susan Smith in ,


As we’re still in the midst of National Breakfast Week, what could hit the spot more on a cold winter’s morning than porridge? 

Whenever I tell people about my Primal diet, often the first question it raises is “What do you do about breakfast?”. People, listen-up! If you think dissing grains means no more cereal-style breakfasts, this Primal No-Oats Porridge is simply going to blow you away. It’s amazing! It looks like porridge, it tastes like porridge and its porridge-like texture (sorry Sarah!) is so authentically ‘porridge’ you might even doubt its healthy credentials. A quick check of the ingredients should reassure you. 

Although there are no high-carb oats in this porridge, it is still relatively high in carbohydrates when you include banana in the recipe. I love the addition of banana - after all, porridge is renowned for being comfort food - but you may prefer to leave it out if you’re trying to lose weight by restricting your carbohydrate intake to 50-100 grams per day and you’re a three-meals-a-day kind of person. 

Personally, I’m not. I only have two meals a day with maybe an occasional snack of nuts, cheese or a little fresh fruit in-between. Anyway, I find this breakfast so satisfying and sustaining that I really don’t need to eat anything else until my second (and last) meal of the day, which I always try to eat late afternoon and definitely before 6pm in line with my body’s circadian rhythms. Eating my breakfast late morning (around 11:30am) and my main meal of the day late afternoon (around 5pm) generally leaves me feeling contentedly full without ever feeling fat. I should add that after our evening meal, come rain or shine, we also do a brisk 2.5 mile walk every day! 

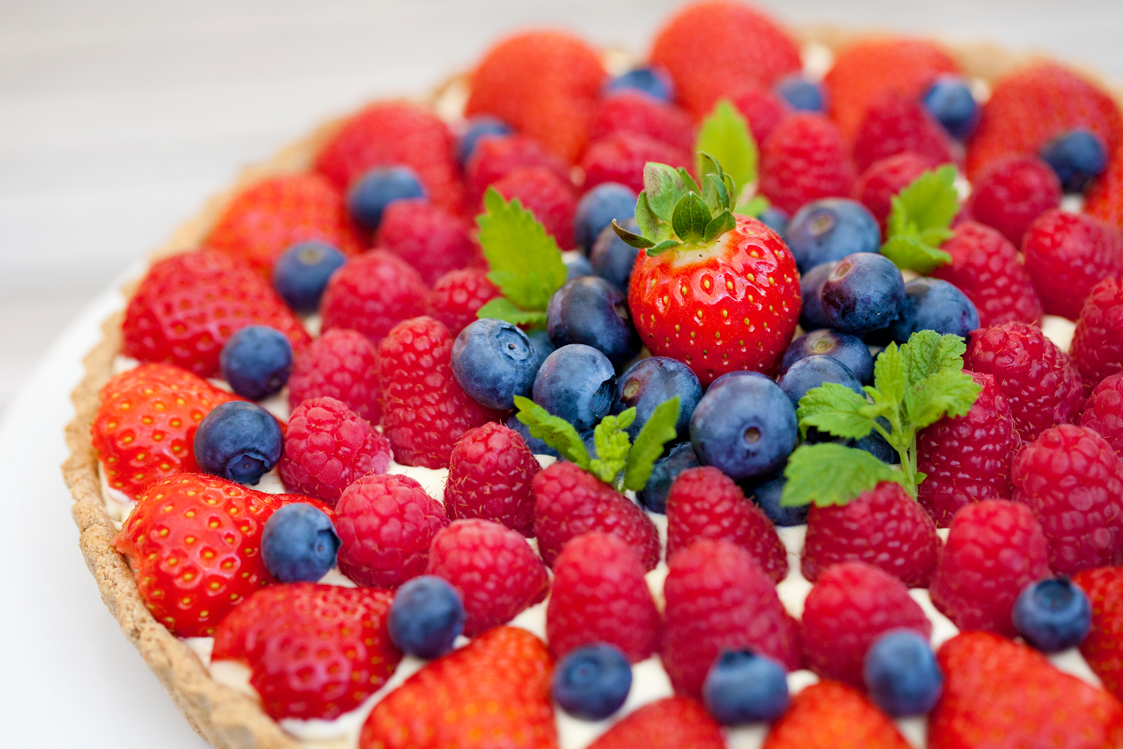
If you still think a 37 grams of carbohydrate ‘hit’ seems excessive for one meal, leave the banana out of the equation altogether and top your porridge with a handful of fresh berries instead. Also, a sprinkling of sesame, sunflower or pumpkin seeds, chopped walnuts or toasted coconut chips would be good to ring the changes. I haven’t tried it yet, but since I love toasted coconut flakes I might just have to knock up some porridge made with coconut milk! There’s lots of opportunity to get creative here! 

Apart from the 15 minute wait for the chia seeds to ‘gel-up’, Primal No-Oats Porridge is a really quick and easy Primal Pronto breakfast to prepare. Whether you like your porridge fruity, nutty or basically pure, sweet and creamy, it’s now a healthy, no-grain option that’s definitely back on our breakfast menu. Enjoy!  

Primal porridge primal breakfast recipes.jpg

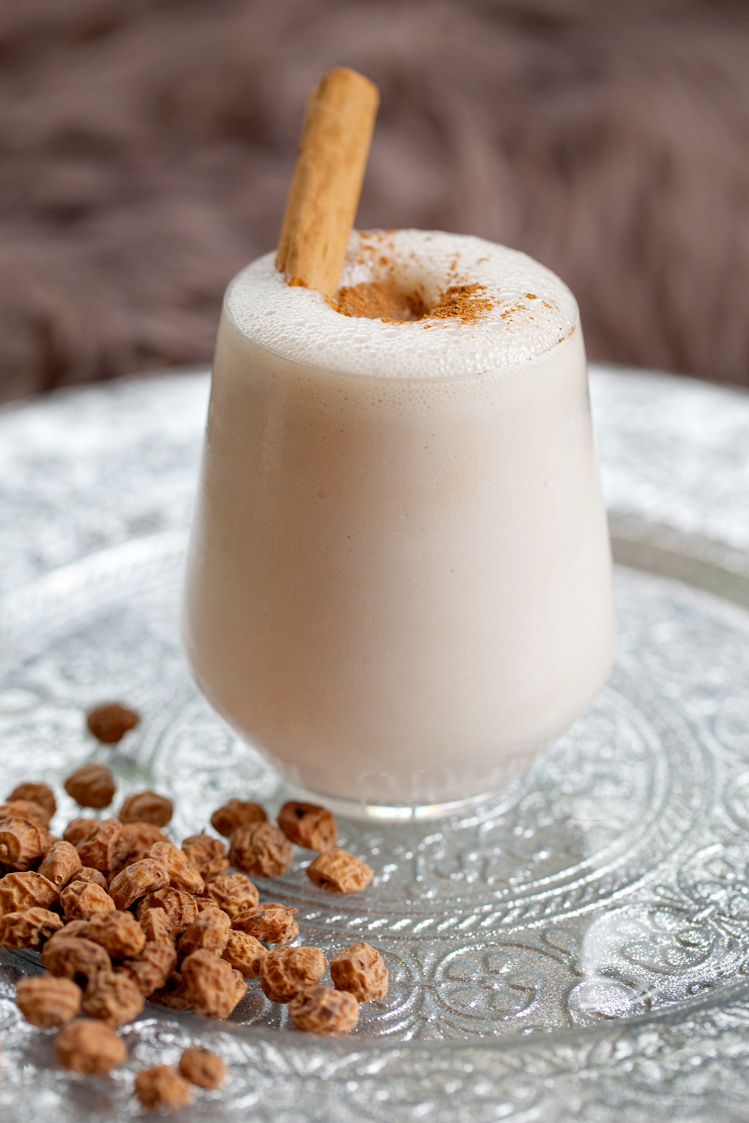
Primal No-Oats Porridge (Serves 1)

Ingredients

1 tbsp organic white chia seeds + 3 tbsp filtered water

1 tbsp Sukrin organic almond flour

1 tbsp organic ground almonds

1 tbsp organic tiger nut flour

1 tbsp organic cold-milled golden flaxseed

Small pinch of sea salt

170ml organic almond milk, preferably homemade (or organic raw cow’s milk)

½ large or 1 small organic banana, sliced (I like to cut mine on the slant) - optional

1 tsp pure vanilla extract 

Sukrin Gold (or organic pure maple syrup / organic raw ‘runny’ honey) - to serve

A little extra milk or cream - to serve


Instructions

Mix the chia seeds with the filtered water and set aside in a refrigerator for 15 minutes.

Place the almond flour, ground almonds, tiger nut flour, flaxseed, vanilla extract and sea salt into a medium saucepan with the almond milk.

Bring to the boil over a medium heat, whisking continuously until the mixture thickens.

Take the pan off the heat and gradually whisk-in the chia seed mixture, then the sliced banana (if using).

Re-heat the porridge over a moderate heat whilst stirring for 2-3 minutes more - until the banana slices soften and the porridge is really hot - and then turn into a warm serving bowl. 

Sweeten to taste with Sukrin Gold, organic maple syrup or raw honey, add a splash of creamy milk (either nut milk or full-fat raw organic cow’s milk/cream) and/or decorate with nuts, seeds or fresh fruit (e.g. fresh berries, slices of kiwi, fruit puree etc.). 


Carbohydrate 14g Protein 9g - per serving (without banana, sweetened with Sukrin Gold)

Carbohydrate 37g Protein 10g - per serving (made with banana)

N.B. Please allow extra carbs if serving with other fresh fruits, honey or maple syrup. 


Low-Carb Breakfast Buns

by Susan Smith in , ,


I couldn’t resist the challenge of coming up with something new for National Breakfast Week! Unbelievably, these delicious, light-textured, incredibly moreish, vegan, Low-Carb Breakfast Buns are dairy-free, gluten-free, grain-free, egg-free and refined sugar-free. No slight-of-hand ‘natural’ sweeteners are added to the mix either…even if you don’t have my fave zero-carb Sukrin Gold to hand (although I think you should!), just one single tablespoon of pure organic maple syrup will sweeten the whole job lot nicely!

These really healthy Breakfast Buns are so fast and easy to make that my man thinks I should add another category to Primal Plate…”Not so much Primal Pronto, more like Instant!” 

If you suffer from a nut allergy, you can substitute whole organic pumpkin seeds for the chopped walnuts. The buns still retain the same satisfying ‘crunch’ and with or without nuts both versions are equally as good.  

So good in fact that you don’t need to reserve them for breakfast. I’d be happy having mine at teatime too! Lovely served warm from the oven with a drizzle of maple syrup, you can almost feel these resistant-starch packed beauties doing you good! Definitely something worth getting out of bed for!

Low-Carb Breakfast Buns (Makes 12)

Ingredients

150g organic tiger nut flour 

25g Sukrin reduced-fat organic almond flour 

25g organic cold-milled golden flaxseed

2 tsp gluten free baking powder

40g organic walnuts, finely chopped (if you are allergic to nuts, use whole pumpkin seeds instead)

40g organic sunflower seeds

90g organic coconut oil, melted (or 6 tbsp organic cold-pressed tiger nut oil )

1 tbsp Sukrin Gold (or 1 tbsp organic pure maple syrup)

1 tbsp pure vanilla extract (I use Ndali)

225ml unsweetened almond milk, preferably homemade (or 225ml full-fat, raw, organic cow’s milk)


Instructions

Pre-heat the oven to 200℃ / 400℉ / Gas mark 6

Line a 12-hole bun tin with 12 paper bun cases

Weigh all the dry ingredients directly into a medium sized bowl and, using a fork, mix together well.

Add the maple syrup (if not used Sukrin Gold) and the oil and combine.

Pour in the milk and continue to mix with a fork until the mixture comes together into a thick batter-like consistency.

Spoon into the bun cases (you’ll need a smidgeon over 50g of batter per case) and bake in the pre-heated oven for 15-20 minutes, or until a cocktail stick inserted into the centre comes out clean.

Serve warm from the oven with a little maple syrup drizzled over, if liked. 


Carbohydrate 9g Protein 4g - per breakfast bun (made with maple syrup & cow’s milk)

Carbohydrate 7g Protein 3g - per breakfast bun (made with Sukrin Gold & almond milk)


Crumble-topped Mince Pies

by Susan Smith in ,


Healthy, Primal, vegetarian mince pies (or vegan, if you substitute coconut oil for butter) without added sugar, wheat flour or other grains? Yes please! 

This recipe is my adaptation of an original recipe I found in Good Food Magazine, Christmas 2007. However, Primal Plate gluten-free mince pies are made with tiger nut and almond flour pastry encasing dollops of delicious homemade mincemeat that has no sugar or fat added. So in spite of them tasting like the best mince pies you’ve ever eaten, you can have all of the pleasure with none of the guilt. I should warn you, even if you’re stuffed to the gunnels with other Christmas food, you’re still going to want to find room for more when you espy these sweet delights! 

But that’s okay, because you can’t really ‘fall off the wagon’ when you’re substituting nutritious, low-carb ingredients for grain flour and only using half the pastry of normal mince pies! Plus, these Crumble-Topped Mince Pies are so meltingly delicious, and look so winter wonderland with their crunchy ‘snow-capped’ topping, that it just won’t seem right to let Christmas day pass you by without one!

They disappear fast in our house, so blogging the recipe seemed sort of compulsory in the run up to Christmas - my fella thinks that eating at least two a day will help keep you in the festive spirit! They’re a much lighter and healthier alternative to the ‘heavy-weights’ found stacked on supermarket shelves (since last September!) and those endorsed by baking traditionalists, and happily, given the demand by my nearest and dearest, they are also ridiculously easy to make. 

Essentially, the mincemeat and the tiger nut pastry both only need a quick ‘whizz’ in a food processor and they’re made. And, since the mince pies can conveniently be cut, pre-assembled and frozen in their tins, you can always have a batch 'at the ready’ for when you need them. Once defrosted, making the crumble and topping the pies takes less than 5 minutes. 

If you like mince pies, these extra special mince pies can’t fail to impress. You won’t like them...you’ll love them! 

Crumble-topped Mince Pies (V)

Ingredients - for the mince pies

1 medium/large ripe banana

100g organic raisins

100g organic sultanas

100g organic currants

50g organic dried cranberries, no added sugar

60g Medjool dates (about 3), stoned and chopped                        

50g flaked almonds

Finely grated zest of 1 organic orange, juice of ½ orange

25g Sukrin Gold

½ tsp grated cinnamon                        

½ tsp ground nutmeg                            

½ tsp ground ginger                            

3 tbsp brandy


Ingredients - for the pastry

125g unsalted butter, chilled and cut into small cubes + a little extra for greasing (or to convert to vegan use coconut oil)

150g organic tiger nut flour

50g Sukrin reduced-fat organic almond flour

1 tbsp Sukrin icing sugar

Finely grated zest of 1 organic orange

1tbsp cold water


Ingredients - for the crumble topping

25g butter, melted (or use coconut oil if you don’t eat dairy)

25g organic ground almonds

25g flaked almonds

¼ tsp ground cinnamon

25g Sukrin Gold


To serve

A little Sukrin icing sugar


Instructions - to make the mincemeat

Simply mix everything together in a food processor until well combined and the texture of mincemeat. Done!


Instructions - to make the pastry

Put the tiger nut flour, almond flour, butter (or coconut oil), icing sugar and orange zest into the bowl of a food processor and whizz together until the mixture starts to clump together.

Add the tablespoon of water and briefly whizz again.

Tip the mixture out onto a sheet of non-stick (parchment) paper. Press it together into a ball, flatten into a disc with the palm of your hand then cover with another piece of non-stick pastry. 

Pre-heat the oven to 180℃ / 350℉ / Gas mark 4. Lightly grease a shallow bun tin.

Roll the dough out between the two sheets of non-stick baking parchment to a 2-3mm thickness. Using a 7½ cm (3 inch) fluted round cutter, stamp out discs from the pastry. Gently place the discs of pastry into each section of the bun tin. 

Press any pastry trimmings back together, re-roll and continue cutting out more discs until you have as many pastry cases as you want, or the pastry is used up - this quantity of pastry dough should make about 16 mince pies. 

Fill each pastry shell with 1 heaped teaspoon mincemeat and spread out to smooth.

At this point, the mince pies can be frozen, uncooked in trays for up to 1 month    


Instructions for the crumble-topping

When you’re ready to cook the mince pies, melt the butter over a low heat, allow to cool slightly, then combine all the crumble ingredients in a small bowl and sprinkle a little on the top of each mince pie. 

Bake on the middle shelf of the oven for about 15 minutes, or until the pastry is cooked and golden brown. 

Cool in the tin(s) for 5 minutes before transferring to a wire cooling tray. 

Sift a little Sukrin icing sugar over the top of the mince pies before serving.


Notes

The mincemeat recipe will make about 36 mince pies. Because it doesn’t contain any sugar, it won’t keep like ordinary mincemeat. However, it can be stored in a covered container in the refrigerator for up to a week.  

These mince pies are good eaten warm or cold. To re-heat them after baking, simply warm them in a pre-heated oven at 180℃ for 5 minutes. Don’t forget to dust with a little extra Sukrin icing sugar before serving, as any previously sprinkled on top of the mince pies dissolves in the heat of the oven second time around!


Carbohydrate 14g Protein 3g - per mince pie


Speedy Seedy No-Grain Soda Bread

by Susan Smith in ,


No grains, no dairy, no eggs, no yeast…no kidding! Inspired by Hugh Fearnley-Whittingstall’s Seedy Rye Soda Bread in the River Cottage Light and Easy cookbook this super-speedy, seedy bread is my Paleo/Primal-friendly grain-free ‘take’ on Hugh’s original recipe. I’m loving the fact that you can knock it up in about 15 minutes then bake and eat it within the hour. 

Mr Fearnley-Whittingstall just happens to be my man of the moment in more ways than one. Pioneering war on waste and taking to task the supermarket's ridiculous stance on wonky veg, he is also a brilliant, down-to-earth, imaginative chef that seriously cares about the environment and sustainability. I salute you sir!

For this blog post, my job was to figure out which no-grain flour alternatives would emulate River Cottage’s inspirational rye-based bread i.e. to create a dense, semi-sweet, almost malty, rye-tasting soda bread, without the rye flour or honey that the original recipe calls for. I think I’ve done it! With the help of Sukrin and their fantastic range of alternative cold-pressed, fat-reduced nut and seed flours (I particularly like the cold-pressed sesame flour in this recipe for it’s distinctive depth of flavour), I was fully equipped and ready to go.  

This nutty tasting bread is deliciously satisfying, can be eaten in the context of either sweet or savoury, and is so quick and easy to make I’ve ended up making 4 loaves in the past 5 days! 

Speedy Seedy No-Grain Soda Bread (makes 1 small loaf - serves 6)

Ingredients - dry

20g organic pumpkin seeds

20g organic sunflower seeds

20g organic sesame seeds

20g organic golden linseeds

1 tbsp organic chia seeds

150g organic ground almonds

50g Sukrin sesame flour  

50g fine milled organic tiger nut flour

20g Sukrin reduced-fat organic almond flour plus a little extra for dusting the finished loaf

½ tsp sea salt

1½ tsp baking soda


To finish the loaf before baking

1 tsp seeds - for sprinkling

1 tsp Sukrin almond flour, for dusting


Ingredients - wet

100ml apple juice (I used Coldpress)

1 tsp raw cider vinegar

50ml water

2 tbsp avocado oil 

Instructions

Pre-heat the oven to 200℃ (180℃ fan-assisted) 

Put all the dry ingredients into a mixing bowl and, using a fork, mix everything together really well.

In a jug, whisk together the wet ingredients. Make a well in the centre of the dry ingredients, pour the liquid into the dry ingredients and quickly mix everything together with a fork.

Allow the mixture to stand for 1-2 minutes, during which time the chia seeds will help thicken out the mixture. 

With the help of a spatula, tip the sticky but malleable dough onto a sheet of non-stick (parchment) paper and, using both hands, form into an approximate 15cm / 6” round. Slide or lift the shaped bread, still sat on its parchment paper, straight onto a baking tray.

Make a deep cross in the bread round (cutting at least halfway down through the dough) then sprinkle a teaspoon of extra seeds on top and lightly dust with a little more almond flour. 

Bake for 35-40 minutes in the pre-heated oven, or until a cocktail stick inserted in the centre comes out clean and the crust is a really dark brown.

Cool on a wire rack. Tuck in!

Top left: Make a well in the centre of the combined dry ingredients, then pour in the combined wet ingredients. Top right: Mix everything together with a fork. Bottom left: After shaping, score a cross in the dough. Bottom right: Sprinkle with extra…

Top left: Make a well in the centre of the combined dry ingredients, then pour in the combined wet ingredients. Top right: Mix everything together with a fork. Bottom left: After shaping, score a cross in the dough. Bottom right: Sprinkle with extra seeds and dust with sifted almond flour before baking.

Notes

I regularly purchase organic nuts and seeds online (more availability and at a better price than most supermarkets) These are my go-to suppliers: Healthy SuppliesReal Foods; Red23; and, for tiger nuts, Na'vi Organics.

This bread will keep for up to 3 days in an airtight container. After a couple of days, it can be used to make croutons or made into breadcrumbs for coating. 

If you want a nutritious, no-hassle, low-carb, home-baked bread for breakfast, simply measure out all the dry ingredients into a bowl and the wet ingredients into a jug the evening before, then cover with cling film. Next day, combine everything together and bake…good morning Primal Pronto!


Carbohydrate 15g Protein 12g - per serving

Speedy Seedy No-Grain Soda Bread is delicious served simply with lashings of organic butter.

Speedy Seedy No-Grain Soda Bread is delicious served simply with lashings of organic butter.


Horchata Ice-Cream with Chocolate Tiger Nut Splats

by Susan Smith in ,


The countdown to Christmas has begun and I have so many festive recipe ideas whizzing around my head that I am struggling to keep pace with my imagination. As for the quantity of ingredients I have to purchase for testing and tasting all of Primal Plate’s foolproof meal alternatives in readiness for the most anticipated meal of the year, they threaten to blow my housekeeping budget!

In our house, all the traditional Christmas food favourites - meat-based, grain-based, high carb and loaded with sugar - are off the menu because we find no joy in eating anything that’s going to harm us, or hurt another. We take the view that since it’s the season of goodwill, this should include all our furred and feathered friends. 

You may be thinking that without the turkey and all its trimmings, the Christmas pudding, cake, trifle and mince pies, what’s left? The answer is, probably too much deliciousness for me to have sufficient time before the big day to share all my ideas with you…but I’ll give it a go. The recipes I’ve created, tested and/or adapted to make them low-carb and primal are the answer to all your entertaining problems if you want to eat well and stay healthy. The aim is to make your festivities more delicious, more fun and less stressful. 

Today’s blog post for Horchata Ice Cream is something I conceived back in July but since the homely warmth of sweet cinnamon is so Christmassy and the exotic spiciness of nutmeg so enlivening in combination with all things sweet and creamy, I think the timing of this brilliant get-ahead frozen dessert is even more appropriate for now. And everyone can join in the fun. Gluten-free, grain-free, no eggs, no dairy or nuts (coconut cream can be substituted for cashew nuts - see note below) and no sugar added, this decadently delicious, sweet-tasting ice cream almost beggars belief. Even the Chocolate Tiger Nut Splats that accompany it are a sort of fortuitous accident. 

Peeled organic tiger nuts are an extremely moreish, nutritious, sweet-tasting tuber packed with resistant starch (the unpeeled ones are too hard for most people to chew and are best reserved for making tiger nut milk) so I now always have the organic skinned variety on hand for a quick and healthy sweet treat that can be eaten guilt-free between meals. 

However, if you try to eat more than one or two of them simultaneously they can be a bit dry, so for some time I’ve been toying with the idea of making skinned tiger nuts into an even more desirable snack by enrobing them in dark chocolate. I had in mind that I’d keep them separate (like chocolate covered coffee beans) but oh, the fiddle and the faff! Initially, I tried submerging each individual tiger nut into melted chocolate with the aid of a cocktail stick but then couldn’t get them back off the stick without pinging them across the kitchen table and splatting melted chocolate everywhere! Because I was attempting to do all of this in the time it took to make a cup of tea, I gave up and resorted to throwing all the tiger nuts into the bowl of chocolate in one go, giving the mixture a quick stir then dolloping teaspoonfuls onto a pre-lined tray and shoving the whole thing in the fridge to set. 

Fifteen minutes later I invited John to sample my now-solid chocolate-coated tiger nut ‘splats’ with his second cup of tea. Much to Sarah’s chagrin (she wasn’t around at the time), they only survived a single, brief, taste-testing session. It seems that melding tiger nuts together with dark chocolate is a recipe for gluttony! However, the sense of over-indulgence is more in the mind than an actual reality. With this dessert, everything simply comes together beautifully - cool, creamy ice cream made even more delectable with the first cold snap of chocolate melting into a silky smooth lubricating combo of dark chocolate and coconut oil that makes eating multiple raw tiger nuts effortless (less chew more swallow!). But best of all, because the resistant starch in both the Horchata Ice Cream and Chocolate Tiger Nut Splats can’t be digested by the body, this particular Christmas confection will never find its way onto your hips, so you can still stay on target for a slim and healthy start to your new year!

I think ice cream is the perfect way not to cook at Christmas. Make and freeze it the week before to save time later. This refreshing Horchata Ice Cream with Chocolate Tiger Nut Splats doesn’t really need any other accompaniment (though a baked apple or poached pear would be nice) - simply serve spiked with a mini-star sparkler to razzle-dazzle ‘em as a fabulous festive finale to Christmas lunch. 

Horchata Ice Cream (Serves 8)

Ingredients

250g organic tiger nuts, soaked in cold water for 4-6 hours (or overnight) then rinsed in fresh cold water and drained

75g raw organic cashews, soaked in cold water for 4-6 hours (or overnight) then rinsed in fresh cold water and drained

8 plump Medjool dates, stoned

1 tbsp vanilla essence

1/2 tsp organic ground cinnamon

1/2 tsp freshly grated nutmeg


Instructions

Put the tiger nuts into a heavy-duty blender with 600ml fresh, cold filtered water and blend until smooth and creamy - about 3 minutes.

Take a nut milk bag (or a double layer of muslin) and set over a deep bowl. Carefully pour the blended tiger nut mixture into the bag/muslin cloth and secure the top of the bag (or gather the ends of the muslin cloth together) to hold the liquid inside. Using your hands twist and squeeze out all of the liquid until you’re left with only dry tiger nut pulp. Rinse out the blender jug.

Tip the tiger nut milk back into the rinsed-out blender. Add the dates, cashew nuts (or coconut cream - see note below), vanilla essence, cinnamon and nutmeg and blend again until the mixture is completely smooth.

Pour the horchata cream into a bowl, then cover with cling film and chill until very cold.

Churn the cold horchata cream in an ice cream maker (according to the manufacturers instructions) until it forms a soft-set ice cream (mine took about 35 minutes to get to this stage) then spoon into a freezer-proof lidded container and put in the freezer for 2 hours to set completely.

If not serving immediately, take the ice cream out of the freezer 30 minutes before you want to eat it and put in a refrigerator to allow it to soften slightly.

Scoop the Horchata Ice Cream into glass sundae dishes, add 2 or 3 Chocolate Tiger Nut Splats and a light dusting of cinnamon, if liked. 

Chocolate Tiger Nut Splats (Makes about 12)

Ingredients

75g organic peeled tiger nuts

50g good quality dark chocolate, coarsely chopped (at least 70% cocoa solids)

1 tsp organic coconut oil


Instructions

Put the chocolate chips into a heatproof bowl and set the bowl over a pan of barely simmering water to allow the chocolate to melt slowly. Do not allow the bottom of the bowl to come into contact with the water. Stir the chocolate occasionally until it is completely melted and smooth.

Take off the heat and add the coconut oil. Stir the coconut oil into the melted chocolate, then add the tiger nuts and keep stirring until all the tiger nuts are evenly coated in chocolate. 

Spoon rough teaspoonfuls of the mixture onto a baking sheet lined with non-stick paper and refrigerate until set. Peel the cold-set Chocolate Tiger Nut Splats off the paper and store in an airtight container in the fridge until required. 

Notes

You need a decent high-powered blender such as a Vitamix to blitz the tiger nuts into a smooth creamy milk and then to completely break down the cashews and dates to make a rich smooth custard. Pass the finished ice cream mixture through a fine sieve before freezing if you’re in any doubt that your blender isn’t up to it.

An ice cream machine does make for a smoother, creamier, airier ice cream but if you don’t own one it is still possible to make decent ice cream at home as long as you plan ahead. Firstly, chill your prepared ice cream mixture over an ice bath or for several hours in the fridge. Meanwhile switch your freezer onto fast-freeze. Pour your ice cream mixture into a deep freeze-proof container and freeze for about an hour until the edges start to get solid. Take out of the freezer and stir vigorously with a fork or whisk to break up the the ice crystals completely and combine with the still liquid centre. If you have one, a hand-held blender will give the best results. Straightaway, put the mixture back into the freezer for another half-hour then take it out again and repeat the mixing and mashing. Continue doing this every half hour until the ice cream is soft-set throughout, then let it freeze solid.

I used dark chocolate chips to save myself the hassle of chopping chocolate. 

Do not take the chocolate tiger nut splats out of the fridge until you’re ready to eat them. Quite apart from the fact that you’ll be missing the satisfying ‘snap’ of cold chocolate when you bite into them, they melt really quickly in your fingers or when left out at room temperature.

The celebration star sparklers are fun but you need to have a couple of people on hand to help light them and to get your dessert to the table in time to surprise your guests - it took me three attempts to get my sparkler to light for Sarah to take the photograph and, once lit, it didn’t sparkle for very long! Frustrating! Next time I’ll try these!

If you are allergic to nuts, you can substitute the cream off the top of a 400ml can of full-fat coconut milk for the cashew nuts. Put the unopened tin of coconut milk in the refrigerator to chill overnight. When you’re ready to make the ice cream, simply scoop off the top layer of solid coconut cream from the can of chilled coconut milk and add to the blender with the cold horchata milk and the rest of the ingredients before blending until smooth and then churning in an ice cream maker. You can use the coconut water that’s left to make a curry sauce or smoothie.

10th December 2015 update: I made Horchata Ice Cream again today for our Christmas day festivities. And, because we're all-grown ups, I added 2 tablespoons of vodka to the cold cream before churning. It isn't for the sake of imbibing more booze! The idea is that adding a little alcohol should help to keep the ice cream a little bit softer (alcohol doesn't freeze) whilst it's stored for the next couple of weeks.  


Carbohydrate 34g Protein 3g - per serving ice cream made with raw cashews

Carbohydrate 12g Protein 2g - per serving (3 chocolate tiger nut splats)


Primal Pronto Energy Bars

by Susan Smith in ,


Fast, no-bake Primal Pronto Energy Bars will keep everyone coming back for more. And why not? Full of energy-boosting nutrients and resistant starch, these grain-free, gluten-free, naturally sweet nibbles can be enjoyed at any time you feel yourself flagging, or when you just fancy something sweet to eat, because they don’t contain refined sugar. 

Great for kids as a Bonfire Night treat, to take on long autumnal walks or as a pre or post-workout snack, these energy bars will revive and sustain you with delicious fudgy, chocolatey goodness.

With only 5 ingredients, they should only take about 15 minutes to bring together (plus 30 minutes to chill). But be warned, they’re more-ishly yummy and can disappear faster than you can make them! 

Primal Pronto Energy Bars (makes 12)

50g coconut oil

150g organic Medjool dates, stoned weight (about 8 dates)

150g milled tiger nuts

50g raw organic cacao powder

1 tbsp organic pure vanilla essence


Instructions

Boil a kettle of clean water.

Remove the stones from the dates then put them in a small heavy based saucepan with enough boiling water from the kettle just to cover. On the hob, bring the water back to the boil then reduce the heat to very low and simmer the dates for 5 minutes to soften. Drain well.

Place the coconut oil in a small saucepan over a low heat until just melted, take off the heat and allow to cool slightly.

Put the softened dates, milled tiger nut flour, cacao powder, vanilla essence and coconut oil into a blender or food processor and process until all the ingredients are fully combined.

Transfer the mixture into a shallow dish or baking tin, pressing it down well and spreading it out evenly. Smooth the surface with a flat edge spatula (or the back of a metal spoon) and mark into even pieces. 

Put the mixture into the freezer for 30 minutes, then refrigerate until you’re ready to serve.


Notes

Cut into small squares and decorated with edible flowers or flower petals these make elegant petits fours to serve with an espresso coffee as a grand finale to a special meal. 

I used a small Waitrose (24.5cm x 17.5cm / 9½ x 7”) non-stick baking tray, which was the perfect size for these energy bars.


Carbohydrate 19g Protein 2g

Although they're an ideal portable outdoor snack, they're also a real after-dinner treat served with coffee. 

Although they're an ideal portable outdoor snack, they're also a real after-dinner treat served with coffee. 


Chocolate Fondants

by Susan Smith in , ,


If you’ve ever watched Masterchef you’ll have seen contestant after contestant being warned by Messrs John Torode and Gregg Wallace how tricky it is to make perfect gooey-centred chocolate fondants. Some contestants go ahead anyway (let’s face it, by the time they’re being filmed, they’re already committed!) and get their timings just right so their fondants come out beautifully cooked on the outside and runny in the middle - but many don’t. Today's recipe is a sure-fire way to ensure that you can make chocolate fondants without any of the brouhaha, giving everyone the impression that you’re an absolute genius in the kitchen! (Psst! you can even make them 24 hours before you want to eat them)

Love chocolate? You’ll love these luxurious hot chocolate fondants. Better still, they’re not the ‘unhealthy' indulgence you might have pre-supposed. On the contrary, eaten in moderation, dark chocolate (at least 70% cocoa solids) is very good for you because it’s chock-full of phytonutrients (specifically cocoa flavanolds) that are scientifically proven to be beneficial for the heart, circulation and brain.

Still feeling some parental guilt about consuming chocolate? More information is available in this extensive blog post that fully explains chocolate’s effects on health, its potential benefits and downsides, and the effects of chemical components such as caffeine and theobromine. In summary, don’t gorge on chocolate, but it’s really more than okay to allow yourself to deeply appreciate its wickedly delicious allure.

As part of a Primal lifestyle, best quality dark chocolate does not make you fat. Typically, I eat 2 or 3 squares (up to 15 grams) every day with my morning Nespresso (a double-whammy for the senses which reminds me that life is really worth living) but at least one scientific study found that young people consuming 42.6g of chocolate a day had slimmer waists and lower BMIs than those eating less. 

Nice but not naughty after all, dark chocolate has finally achieved superfood status. I suggest you grab a spoon and get stuck in! 

Chocolate Fondants (Makes 4 large or 6 small fondants)

Ingredients

125g unsalted butter + extra for greasing 

3 whole large organic eggs 

2 organic egg yolks (in addition to the the eggs above)

25g raw organic ‘runny’ honey

8 drops organic liquid stevia 

125g dark chocolate - I used Callebaut Finest Satongo dark chocolate chips

25g tiger nut flour

Good quality chocolate bar, broken into squares (I used Michel Cluizel’s Maralumi dark chocolate bar)

Sukrin icing sugar, for dusting

Organic double or pouring cream, for serving


Instructions

Grease either 4 large or 6 small ramekin dishes.

Melt together the butter and chocolate in a bowl over a pan of hot (not boiling) water on the hob.

Whilst the chocolate/butter mixture is melting, whisk the eggs / egg yolks / honey and liquid stevia together for about 5 minutes until pale and very thick (it should hold its shape for a few seconds when a little of the mixture is flicked over the surface) - you really need an electric whisk for this. 

With a balloon whisk, whisk the tiger nut flour into the chocolate/butter mixture. 

Cool the chocolate mixture and then pour into the whisked egg mixture.

Using a metal spoon, fold gently to combine the two mixtures. 

Divide the mixture equally between the ramekins. 

Leave in the fridge for up to 24 hours before they are required.

Just before cooking, press a square of chocolate into the centre of each ramekin.

Cook for 12-15 minutes at 200℃ / 400℉ / Gas mark 6

Sprinkle with icing sugar and serve immediately.


Notes: 

These chocolate fondants are foolproof because you’re not relying on precise cooking times to ensure that the middle of the fondants are soft and runny - instead the melted chocolate squares create a yummy pool of hot chocolate at their centre. 

The mixture will carry on cooking in the ramekins, so eat immediately. 

Sukrin sweetener is produced via a natural fermentation process from the glucose naturally occurring in pears, melons and mushrooms. The powdered form of Sukrin I’ve used for dusting the chocolate fondants looks, tastes and behaves in exactly the same way as normal white icing sugar made from sugar beet/cane. And, I’m pleased to report, it has no bitter after taste. 


Carbohydrate 16g Protein 9g - per small chocolate fondant

Carbohydrate 25g Protein 14g - per large chocolate fondant


Apple and Blackberry Crumble

by Susan Smith in


This week there’s been yet another impediment to our 2015 home improvement plan - namely a mahussive wasp nest measuring at least 18 to 20 inches across. Not that we got close enough to actually measure it, but it is significantly bigger than my largest sized hat box that holds the most glamorous and ostentatious hat I possess (thanks Philip Tracey!). 

I was first alerted to our yellow-jacketed uninvited house guests when I was up until the early hours of the morning one day last week doing a food-blogger’s night shift. At first I thought that the incessant tapping at the window were moths trying to get to the light. Then I thought it must be raining. Finally, when I got up to investigate, I saw the outside of the window pane was teeming with a hundred wasps or more. Quite scary, since I never knew that wasps were nocturnal or even attracted to the light. I’d sort of hoped that as we have a fruiting damson tree adjacent to the office window, they were looking for something sweet to eat. In retrospect, I think they were simply on their flight path to and from the nest, which we later discovered in our loft.

Because the loft door has to be left open for re-decoration, during which time the wasps can merrily make their way into our home, we had to cancel the decorator and call in pest control. But wait. You can’t kick up a fuss about the decline in the bee population and then kill off a whole nest worth of wasps can you? A rhetorical question because no, we can’t. We’ve decided it would be just as an unethical to kill off our resident wasps as it is to kill bees. In spite of their bad press (I don’t think they’re nearly as aggressive as a human being flailing around in a state of panic because they’re frightened of being stung), wasps really do serve a useful ecological function - they pollinate flowers and crops and are the natural predator of many other insect pests e.g. they eat caterpillars that would otherwise destroy food crops and keep the fly population down by feeding them to their young. Good job! 

Nevertheless, it would be rude to risk them stinging our decorator, so the work has had to be put on hold until we can figure out how to construct a no-fly zone by creating a wasp-proof curtain to contain them on their side of the attic. In a few more weeks, when the weather turns colder, the worker wasps will die off naturally and then the hive becomes obsolete. And the good news is, wasps are fiercely territorial. This means they will never re-colonise an old nest or build a new nest anywhere near the site of an old one. Magic! Our magnificent wasp nest will be left in situ as a natural deterrent to future wasps, proving that nature takes care of itself if only humans will live and let live.

Like humans, wasps have a sweet tooth and they really love ripe fruit and all things sugary, which is probably why late summer and autumn - the ‘‘season of mists and fruitfulness” - is when they become more noticeable. There’s definitely something in the air, because on a recent sortie to our local greengrocer my man came back with some locally-grown, outrageously plump, sweet, juicy blackberries that he felt compelled to purchase because they were so big, black and beautiful. He had no idea what I would do with them, but on an unusually cold day in early September nothing shouted ‘comfort’ at me more than the prospect of a glorious Apple & Blackberry Crumble with lashings of cream. 

Blackberries have a wonderful affinity with apples (so too do raspberries - see notes below) but a classic crumble is normally off-limits for anyone who doesn’t eat grains and doesn’t want a dessert laden with sugar. If this is you, rejoice because gloriously comforting fruit crumble is now back on the menu with this delicious, easy-to-make, no-grain, low sugar recipe.

As an advocate for eating Primal (albeit primarily vegetarian), I’ve found tiger nut flour is a brilliantly conceived ingredient that just keeps on giving. Quickly whizzed in a blender with grass-fed butter and very little coconut palm sugar, plus chopped pecans for crunch, this Apple & Blackberry Crumble is as good to eat as any I can remember from my childhood. For a moment of happiness, just dive in with a spoon. 

Apple and Blackberry Crumble (Serves 4)

Ingredients

100g tiger nut flour

50g cold organic butter, cut into pieces 

15g organic coconut palm sugar

30g raw pecans, finely chopped

4 decent-sized organic eating apples, peeled, cored and sliced (I used Braeburn but Cox’s or Granny Smith’s would be good too)

40ml fresh orange juice (about ½ orange, juiced)

175g blackberries


Instructions

Pre-heat the oven to 180℃ / 350℉ / Gas mark 4

Put the sliced apples and orange juice into a medium saucepan, cover the pan and cook over a moderate heat for about 8 minutes, or until the apples are soft but not mushy. If there is any juice left in the bottom of the pan at the end to the cooking time, take the pan lid off, turn up the heat and continue cooking for a minute or so more until there is no liquid left. 

Tip the apples into an ovenproof dish (I used an oval Pyrex dish measuring 6.5 cm x 9cm) then arrange the whole blackberries on top of the apples in a single layer.

Put the tiger nut flour, butter and palm sugar into the bowl of a food processor and ‘pulse’ several times over until the mixture resembles fine breadcrumbs. Tip into a medium size bowl and add the chopped pecans. 

Spoon the crumble mixture evenly over the fruit. Place the dish on a baking tray and bake in the pre-heated oven for 35-40 minutes.

Take out of the oven and allow the crumble to stand for 5 minutes before serving with a generous spoonful of clotted or double cream. 


Notes:

Although this is a quick and easy dessert to make, you can skip the apple ‘prep’ altogether by substituting 350g fresh raspberries for eating apples. Just make sure they’re naturally sweet-tasting so you don’t need to add any other sweetener. Simply layer up your oven-proof dish with raw whole raspberries and blackberries before spooning over the crumble mixture and baking at 180℃ for 25 minutes. 

To make the crumble mixture without a food processor, use the rubbing-in method. Using your fingertips and thumbs, take small amounts of the cold butter and tiger nut flour mixture and rub them together, from little finger to first finger. Raise your hands above the surface so they are not warming the rest of the mixture. When the mixture looks like breadcrumbs, add the coconut palm sugar (and cinnamon, if using - see note below) and mix together with a fork before spooning on top of the fruit. 

If you like the spicy, sweetness of ground cinnamon, a teaspoon added to the crumble mixture before baking will complement the apple in Apple & Blackberry Crumble beautifully. 


Carbohydrate 39g Protein 3g - per serving (Apple and Blackberry)

Carbohydrate 29g Protein 3g - per serving (Raspberry and Blackberry)


Tiger Nut Victoria Sponge

by Susan Smith in


I don’t see my sister that often but when I do I try to make it something of an occasion. She travelled up from London to Nottingham on a business trip this week, but since my house is currently akin to ‘Steptoe’s parlour’ (the entire top floor including my dressing room and bedroom have had to be cleared and vacated for refurbishment and re-decoration), I was unable to offer her overnight accommodation. I decided the next best thing I could do was to bake a cake.

Thankfully, Sarah volunteered to host our impromptu tea party at her house, which involved buying a selection of the finest teas she could find (my sister is something of a tea connoisseur) but I still had to devise a last-minute, quick and easy, gluten, grain and refined sugar free cake from scratch. Overwhelmed at the prospect it was a bit touch and go as to whether a visit to our local deli wouldn't be a better option, but then I remembered…

When my two children were little I used to regularly take them on very long walks (at least 5 to 10 miles) mainly because I wouldn’t let them sit for more than 2 hours a day glued to the television screen (thank goodness computer games hadn’t been invented). Anyway, I think more often than not they were persuaded to go the distance with me because I promised them freshly-baked cake on our return. At that time, my go-to cake recipe was for a Victoria Sandwich, which I could weigh out and quickly knock-up in a food processor in about 10 minutes flat.

The memory of an all-in-one method for making cake was sweet relief in the midst of the current crazy-busy situation I’m in. All I had to do was devise a healthy new recipe without a sniff of the refined self-raising flour, flora margarine and caster sugar, which so reliably whizzed itself up to seeming perfection thirty-plus years ago.

Fuelled by a taste for nostalgia, I am so excited that my re-invention of a Victoria Sandwich works just as well as the original. Strictly speaking, a classic Victorian sandwich recipe firstly involves weighing the eggs and then weighing out the same quantity of butter, sugar and flour before laboriously creaming the ingredients together with a wooden spoon - certainly not with a whisk - or, as in this recipe, a food processor. However, only the cook will know the difference, because this cake only takes about 10 minutes to make, not 30 minutes!

The result is an evenly risen, delightful party cake full of golden spongey goodness, which I think owes much of its success to tiger nut flour. Baking it wasn’t all plain sailing. The amount of cake batter my recipe made wasn’t enough to fill two 20cm/8” sandwich tins and, since I don’t have any smaller sized tins, I ended up piling all my cake mixture into just one of the sandwich tins and manually splitting the cooked cake through the middle with a serrated knife after it had completely cooled down (see note below).

Also, because tiger nuts are naturally sweet, I think I could have got away with using less honey i.e. 100g rather than 125g (to make my cake more low-carb) - however, as everyone agreed it wasn’t too sweet for their taste, I’ve left the original recipe alone. Just a word of caution if you’re concerned about your carbohydrate intake, make sure you have a few more friends to share it than I did - four of us happily (and all too easily), devoured the whole cake in just one sitting!

To make my cake extra special, I used whipped cream and fresh strawberries as well as 100% pure fruit spread to fill and decorate it. Whether you prefer to keep your cake simple or make it more luscious, I can promise you that this light and lovely easy-to-make cake recipe is a teatime winner. 

Tiger Nut Victoria Sponge (10 servings)

Ingredients

200g tiger nut flour

2½ level tsp gluten-free baking powder (I used Waitrose Cook’s Homebaking brand)

200g butter, softened + a little extra for greasing the tin(s)

4 large organic eggs

125g raw clear organic honey

150g 100% strawberry fruit spread (I used St Dalfour)

200ml organic double cream

225g fresh strawberries, washed and dried - approximately 150g hulled and sliced and 75g left whole (for decoration)


Instructions

Heat the oven to 175℃ / 350℉ / Gas mark 4

Grease and bottom line (with non-stick baking parchment) either 1 x loose-bottomed 20cm (8 inch) sandwich tin OR 2 x 15cm (6 inch) loose-bottomed sandwich tins.

Sift the tiger nut flour and baking powder together into a medium bowl.

Fix the double-bladed ’S’ shaped knife into the food processor and place the butter, honey, flour/baking powder and eggs into the processor bowl. 

Process for about 30 seconds until well mixed and a creamy (not runny) consistency. You may need to scrape down the sides of the of the bowl once or twice to make sure everything is incorporated.

Tip the cake mix into the prepared cake tin(s), spreading out evenly and levelling off the surface with a palette knife, then place into the oven. 

Bake the single 20cm (8”) cake for about 30 mins OR, if you’ve divided the cake mix between two 15cm (6”) sandwich tins, for about 20 minutes - until risen, golden-brown and firm to the touch. Also, if you put your ear close to the surface of the cooked cake it will kind of ‘sing’.

When ready, remove from the oven and allow to cool for 5 mins in the tin(s), before turning out onto a wire rack and cooling completely.

Split the single cake horizontally into two even halves, if required. Sandwich the two halves (or the two separate cakes) together by spreading the strawberry preserve onto one half. Top with the second half of the cake (cut side down, if you had to slice a whole cake through the middle)

For a special occasion, lightly whip the cream until it stands in soft peaks (don’t over whip it as it’ll be difficult to spread out evenly on top of the fruit spread). Fill the cake with the whipped cream and sliced strawberries. Put the second half of the cake on top (see above) and decorate with whole strawberries if liked.

Notes

N.B. I need to confirm the exact size of sandwich tins best suited to this recipe - 2 x 15cm is a guesstimate based on my only experience of making this cake in a larger tin. It is obviously easier for you to bake the cake halves separately in two tins rather than having to manually cut one cake horizontally through its middle afterwards. Please let the cake cool down completely before attempting to do this, otherwise it might fall apart. You still need a steady hand and clear vision to make an even cut! 

To avoid wire rack marks when you’re baking your cake in two tins, put a clean tea towel over the cooked cake in the tin, put your hand on top of the tea towel and turn the tin upside-down onto your hand and the tea towel - then carefully turn it from your hand onto the wire rack to cool completely.

If you are making a 15cm (6”) diameter sandwich cake, you may want to reduce the amount of whipped cream and strawberries for the filling accordingly. However, if you’re just using fruit spread to sandwich this size of cake together, the quantity shown in the above recipe will still be correct. 


Carbohydrate 29g Protein 5g - per serving


Chocolate Tiger Nut Stollen Bites

by Susan Smith in , ,


If you had a go at making Tiger Nut Horchata last week, you might be thinking that despite the tiger nut pulp leftovers (I just feel guilty for throwing it away), horchata is such a delicious, healthy drink it deserves to be a ‘keeper’. If so, today’s recipe for Chocolate Tiger Nut Stollen Bites answers the need for thrift by transforming tiger nut pulp into a superfood energy bite that’s as enticing as tiger nut milk itself.

On the other hand, if you haven’t yet tried homemade horchata, this week’s recipe might just be the means to an end…

Chocolate Tiger Nut Stollen Bites are simply yummy - chocolatey, fudgy, fruity and nutty all at the same time - but they won’t cause your blood sugar levels to spike. A really healthy option when you’re craving something sweet, these chocolate-coated balls of fibre-rich goodness are packed full of  vitamins, minerals and protein and are perfect to enjoy anytime you feel the need for an energy-boosting snack. I find them seriously addictive with my favourite morning Nespresso, so the next time I make a batch of Tiger Nut Horchata, I’ll be using up all the residual tiger nut pulp in one go and doubling up the recipe below for these irresistible, no-added sugar sweeties!

They’re also dainty and elegant enough to serve as after-dinner petits fours.

Chocolate Tiger Nut Stollen Bites (Makes 32 ‘bites’)

Ingredients

50g whole almonds

50g pecans

100g tiger nut pulp (left over from making horchata)

100g (about 6-8) Medjool dates, with stones removed

50g organic Goji berries

30g coconut butter

45g dark chocolate chips

¼ tsp sea salt

For chocolate coating (optional)

75g chocolate chips, melted

Extra Goji berries, for decoration (optional)


Instructions

Put half the almonds and pecans into a food processor and pulse together until they are coarsely chopped into small pieces (the texture should be slightly coarse with some bigger pieces, to add ‘bite’ to the final mixture). Tip the chopped nuts out into a bowl and set aside.

Add the remaining almonds and pecans to the bowl of the food processor and whizz until very finely chopped. Add the tiger nut pulp and whizz some more until everything is well combined.

Add the pitted dates to the mixture and whizz again until the mixture becomes sticky and starts to form a dough. 

Add the Goji berries and coconut butter and process again until well incorporated. Keep whizzing until you have a thick smooth paste (the texture of almond paste/marzipan).

Add the chocolate chips, sea salt and the reserved chopped nuts and pulse (minimally) several times to ensure that the chocolate and nuts are evenly distributed throughout the mix whilst still retaining their texture.

Roll the mixture into small balls between the palms of your hands (10g per ‘bite’ is just the right amount) and store in the refrigerator.

For chocolate coating, melt 75g of chocolate chips in a heatproof bowl set over a barely simmering pan of hot water (do not allow the bottom of the bowl to touch the surface of the water).

When the chocolate is melted, stir with a metal spoon until it is smooth and glossy then remove from the heat. 

Using a couple of teaspoons to help you, carefully drop the tiger nut stollen balls one at a time into the melted chocolate and turn them over and around until evenly coated. Allow any excess chocolate to drip back into the bowl before placing each coated bite onto a baking tray lined with waxed paper. Leave alone until completely set. Decorate each with a single Goji berry, if liked.

Store in an airtight container in the fridge for up to a week - though they’re highly unlikely to last that long!

Notes:

You don’t have to cover Chocolate Tiger Nut Stollen Bites in melted chocolate but I think the chocolatey-taste-hit and ‘snap’ of the cold chocolate shell surrounding a soft, fudgy centre makes for a decidedly more decadent experience.

Dark chocolate can develop a whitish-grey ‘bloom’ on its surface when kept in the fridge. Although blooming may make the chocolate look less appetising it is still perfectly safe to eat. I deliberately didn’t ask Sarah at Mirror Imaging to photograph my tiger nut stollen bites until they were four days old and, as you can see, they look fine - not as glossy as chocolate kept at room temperature but still looking good. 

I coined the name ‘Stollen’ (a traditional German Christmas cake) for these little bites because that’s what their taste and texture remind me of, though I didn’t want to wait for next Christmas to share the recipe! When the time is right, a dash of ground cinnamon added to the mix would certainly make for a distinctly Christmassy treat.

The Goji berry is a nutritionally rich, dried red fruit from Tibet, Quinghai Province that is packed full of minerals, including zinc, calcium, selenium and iron. Goji Berries contain more than 11% protein, including 18 amino acids and all 8 of the essential amino acids. They’re also very rich in beta-carotene and supply up to 500 times more vitamin C than oranges! 


Carbohydrate 7g Protein 1g - per bite


Tiger Nut Horchata

by Susan Smith in


In the heat of summer our thoughts are often wont to turn to ice cream. However, with my new found friend the tiger nut, otherwise known as chufa (pronounced Choo-fah), I’ve discovered a serious contender when making my first batch of ice-cold Tiger Nut Horchata. There can simply be nothing more refreshing, or good for you, than downing a glass of this Spanish-style refreshment on a hot day.

Tiger Nut Horchata a.k.a. tiger nut milk is a delicious creamy, milk-like drink that can be best described as ‘liquid gold’ for the health conscious. Tasting so good and loaded with resistant starch, raw tiger nut milk (and whole organic tiger nuts eaten as a snack) are a veritable powerhouse of nutrients (see my last two blog posts for more information). Suffice to say, tiger nuts are an original Paleo superfood with a ratio of carbohydrates, fats and protein so similar to human breast milk it almost beggars belief. Tiger nuts are, after all, just a brown, wrinkly vegetable tuber!

In spite of its name, tiger nut milk is both nut and dairy free, which is an absolute boon for people who are lactose intolerant or who suffer from a nut allergy. It’s also gluten-free so coeliacs needn’t go without either. You can use Tiger Nut Horchata as a milk replacement in tea, coffee, poured over our Nut & Seed Granola for breakfast, and pretty much for everything that calls for normal milk. Naturally sweet, tiger nut milk is non-allergic, safe for diabetics and, since tiger nuts do not contain inflammatory omega-6 fats, Tiger Nut Horchata makes for a much healthier alternative to dairy milk or other nut milks.

Most recipes I’ve found for Tiger Nut Horchata (Horchata de Chufa) are full of refined sugar (up to 200g of sugar per 250g of tiger nuts) but because tiger nuts are intrinsically sweet-tasting, I think it’s debatable whether tiger nut milk actually needs any added sugar at all. In the end I decided to stay true to Spanish tradition (I confess my tiger nut milk did taste a little ‘thin’ without) but I have so moderated the amount and type of sweetener in my Tiger Nut Horchata, it still faithfully follows Primal and Paleo dietary guidelines. My sweeteners of choice in this unique recipe are small amounts of raw organic honey and liquid stevia, which both make the grade (to see why, please read The Definitive Guide To Sugar on Mark’s Daily Apple). The end result is a slightly thickened, rich, creamy, sweet (but not too sweet), seriously satisfying vegetable milk that’s fit for the gods.

Using heathy sweeteners rather than refined sugar, I can well imagine Tiger Nut Horchata justifiably becoming the world’s next healthy-drink ‘craze’. And, with that thought, I drink to your good health. Salud!

Tiger Nut Horchata (makes 1000ml / 1 litre)

Ingredients

250g organic tiger nuts, covered with cold water by 5cm (2”) and left to soak overnight at room temperature

1000ml (1 litre) fresh, filtered water

40ml raw organic liquid honey (I used mild-tasting Raw Health organic acacia flower honey)

2 drops liquid stevia (*see note below for Vegan Tiger Nut Horchata) 

Organic ground cinnamon

Fresh ice cubes

Whole cinnamon stick(s), if liked


Instructions

Take your Nut Milk Bag and set it over a deep bowl. 

Drain the tiger nuts, rinse them well under cold water then drain again and tip into the blender container. Add the filtered water, the honey and 2 drops of liquid stevia, then secure the lid and blend on high speed until completely homogenised and smooth - this will take about 3-4 minutes (depending on your blender). After blending, if the mixture seems a little too hot to handle, allow it to cool down before proceeding to the next step.

Carefully pour the blended tiger nut mixture into the nut milk bag, tighten the tie at the top of the bag to hold everything inside, then using your hands firmly squeeze out all the liquid until you’re left with only dry tiger nut pulp.

Cover the bowl containing the tiger nut milk and cool completely, then transfer to a glass bottle or lidded container and store in the refrigerator for up to 4 days. 

To serve, third-fill a glass with ice (small ice cubes are best), shake or stir your chilled horchata well then pour over the ice and sprinkle a large pinch of organic ground cinnamon on top (**see note below) 

For a final flourish, add a whole cinnamon stick to each glass and use as a swizzle stick to distribute the cinnamon flavour throughout your drink.  

Notes

You’ll need a powerful blender and a strong Nut Milk Bag to ensure this simple Tiger Nut Horchata recipe is a breeze for you to make on a regular basis. You can use 2 or 3 layers of wet cheesecloth or cotton muslin to strain your tiger nut milk through but the Nut Milk Bag sold by Love Tree Products is strong, re-usable and easy to clean. it also produces a silky-smooth milk with no bits in it. I personally wouldn't want the mess, the faff or the unpredictability of making a DIY version!

*To make Tiger Nut Horchata vegan, simply leave out the raw honey and double the drops of liquid stevia (to 4) for the same level of sweetness.

It’s recommended you don’t discard the tiger nut pulp, instead dry it out in an oven and use as a substitute for desiccated coconut. Alternatively, convert into nutritious Tiger Nut Energy Balls

** I actually prefer to put my refrigerated horchata into a blender with half dozen ice cubes and whizz together for about 10 seconds to break up the ice for a super-cold drink that doesn’t smack you around the mouth with ice cubes every time you take a sip (it was Sarah that insisted I put a single ice cube in the glass for the photographs!) You can also put the horchata into the freezer for about an hour to turn it into a ‘slushy’. Which suggests to me that I should be creating a tiger-nut-milk-based recipe for ice cream, sooner rather than later!

To calculate the carbohydrate content of this recipe I’ve referenced whole tiger nuts, not tiger nut milk. Although carb grams per serving looks relatively high, there is a significant amount of tiger nut sediment that’s discarded after squeezing out the milk. Also, some of the carbohydrate content in raw tiger nuts is in the form of a unique fibre known as resistant starch, which cannot be absorbed by the body in the process of digestion. This means it passes through your system without deleterious effects on blood sugar or insulin levels. Similarly, you don’t obtain significant calories from resistant starch either.

However, resistant starch is a highly beneficial pre-biotic that feeds the friendly bacteria in your gut, which in turn provides numerous health benefits that can ultimately assist in weight loss. Your healthy gut flora actually need this ‘food’ to survive and thrive, Thus, Tiger Nut Horchata is recommended for even the most carb sensitive individual. Even if you are trying to lose weight, it’s more important to focus on eating real, nutritious food than to worry unduly about counting grams of carbohydrate or calories. The message is: ditch all grains, legumes, refined sugar and unhealthy processed seed oils and fats, and your carbohydrate and calorie intake will happily take care of itself!

Caution: Tiger nuts and tiger nut flour have very high amounts of resistant starch which, if you’re not used to, can cause discomfort and bloating when eaten in large amounts. It is therefore advised that you slowly introduce resistant starch into your diet (less than a teaspoon per day) and gradually increase your tolerance to your particular comfort level, which will hopefully be about 15-30 grams a day. 


Carbohydrate 55g Protein 5g - per 250ml serving of Tiger Nut Horchata (without ice)


Tigernut ‘Hob-Nobs'

by Susan Smith in


Last week Sarah and I went clothes shopping. We both stared in disbelief at the clothes tag, which read Size 4. The garment we’d picked up looked the right size but in unison we both exclaimed ”I’m never a Size 4!” Well, at least as far as Whistles is concerned, we both are, and so we ended up fighting over a single pair of trousers (Sarah’s sense of Birthday Girl entitlement meant she won!)

The surprising thing is, now I’m developing Primal-friendly recipes for this blog, we eat far more guilt-free baked and sweet treats than ever before, yet we continue to drop dress sizes or, at the very least, 'stay put' at our optimum weight. True, we have recently cut back on our alcohol intake (one bottle of Champagne between three of us is now our idea of binge drinking!) but still…way to go! I am absolutely convinced that an eating strategy that’s highly nutritious, low in carbohydrates and much higher in fat than you’ve been told is good for you, is decidedly the best if you want to lose excess weight.

The downside? For a full-on, enjoyable experience whilst you shed unwanted inches, you actually have to cook! I think It’s a crying shame that most people seem to prefer ready-meals, eating out, microwaving, meal-replacement shakes and other fast food options rather than getting into the kitchen with their family and cooking fresh, nutritious food for themselves. Consequently, they then either have to resort to extreme bouts of exercise or workouts in the gym in the hope they can ‘burn’ off their foodie indiscretions (how much time does that take up in the “I’m too busy to cook’ lifestyle?), or allow themselves to get fat. People need reminding that a good diet isn’t just about weight loss and being thin, it’s about being healthy and giving your body all the nutrients it needs so it doesn’t fall prey to debilitating disease.

To get you started on your real food adventure (if you haven’t already), Tigernut Hob-Nobs are where it’s at! These crunchy, crumbly biscuits are child’s play to make, moreishly delicious to eat and are full of goodness. Perhaps it’s most useful to begin by saying what these biscuits don’t contain:

  • No grains
  • No gluten
  • No sugar
  • No dairy
  • No eggs 

What you do get from taking the time to bake Tigernut ‘Hob-Nobs’ are some remarkable health benefits:

  • Tiger nuts have a high content of soluble glucose and oleic acid, along with high energy content (starch, fats, sugars and proteins)
  • They are rich in minerals such as phosphorous and potassium, calcium, magnesium and iron necessary for bones, tissue repair, muscles, the blood stream and for body growth and development. 
  • They are rich in vitamins E and C. Vitamin E delays cell ageing, improves elasticity of skin and helps to clear the appearance of wrinkles, acne and other skin issues.
  • Sugar-free tiger nut milk (Primal Plate recipe for Horchata coming soon) is suitable for diabetic people and also helps in weight control. It is recommended for those who suffer from indigestion, flatulence and diarrhoea because it contains digestive enzymes like catalase, lipase and amylase. 
  • The high content of oleic acid has positive effect on cholesterol, thereby preventing heart attacks and thrombosis. 
  • Tiger nuts reduce the risk of colon cancer and prevent constipation. 
  • Tiger nuts also contain a good quantity of vitamin B1, which assists in balancing the central nervous system and helps to encourage the body to adapt to stress. 
  • The health benefits reflect a reduction of low density lipoprotein-cholesterol, which is good for sports’ men and women and those intending to lose weight.

In summary, I really can’t imagine any other snack food that would nutritionally support anyone (including gym bunnies and athletes) better than my Tigernut ‘Hob-Nobs' Nor a better way to indulge in some childhood nostalgia than with delicious raw whole milk and biscuits. Scrumptious!

Go nuts for tiger nuts! You can buy them online from The Tiger Nut Company

Our Tigernut Hobnobs are perfect with a glass of raw whole milk

Our Tigernut Hobnobs are perfect with a glass of raw whole milk

Tigernut ‘Hob-Nobs' (Makes 16 biscuits)

Ingredients

75g coconut butter (not coconut oil)                            

2 tsp vanilla essence

150g tiger nut flour

¼ tsp sea salt                

1 tsp baking powder

75g macadamia nuts, chopped (for ease, I pulse the nuts several times in a food processor - however, don’t process them too long or you’ll end up with nut butter!)

50g cup unsweetened shredded coconut 

3 tbsp cold coconut water


Instructions

In a large bowl combine tiger nut flour, salt and baking powder.

Use your fingertips to rub the coconut butter into the flour, salt and baking powder until you have a mixture that resembles coarse breadcrumbs with no large lumps of coconut butter remaining.

Using a fork, stir in the vanilla essence, chopped macadamia nuts and desiccated coconut.

Stir in the coconut water then abandon the fork and knead the mixture with your hand until it all comes together to form a firm dough.

Roll the dough out between two sheets of cling film to 6mm/ ¼ inch thickness. Using a 6cm / 2½ inch biscuit cutter, cut out 16 biscuits. As you go, you’ll need to gather up the off-cuts and press them back together before re-rolling out to make more biscuits N.B. because tiger nut flour is gluten-free, you can work the dough several times over and it won’t get tough.

Lay the biscuits 2cm apart onto a parchment lined baking sheet. Cover the biscuits loosely with cling film then place the baking sheet in the fridge to chill for 20 minutes. 

Preheat oven to 160℃ / 325°F / Gas mark 3

Transfer the baking sheet to the pre-heated oven and bake for 20 minutes until light golden brown. Turn the tray around halfway through the cooking time to ensure the biscuits brown evenly.

Remove from the oven and transfer the biscuits to a wire cooling rack - they’ll crisp up even more as they cool, so try to distract yourself from eating them until they do!


Carbohydrate 12g Protein 2 g - per biscuit


Summer Berry & Lemon Cream Tigernut Tart

by Susan Smith in , ,


This week was the start of Wimbledon (think strawberries and cream) and culminates in Independence Day (Saturday, 4th July) - think, ‘Happy Birthday’, to my beautiful daughter, Sarah! After that Mirror Imaging is into a run of photoshoots and weddings on five consecutive weekends that will keep us both busy until the end of September. So with that in mind, I really wanted to make an extra special summer birthday ‘cake’ for Sarah, not only to celebrate her birthday but also the last of our leisurely weekends for the foreseeable future!

Today, I am so excited to be able to bring something completely new to the party - a delicious summer fruit tart made with tiger nut pastry. “Tiger, erm what?”…I hear you say!

Q. When is a nut not a nut? A. When it’s a tiger nut! 

Tiger nuts, also known as ‘earth almonds’ and in Spain, ‘chufas’, are the sweet, brown, nutty, ‘super’ tubers of the sedge plant (a stubborn, weed-like grass), which is grown and harvested like potatoes. And, they are incredibly good for you. 

Truly Primal/Paleo (our early human ancestors used to forage and feast on this nutrient dense wonder food), tiger nuts have a nutritional profile that really holds its own against red meat, olive oil and even human breast milk. In fact, tigernut milk (recipe for Spanish style ‘Horchata de Chufas' coming soon) is the healthiest substitute for dairy milk because it is rich in monounsaturated fat and does not contain inflammatory omega-6 fatty acids like other nut milks do. Tiger nuts are also full of dietary fibre, particularly resistant starch, are high in minerals (magnesium, phosphorous, potassium, calcium and iron) and Vitamins C and E. Sounds to me like the under-utilised tiger nut might well be the answer to 795 million people around the world still struggling with hunger and malnutrition! 

And, in modern society, where people are often overfed and under-nourished, research suggests that tiger nuts can help reverse or stop the progression of degenerative diseases such as  diabetes, heart disease, circulatory problems, digestive disorders, autoimmune diseases and some cancers, including colon cancer.

I’ve only just re-discovered tiger nuts (they were sold as sweets when I was little) as part of my ongoing search for grain-free, gluten-free and now nut and allergy-free alternatives to grain flours. To say I’m chuffed with the way my chufa pastry lined Summer Berry & Lemon Cream Tigernut Tart worked out, is an understatement! This new kid on the block for lovers of Primal/Paleo treats, ticks all the boxes for healthy, nutritious food that makes you glad to be alive - indeed a little bit smug - because who would guess that this gorgeous Summer Berry & Lemon Cream Tigernut Tart would be entirely compatible with a low-carb, refined sugar-free diet?

When cooked, this tigernut pastry has more the taste and texture of a biscuit cheesecake base than it does shortcrust pastry per se, but I like this. As pastry goes, it’s very user friendly. It rolls out like pâte sucrée (French name for sweet shortcrust pastry) and was incredibly well behaved when I lined the flan case - although a chunk fell off one edge when I lifted my rolled pastry disk off the work surface, it was easy to patch up and press everything back together again with my fingers, once it was in the tin. 

Best of all, because tiger nuts are naturally sweet, you don’t need to add sugar or other sweeteners. I’ve been wanting to devise a recipe for Primal cheesecake for some time, so when I do I’m certain this recipe will double-up, adapting itself to both sweet tarts and cheesecakes beautifully.  

Meanwhile, I hope you’ll make the most of summer’s juiciest berry-fruits in this exceptionally lovely looking tart - I think summer celebrations will be the sweeter for it. 

Summer Berry & Lemon Cream Tigernut Tart (Serves 10)

Ingredients - for tiger nut pastry

225g tiger nut flour (available online from The Tiger Nut Company)

1 tsp baking powder

2 tsp pure vanilla essence

30g unsalted butter, melted

1 large organic egg, beaten

a little extra melted butter (about 5g), for greasing 


Instructions - to make the pastry case

Pre-heat the oven to 180℃ / 350℉ / Gas mark 4.

Grease the base and sides of an 8 inch loose-bottomed fluted flan tin with melted butter.

Combine the tiger nut flour, baking powder and vanilla essence in a bowl.

Mix in the melted butter, then add the beaten egg and stir with a fork to combine.

When roughly combined, abandon the fork and bring the mixture together with your hand to achieve a firm but moist dough. 

Roll out to a round thickness of 3mm-6mm between two sheets of plastic cling film (to avoid the dough sticking to your worktop or rolling pin). As you roll, turn regularly to achieve an even round shape that is approximately 2½cm/1” larger than the circumference of your tart tin (this allows for the sides of the tart). 

Carefully peel off the top layer of cling film, then loosely wrap the pastry around your rolling pin removing the bottom layer of cling film as you do, then using the rolling pin to support the pastry, lift it one piece directly into the tart tin. If it splits or breaks in transition (mine did!), don’t worry, just patch it back together by pressing it firmly and evenly into the base and up the sides of the tin with your hands. N.B. Since tiger nut flour is gluten-free it’s easier to handle than normal shortcrust pastry, because it doesn't get harder and tougher if you need to re-work it. Once it’s settled in the tart tin in an even thickness, trim any raggedy bits of pastry off the top edge by going around with a sharp knife (chef’s privilege to eat these pastry off-cuts raw!)

Prick the base of the tart all over with the prongs of a fork. 

Bake for about 12-15 minutes, or until lightly browned and crisp. Leave to cool completely in the tin before transferring to a serving plate.  


Ingredients - for lemon cream filling

150ml Primal Lemon Curd

150ml Crème Fraîche (I used Roddas)

150ml Double Cream


Instructions - to make the lemon cream filling

Put all the ingredients into a bowl and whisk until the mixture thickens and will stand in soft peaks.

Cover and store in the refrigerator until you’re ready to assemble your tart. 


Ingredients - for fruit topping

250g fresh strawberries, picked over and cleaned as necessary

175g fresh raspberries 

100g fresh blueberries

A few sprigs of fresh mint or lemon balm, to decorate


Instructions - to assemble the tart 

Not more than an hour before serving the tart, place the pastry case onto a serving plate. 

Spoon the lemon cream filling into the tart case and spread out evenly.

Arrange the fruit attractively on top of the lemon cream filling, then garnish with sprigs of fresh mint or lemon balm. 

Notes

Although this tart looks like ‘fancy-pants’ French patisserie, please do not be intimidated by the recipe. Rolling out the pastry and lining the tart tin is the only challenge - and only then for the novice cook. Everything else is quick and easy to do - including making the pastry and assembling the tart. If you need to, just follow the photographs for how to arrange the fruit topping.

I suggest you make a batch of yummy Primal Lemon Curd up to several days in advance (in readiness for the lemon cream filling) and store (hide!) in the refrigerator until you’re ready to assemble your tart. 

I like the visual treat of using several different types of summer berries as the topping for this tart - and the particular selection I’ve chosen all marry well with the lemon cream filling. However, just one type of fruit (blackberries, cherries, sliced peaches, apricots, etc.), or any combination you like, will work. Just select the sweetest, juiciest and most visually appealing fruit you can find.

Refrigerated in an airtight container, this tart still eats really well the next day.


Carbohydrate 26g Protein 5g - per serving