No-Churn Double Chocolate & Cherry Ice Cream

by Susan Smith in


Last week, the weather forecasters promised us that there was a heatwave heading our way and in response to this welcome “summer-where-are-you?” turnaround, I decided to celebrate by making ice cream. Second time around (the first batch was as solid as a rock!) it was voted a spectacular success. With a taste and texture to rival Haagen Daz or Green & Black’s, this sophisticated, silky-smooth, chocolatey ice cream has no added sugar and doesn’t need an ice cream machine to make it. It tastes so good, I’m thinking of setting up in business!

Most no-churn ice creams rely on just two ingredients - straight-out-of-a-tin sweetened condensed milk and double cream. Unfortunately, as fine and dandy as it may sound to just open-up a tin and whip up some cream to make ice cream, a little more stove-top effort is required for the health conscious who don’t eat sugar. Actually, it’s more time than effort that’s needed here. The base for Primal Plate’s version of no-churn ice cream is simply made from organic full-fat coconut milk and Sukrin Gold - a natural, healthy, almost zero-calorie, sugar-free sweetener - gently simmered together for 45-60 minutes until it bubbles down into sweetened condensed milk. Easy or what?

Choosing the flavourings for my ice cream was a no-brainer. Just the sight of dark, sweet, juicy English cherries at the height of their seasonal deliciousness (just 4 weeks every July and August) is enough to tempt me to binge on more of them than I can reasonably afford. However, taking this pleasure one step beyond bliss is the winning flavour combination of cherries and chocolate brought together in a delectable ice cream.

Better still, dark chocolate and cherries are ranked No.1 and No.3 respectively on the Top Ten Paleo Super Foods which means that not only does this decadent ice cream taste divine, it is really good for you too. Anti-inflammatory, anti-carcinogenic, cardio protective…the list of health benefits for cherries and cacao goes on. So if you love ice cream, dark chocolate or, like me, cherries, now is the time to indulge yourself completely guilt-free with this low-carb, no added sugar, cooling chocolate and cherry iced cream sensation. 

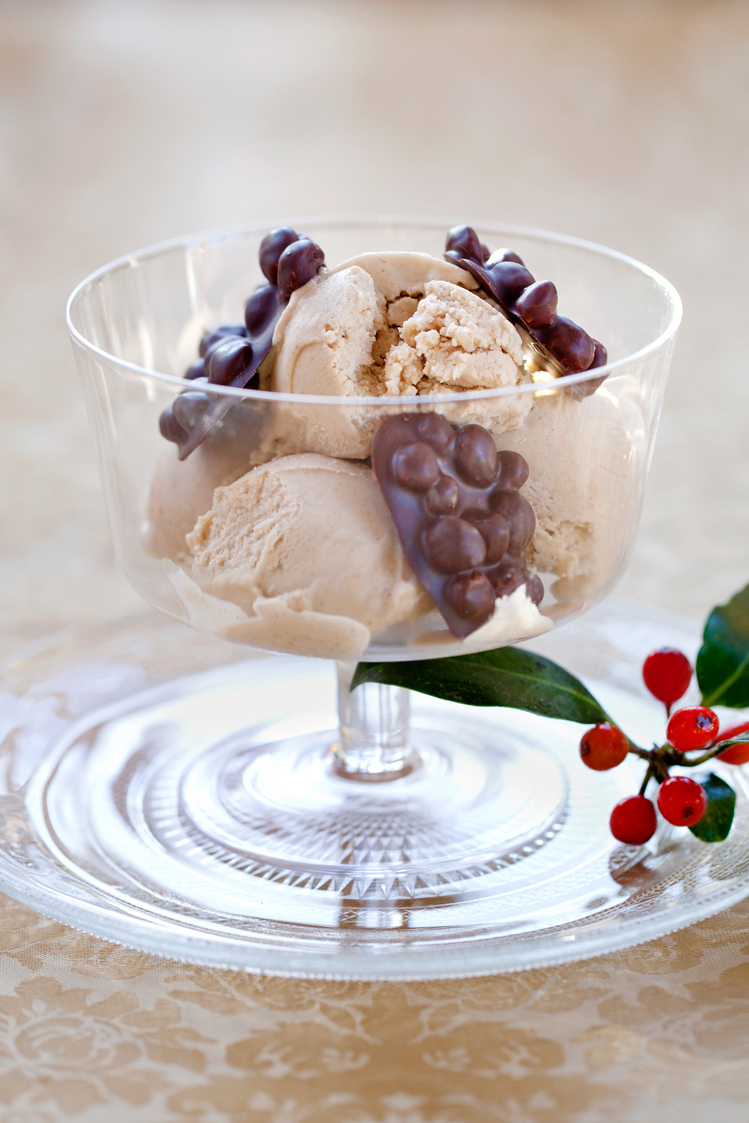
Although temperatures in the East Midlands never really did hit the high spots this week, this No-Churn Double Chocolate & Cherry Ice Cream most certainly did. Whether you’re stepping out into the sunshine to enjoy a refreshing scoop or two, or you want to create a fabulous 5-star dessert for your next summer soiree, I think you’ll be hard pressed to find anything more pleasing.

No-Churn Double Chocolate & Cherry Ice Cream (Serves 6)

Ingredients

300ml organic double cream

400ml organic full-fat coconut milk

50g Sukrin Gold

30g organic raw cacao powder, sifted

1 tsp pure vanilla extract

6-10 drops organic clear liquid stevia

50g dark chocolate (at least 70% - I used Callibaut 72% Satongo chocolate chips

225g dark cherries

Extra to serve:

Whole cherries, washed

Dark chocolate, finely chopped or grated


Instructions

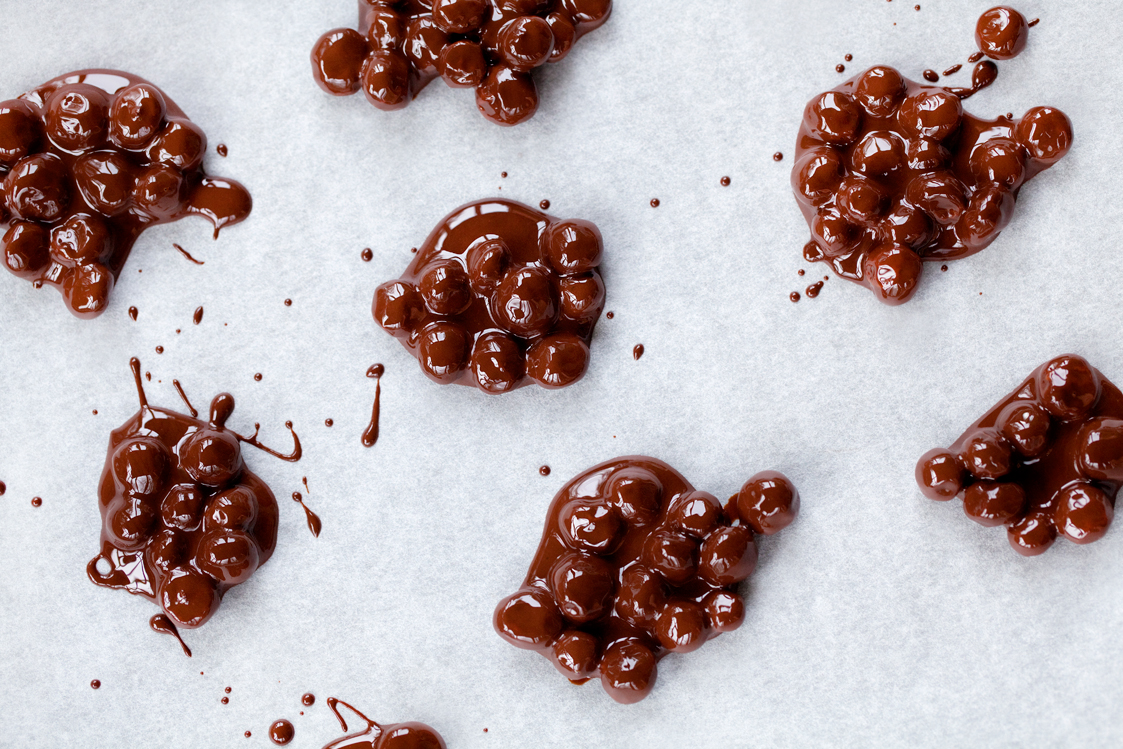
In a medium saucepan, bring the coconut milk and Sukrin Gold to a light boil. Simmer on a low heat for 45-60 minutes, stirring occasionally (be careful, the mixture has a tendency to bubble-up and splatter when stirred!) or until it has reduced in volume by half. Do not cover the pan.

Mix in the raw cacao powder and vanilla extract and whisk together until all is combined and smooth. Pour into a large mixing bowl, cover and let it cool down to room temperature. Do not refrigerate.

Meanwhile, wash and pit the cherries and cut them into small pieces. And, if you’re not using chocolate chips, roughly chop the chocolate into small pieces with a serrated knife.

Add the double cream (straight from the refrigerator) to the bowl of cooled condensed milk.

Whip the cream and condensed milk together until slightly thickened and the mixture falls in ribbons from the whisk. N.B. The mixture just needs to hold its shape rather than stand in stiff peaks.

Add the chocolate chips and cherry pieces to the whisked cream then very gently stir everything together with rubber spatula until evenly combined.

Pour into a plastic freezer container, smooth off the top then press a piece of waxed paper (or cling film) directly onto the surface to stop ice crystals from forming. Cover with a lid and and place in the freezer for at least 3-4 hours.

Notes:

It’s easier to cut the cherries into pieces if you have them facing skin side up on your chopping board.

To soften the ice cream before serving, let it sit at room temperature for about 15 minutes or in the refrigerator for 30 minutes. 

Always start scooping ice cream from the outer edge where it is softest. This stops ice crystals forming on the outer edges when it’s refrozen. Before returning to the freezer, replace the waxed paper and container lid. 

Full-fat ice cream will become more solid the longer you freeze it. For the best texture and taste, eat within 2 weeks.   


Carbohydrate 16g Protein 5.5g - per serving


Lucky's Nut Truffles

by Susan Smith in ,


As I write this blog I’m sat at the end of my hallway with my computer balanced on top of a pile of books, hemmed in by displaced furniture and various bits of office paraphernalia (phase 3 of our annual home improvement and re-decoration schedule has been going on for what seems an interminable 4 weeks already) whilst my man stands next to me with his computer resting on a still unwrapped furniture delivery, trying to research plant variants that have sprouted in our garden, which we don’t recognise.

We’re not green-fingered, but we do like to try and make sense of our green space without destroying all life within it. You only have to look up to see that we’re unusual in this respect. It seems that the majority of people are hell-bent on ‘managing’ nature, particularly when it comes down to so-called tree maintenance a.k.a. the ceaseless year-round topping, lopping and felling of trees. Question: When is a tree not a tree? Answer: When some idiot has butchered all its magnificent branches back to stubs and spindly, finger-like projections have grown in place of the beautiful tree-shaped canopy that once was…or cut it down completely to an ugly stump. 

Stupid is as stupid does. I’m convinced the obsessive compulsion to mess with trees is a form of egocentric behaviour that satisfies man's craving for power and control. With big tool in hand - I mean chain-saw - I believe the power rush they get from hacking, sawing and destroying a living entity is an addiction that feeds on itself. Not only do they spoil the look of the trees that still stand, the resulting pitiful, topped and disfigured specimens are left with open wounds that are vulnerable to attack from invading pathogens (fungi and bacteria). Cutting back, thinning out and removing branches destroys a tree’s natural defences - the tree bark that protects the underlying tree tissue. It also threatens its life support system - the loss of leaves that are every tree’s source of food. Exposed to the sun, the cuts are in effect death wounds and the removal of a large percentage of leaf-bearing branches, starvation.

If a starving tree has enough energy, it will send out multiple shoots beneath the cuts to try and replace its leaves as quickly as possible. These new shoots will never be as strong as the original branch they emerge from and can easily snap off even years after they’ve grown back to the size that the tree was before it was attacked. Furthermore, trees can’t heal - they try to defend themselves by closing off their wounds with a tough, woody substance called wound wood. A tree’s ability to seal off its wounds depends on many variables; its age, species, health and vigour, the size and shape of the wound and the time of year. If a tree can’t respond quickly to its injury it falls prey to rot, insect infestation and wood decay, which in turn leads to a loss of vitality and vigour that results in the tree’s inevitable decline, dieback and structural failure.

It is of course a cunning way for tree cutters to future-proof their industry. If you didn’t need the services of a tree surgeon before, you most certainly will when your decayed and dying trees become a health and safety issue for you and your neighbours!

Despite all the ugliness surrounding them, people still have embedded in their sub-conscious that regular tree felling and pruning is both necessary and good. "It lets in more light; it prevents tree root damage to property; it stops the mess trees create (have they not heard of a broom?); wet leaves are dangerous; tall trees block TV/Sky/Broadband reception; it spoils my view; I can’t see the sky (!); I need the space for off-road parking…" are just some of the excuses given. Then there are the unqualified tree surgeons stalking the neighbourhood for mature trees that they can cash-in on, knocking on doors and persuading homeowners that their trees are an imminent threat unless they are cut-back. I give them short thrift, but many folk are convinced.

What these people don’t seem to know or appreciate is:

  • Trees give us oxygen and oxygen helps us breathe - a mature tree in season produces as much oxygen as ten people inhale in a year!
  • Trees give birds and animals shelter so if you cut them down you’re messing up their homes.
  • Trees help clear the air of heat and pollutant gases. 
  • Trees clean the soil - trees filter dangerous chemicals and pollutants out of the soil, which helps assure our food security. 
  • Trees absorb carbon dioxide and help stop global warming.
  • Trees help conserve rain (to prevent drought) and reduce the likelihood of flooding. They fight soil erosion by protecting the soil from surface flooding - binding soil to sloping land with their roots.
  • Trees help control noise pollution.
  • Trees mask ugliness and keep unsightly structures from view.  
  • Trees save energy. In winter they act as wind breaks - breaking the force of cold, blustery winds and reducing the cost of heating your home. In summer, strategically planted trees around your home shield your property from UV rays and reduce the need for air conditioning.
  • Trees give us food - e.g. nuts and fruits.
  • Trees improve human health and well-being. As well as offering cooling shade and protecting us from the sun’s harsh rays, they are aesthetically pleasing to look at. Full of life, strong and magnificent, their beauty is more than skin deep. Exposure to trees and nature calms the mind and uplifts the soul. Being in a natural environment surrounded by trees can lower blood pressure and heart rate. Hospital patients who have a view of trees from their window heal quicker, take less drugs and have fewer post surgical complications than those who don’t. Even babies born to mothers that live near to trees are less likely to be underweight. 
  • Trees increase property values significantly - they not only beautify your property and the surrounding area, there is less fear and violence in well-planted, green spaces than there is in and around homes in barren neighbourhoods. Houses surrounded by trees sell for 15-25 percent higher than houses with no trees. 

Since trees do so much to benefit humans, we think it’s best to leave them alone to do their job. No radical pruning of healthy trees is required or allowed! Our reward is a semi-wild garden that nature has developed into something quite Disney-like. As well as owls, doves, pigeons, innumerable songbirds, hedgehogs, mice, frogs, bats, the occasional pheasant seeking refuge from the local Sunday shoot, and a hungry female sparrowhawk that knows for sure there are rich pickings to be had, we live harmoniously alongside a small army of grey squirrels that are accidentally planting more trees.

Because humans have destroyed so much of the natural landscape, squirrels have been forced to adapt to a more urban environment to survive. Grey squirrels have adapted more successfully than their red squirrel counterparts, but that doesn’t excuse the widespread racism against grey squirrels, which vilifies them with exaggerated claims that they damage/kill trees by bark stripping and excuses the culling of them because, according to urban myth, grey squirrels are deemed pests that destroy property and cause a decline in red squirrel populations. As with the obsession for tree-pruning, it’s all a load of twaddle. Both red and grey squirrels strip tree bark to build their dreys (squirrel nests) and to get to the underlying wood as a source of nutrition when times are hard but, unlike human crime against trees, the damage they cause is minimal and it doesn’t kill the trees. Here are the facts about the demise of red squirrels and, as you might expect, it’s mostly down to humans!

Given that the natural habitat of squirrels is now disappearing at a rate of knots, they make their dreys in any tree-like structure they can find. Four years ago, around the time our next door neighbour cut down an entire copse of eighteen mature trees, one beautiful, dedicated, mamma squirrel sought shelter on our roof under the solar panels, where she built her drey and tried to raise her kittens (baby squirrels). Sadly, it was not meant to be. Somehow, mum sustained a fatal injury to her back and later that day (Friday 13th April 2012) two kittens fell out of their nest and slid straight off the roof - three storeys high - directly onto the solid concrete path outside our back door. What to do? Tiny, helpless and with their eyes still closed, we had no choice but to take on the immediate squirrel care challenge in front of us! 

In the first few weeks of life, baby squirrels don’t do much more than eat, sleep and grow. However, it wasn’t long before our two little boys became gorgeous handfuls of wriggly, noisy, messiness that took over our lives completely. Active during daylight hours, they lived right next to my desk in our home office. Despite the immense parental responsibilities thrust upon us, we soon discovered what a life-affirming joy these intelligent, industrious, characterful and acrobatic critters are. With the help and support of Clarissa Summers we loved and cherished little Kipp and Lucky 24/7, until they were about six months old and ready to be released back into the wild. Our boys may be long gone, but our love and respect for squirrels lives on.

Whether chasing each other from tree branch to tree branch, jumping around in the tops of our trees, sitting perfectly still in the classic squirrel pose with their tail arched over their back, pausing in front of us to munch on a nut or cheekily peering through the window to get our attention, squirrels are without doubt the cutest, most entertaining of all the wildlife species living in our garden, and we happily pay the price to secure their allegiance. Not only do we make executive-style squirrel boxes to keep them warm and safe, we’re also their most reliable food source - namely, an all-year-round supply of best-quality walnuts (their favourite), hazelnuts and, when in-season, acorns too. It’s part of a deliberate plan. The squirrels have learned how to exploit our generosity by approaching us with charming gestures that signal their need for more nuts, and we know that large quantities of these will be stored in the ground. As squirrels don’t always remember where they’ve buried their nuts, there’s always the potential for some of their cache to take root and grow into new trees.

Helping squirrels survive and thrive in captivity very much depends on what you feed them. As well as whole nuts, fruit and veggies, I used to make my two boys nutritious seed and nut balls that helped them grow strong and kept them noisily bouncing around their cage for hours. It seems timely that today’s recipe for Lucky’s Nut Truffles (no prizes for guessing why I’ve called them that) are an energy ball equivalent for humans. These blissful little bombs of goodness mix protein, vitamins, fibre, minerals and essential fats and are a chocolatey, nutty delight to enjoy any time you need an energy boost. Sweetly satisfying and sustaining, Lucky’s Nut Truffles are ideal for a pre or post workout snack, yet still dainty enough for some after dinner indulgence. Incredibly moreish, I suggest you squirrel away a plentiful stash for yourself in the refrigerator, where they could (but I predict won’t!) last a couple of weeks.

Lucky’s Nut Truffles (make about 22)

Ingredients

100g organic raw walnuts

100g organic raw hazelnuts, unskinned

15g raw cacao powder

100g Medjool dates, pitted (about 6)

1 ½ shots (60 ml) freshly brewed espresso-strength coffee

1 tbsp smooth almond butter

3 tbsp coconut butter

2 tsp organic ground cinnamon

2 drops organic liquid stevia

2 tsp pure vanilla extract

50g organic shredded coconut, for coating

Instructions

Pre-heat the oven to 180℃ / 350℉ / Gas mark 4. 

Put the pitted dates into a bowl and pour over the hot coffee. Set aside.

Place the walnuts and hazelnuts together on a baking tray and toast for 8-9 minutes. 

Place the shredded coconut on a separate baking sheet and toast at the same temperature for 5-6 minutes, or until a deep golden brown. Leave on the tray to cool.

Tip the toasted nuts - it doesn’t matter if they’re still warm - into a food processor bowl and blitz until finely chopped. Don’t allow all the walnuts and hazelnuts to become totally smooth as some slightly larger, crunchy pieces in the mix adds texture. Empty the ground nuts into a bowl and set aside.

Add the dates, coffee, cacao powder, almond and coconut butters, ground cinnamon, vanilla extract and liquid stevia to the now empty processor bowl (no need to wash it first) and process until the mixture clumps together into a sticky, gooey paste. You may need to scrape down the sides of the bowl a couple of times to ensure an even mix.

Add the toasted nuts to the paste and pulse everything together until the nuts are evenly distributed.

Using a dessertspoon, scoop the dough into individual bite-sized portions (approximately 17g each) and roll anti-clockwise between the palms of your hands into smooth, round balls.

To finish, roll the truffles in the toasted coconut. 


Carbohydrate 6g Protein 2g - per truffle


Chocolate Orange Brownies

by Susan Smith in


Excuse me for boasting but these are simply the nicest, fudgiest, most intense chocolate-orange flavoured brownies I’ve ever tasted! Dusted with non-caloric icing sugar and studded throughout with crunchy walnuts (decorate with a sprig of holly for good measure), these no-added sugar brownies capture the look and taste of Christmas in every delicious bite-full. 

I think they’re a brilliant, low-carb alternative to Christmas cake. And, they’re definitely not Terry’s, they’re mine!  

Chocolate Orange Brownies (makes 12)

Ingredients

180g unsalted butter, cut into cubes - plus a little extra for greasing

280g good quality dark chocolate (at least 70% cocoa solids)

160g walnuts

3 large organic eggs

100g Sukrin Gold

Zest of 2 large organic oranges, finely grated

1 tbsp pure vanilla extract (I used Ndali as it doesn't contain sugar)

180g finely-milled organic tiger nut flour

50-60ml freshly squeezed orange juice

Sukrin icing sugar, for dusting


Instructions

Pre-heat the oven to 180℃ / 350℉ / Gas mark 4. Grease a deep sided brownie baking tray (mine measured 18cm x 32cm) and line the bottom and sides with non-stick (parchment) paper. I recommend a single piece of paper cut and inch or so bigger than the dimensions of your baking tray and then cut down into each corner (with a pair of scissors) so the paper sits flat in the tin.

Break up the chocolate into small pieces and put into a heatproof bowl with the butter. Set the bowl over a pan of barely simmering water and leave to slowly melt, stirring occasionally. Alternatively, you can do this directly in a saucepan over a very low heat, stirring regularly. However, to avoid the risk of overheating the chocolate, take the pan off the heat whilst there are a few small lumps of chocolate still not melted - the residual heat will be enough for it to continue melting without spoiling. Allow to cool.   

Chop the walnuts into rough pieces (I do this by pulsing them a few times in a food processor) then set aside. 

Put the eggs, Sukrin Gold and vanilla essence into a large bowl and whisk together until well blended and really frothy. I use an electric whisk and allow about 8-10 minutes to get enough air into the mixture. N.B. Sukrin Gold doesn’t behave like sugar in this recipe insofar that, unlike some cake mixtures, this one won’t become mousse-like no matter how long you whisk it for!

Stir in the melted chocolate and butter mixture, then fold in the walnuts and tiger nut flour. 

Finally, add enough fresh orange juice to loosen the mixture a little and then pour into the prepared tin. The mixture should be just soft enough (though not runny) to find its own level in the tin but you may need to spread it out evenly with a flat spatula. 

Bake at 180℃ for 25 minutes - test with cocktail stick, it should seem ever so slightly under-cooked i.e. a few moist crumbs should stick to the cocktail stick when you withdraw it. 

Cool in the tray, then cut into 12 even squares.

Lightly dust with Sukrin icing sugar before serving.


Carbohydrate 18g Protein 6g - per brownie


Horchata Ice-Cream with Chocolate Tiger Nut Splats

by Susan Smith in ,


The countdown to Christmas has begun and I have so many festive recipe ideas whizzing around my head that I am struggling to keep pace with my imagination. As for the quantity of ingredients I have to purchase for testing and tasting all of Primal Plate’s foolproof meal alternatives in readiness for the most anticipated meal of the year, they threaten to blow my housekeeping budget!

In our house, all the traditional Christmas food favourites - meat-based, grain-based, high carb and loaded with sugar - are off the menu because we find no joy in eating anything that’s going to harm us, or hurt another. We take the view that since it’s the season of goodwill, this should include all our furred and feathered friends. 

You may be thinking that without the turkey and all its trimmings, the Christmas pudding, cake, trifle and mince pies, what’s left? The answer is, probably too much deliciousness for me to have sufficient time before the big day to share all my ideas with you…but I’ll give it a go. The recipes I’ve created, tested and/or adapted to make them low-carb and primal are the answer to all your entertaining problems if you want to eat well and stay healthy. The aim is to make your festivities more delicious, more fun and less stressful. 

Today’s blog post for Horchata Ice Cream is something I conceived back in July but since the homely warmth of sweet cinnamon is so Christmassy and the exotic spiciness of nutmeg so enlivening in combination with all things sweet and creamy, I think the timing of this brilliant get-ahead frozen dessert is even more appropriate for now. And everyone can join in the fun. Gluten-free, grain-free, no eggs, no dairy or nuts (coconut cream can be substituted for cashew nuts - see note below) and no sugar added, this decadently delicious, sweet-tasting ice cream almost beggars belief. Even the Chocolate Tiger Nut Splats that accompany it are a sort of fortuitous accident. 

Peeled organic tiger nuts are an extremely moreish, nutritious, sweet-tasting tuber packed with resistant starch (the unpeeled ones are too hard for most people to chew and are best reserved for making tiger nut milk) so I now always have the organic skinned variety on hand for a quick and healthy sweet treat that can be eaten guilt-free between meals. 

However, if you try to eat more than one or two of them simultaneously they can be a bit dry, so for some time I’ve been toying with the idea of making skinned tiger nuts into an even more desirable snack by enrobing them in dark chocolate. I had in mind that I’d keep them separate (like chocolate covered coffee beans) but oh, the fiddle and the faff! Initially, I tried submerging each individual tiger nut into melted chocolate with the aid of a cocktail stick but then couldn’t get them back off the stick without pinging them across the kitchen table and splatting melted chocolate everywhere! Because I was attempting to do all of this in the time it took to make a cup of tea, I gave up and resorted to throwing all the tiger nuts into the bowl of chocolate in one go, giving the mixture a quick stir then dolloping teaspoonfuls onto a pre-lined tray and shoving the whole thing in the fridge to set. 

Fifteen minutes later I invited John to sample my now-solid chocolate-coated tiger nut ‘splats’ with his second cup of tea. Much to Sarah’s chagrin (she wasn’t around at the time), they only survived a single, brief, taste-testing session. It seems that melding tiger nuts together with dark chocolate is a recipe for gluttony! However, the sense of over-indulgence is more in the mind than an actual reality. With this dessert, everything simply comes together beautifully - cool, creamy ice cream made even more delectable with the first cold snap of chocolate melting into a silky smooth lubricating combo of dark chocolate and coconut oil that makes eating multiple raw tiger nuts effortless (less chew more swallow!). But best of all, because the resistant starch in both the Horchata Ice Cream and Chocolate Tiger Nut Splats can’t be digested by the body, this particular Christmas confection will never find its way onto your hips, so you can still stay on target for a slim and healthy start to your new year!

I think ice cream is the perfect way not to cook at Christmas. Make and freeze it the week before to save time later. This refreshing Horchata Ice Cream with Chocolate Tiger Nut Splats doesn’t really need any other accompaniment (though a baked apple or poached pear would be nice) - simply serve spiked with a mini-star sparkler to razzle-dazzle ‘em as a fabulous festive finale to Christmas lunch. 

Horchata Ice Cream (Serves 8)

Ingredients

250g organic tiger nuts, soaked in cold water for 4-6 hours (or overnight) then rinsed in fresh cold water and drained

75g raw organic cashews, soaked in cold water for 4-6 hours (or overnight) then rinsed in fresh cold water and drained

8 plump Medjool dates, stoned

1 tbsp vanilla essence

1/2 tsp organic ground cinnamon

1/2 tsp freshly grated nutmeg


Instructions

Put the tiger nuts into a heavy-duty blender with 600ml fresh, cold filtered water and blend until smooth and creamy - about 3 minutes.

Take a nut milk bag (or a double layer of muslin) and set over a deep bowl. Carefully pour the blended tiger nut mixture into the bag/muslin cloth and secure the top of the bag (or gather the ends of the muslin cloth together) to hold the liquid inside. Using your hands twist and squeeze out all of the liquid until you’re left with only dry tiger nut pulp. Rinse out the blender jug.

Tip the tiger nut milk back into the rinsed-out blender. Add the dates, cashew nuts (or coconut cream - see note below), vanilla essence, cinnamon and nutmeg and blend again until the mixture is completely smooth.

Pour the horchata cream into a bowl, then cover with cling film and chill until very cold.

Churn the cold horchata cream in an ice cream maker (according to the manufacturers instructions) until it forms a soft-set ice cream (mine took about 35 minutes to get to this stage) then spoon into a freezer-proof lidded container and put in the freezer for 2 hours to set completely.

If not serving immediately, take the ice cream out of the freezer 30 minutes before you want to eat it and put in a refrigerator to allow it to soften slightly.

Scoop the Horchata Ice Cream into glass sundae dishes, add 2 or 3 Chocolate Tiger Nut Splats and a light dusting of cinnamon, if liked. 

Chocolate Tiger Nut Splats (Makes about 12)

Ingredients

75g organic peeled tiger nuts

50g good quality dark chocolate, coarsely chopped (at least 70% cocoa solids)

1 tsp organic coconut oil


Instructions

Put the chocolate chips into a heatproof bowl and set the bowl over a pan of barely simmering water to allow the chocolate to melt slowly. Do not allow the bottom of the bowl to come into contact with the water. Stir the chocolate occasionally until it is completely melted and smooth.

Take off the heat and add the coconut oil. Stir the coconut oil into the melted chocolate, then add the tiger nuts and keep stirring until all the tiger nuts are evenly coated in chocolate. 

Spoon rough teaspoonfuls of the mixture onto a baking sheet lined with non-stick paper and refrigerate until set. Peel the cold-set Chocolate Tiger Nut Splats off the paper and store in an airtight container in the fridge until required. 

Notes

You need a decent high-powered blender such as a Vitamix to blitz the tiger nuts into a smooth creamy milk and then to completely break down the cashews and dates to make a rich smooth custard. Pass the finished ice cream mixture through a fine sieve before freezing if you’re in any doubt that your blender isn’t up to it.

An ice cream machine does make for a smoother, creamier, airier ice cream but if you don’t own one it is still possible to make decent ice cream at home as long as you plan ahead. Firstly, chill your prepared ice cream mixture over an ice bath or for several hours in the fridge. Meanwhile switch your freezer onto fast-freeze. Pour your ice cream mixture into a deep freeze-proof container and freeze for about an hour until the edges start to get solid. Take out of the freezer and stir vigorously with a fork or whisk to break up the the ice crystals completely and combine with the still liquid centre. If you have one, a hand-held blender will give the best results. Straightaway, put the mixture back into the freezer for another half-hour then take it out again and repeat the mixing and mashing. Continue doing this every half hour until the ice cream is soft-set throughout, then let it freeze solid.

I used dark chocolate chips to save myself the hassle of chopping chocolate. 

Do not take the chocolate tiger nut splats out of the fridge until you’re ready to eat them. Quite apart from the fact that you’ll be missing the satisfying ‘snap’ of cold chocolate when you bite into them, they melt really quickly in your fingers or when left out at room temperature.

The celebration star sparklers are fun but you need to have a couple of people on hand to help light them and to get your dessert to the table in time to surprise your guests - it took me three attempts to get my sparkler to light for Sarah to take the photograph and, once lit, it didn’t sparkle for very long! Frustrating! Next time I’ll try these!

If you are allergic to nuts, you can substitute the cream off the top of a 400ml can of full-fat coconut milk for the cashew nuts. Put the unopened tin of coconut milk in the refrigerator to chill overnight. When you’re ready to make the ice cream, simply scoop off the top layer of solid coconut cream from the can of chilled coconut milk and add to the blender with the cold horchata milk and the rest of the ingredients before blending until smooth and then churning in an ice cream maker. You can use the coconut water that’s left to make a curry sauce or smoothie.

10th December 2015 update: I made Horchata Ice Cream again today for our Christmas day festivities. And, because we're all-grown ups, I added 2 tablespoons of vodka to the cold cream before churning. It isn't for the sake of imbibing more booze! The idea is that adding a little alcohol should help to keep the ice cream a little bit softer (alcohol doesn't freeze) whilst it's stored for the next couple of weeks.  


Carbohydrate 34g Protein 3g - per serving ice cream made with raw cashews

Carbohydrate 12g Protein 2g - per serving (3 chocolate tiger nut splats)


Primal Pronto Energy Bars

by Susan Smith in ,


Fast, no-bake Primal Pronto Energy Bars will keep everyone coming back for more. And why not? Full of energy-boosting nutrients and resistant starch, these grain-free, gluten-free, naturally sweet nibbles can be enjoyed at any time you feel yourself flagging, or when you just fancy something sweet to eat, because they don’t contain refined sugar. 

Great for kids as a Bonfire Night treat, to take on long autumnal walks or as a pre or post-workout snack, these energy bars will revive and sustain you with delicious fudgy, chocolatey goodness.

With only 5 ingredients, they should only take about 15 minutes to bring together (plus 30 minutes to chill). But be warned, they’re more-ishly yummy and can disappear faster than you can make them! 

Primal Pronto Energy Bars (makes 12)

50g coconut oil

150g organic Medjool dates, stoned weight (about 8 dates)

150g milled tiger nuts

50g raw organic cacao powder

1 tbsp organic pure vanilla essence


Instructions

Boil a kettle of clean water.

Remove the stones from the dates then put them in a small heavy based saucepan with enough boiling water from the kettle just to cover. On the hob, bring the water back to the boil then reduce the heat to very low and simmer the dates for 5 minutes to soften. Drain well.

Place the coconut oil in a small saucepan over a low heat until just melted, take off the heat and allow to cool slightly.

Put the softened dates, milled tiger nut flour, cacao powder, vanilla essence and coconut oil into a blender or food processor and process until all the ingredients are fully combined.

Transfer the mixture into a shallow dish or baking tin, pressing it down well and spreading it out evenly. Smooth the surface with a flat edge spatula (or the back of a metal spoon) and mark into even pieces. 

Put the mixture into the freezer for 30 minutes, then refrigerate until you’re ready to serve.


Notes

Cut into small squares and decorated with edible flowers or flower petals these make elegant petits fours to serve with an espresso coffee as a grand finale to a special meal. 

I used a small Waitrose (24.5cm x 17.5cm / 9½ x 7”) non-stick baking tray, which was the perfect size for these energy bars.


Carbohydrate 19g Protein 2g

Although they're an ideal portable outdoor snack, they're also a real after-dinner treat served with coffee. 

Although they're an ideal portable outdoor snack, they're also a real after-dinner treat served with coffee. 


Chocolate Fondants

by Susan Smith in , ,


If you’ve ever watched Masterchef you’ll have seen contestant after contestant being warned by Messrs John Torode and Gregg Wallace how tricky it is to make perfect gooey-centred chocolate fondants. Some contestants go ahead anyway (let’s face it, by the time they’re being filmed, they’re already committed!) and get their timings just right so their fondants come out beautifully cooked on the outside and runny in the middle - but many don’t. Today's recipe is a sure-fire way to ensure that you can make chocolate fondants without any of the brouhaha, giving everyone the impression that you’re an absolute genius in the kitchen! (Psst! you can even make them 24 hours before you want to eat them)

Love chocolate? You’ll love these luxurious hot chocolate fondants. Better still, they’re not the ‘unhealthy' indulgence you might have pre-supposed. On the contrary, eaten in moderation, dark chocolate (at least 70% cocoa solids) is very good for you because it’s chock-full of phytonutrients (specifically cocoa flavanolds) that are scientifically proven to be beneficial for the heart, circulation and brain.

Still feeling some parental guilt about consuming chocolate? More information is available in this extensive blog post that fully explains chocolate’s effects on health, its potential benefits and downsides, and the effects of chemical components such as caffeine and theobromine. In summary, don’t gorge on chocolate, but it’s really more than okay to allow yourself to deeply appreciate its wickedly delicious allure.

As part of a Primal lifestyle, best quality dark chocolate does not make you fat. Typically, I eat 2 or 3 squares (up to 15 grams) every day with my morning Nespresso (a double-whammy for the senses which reminds me that life is really worth living) but at least one scientific study found that young people consuming 42.6g of chocolate a day had slimmer waists and lower BMIs than those eating less. 

Nice but not naughty after all, dark chocolate has finally achieved superfood status. I suggest you grab a spoon and get stuck in! 

Chocolate Fondants (Makes 4 large or 6 small fondants)

Ingredients

125g unsalted butter + extra for greasing 

3 whole large organic eggs 

2 organic egg yolks (in addition to the the eggs above)

25g raw organic ‘runny’ honey

8 drops organic liquid stevia 

125g dark chocolate - I used Callebaut Finest Satongo dark chocolate chips

25g tiger nut flour

Good quality chocolate bar, broken into squares (I used Michel Cluizel’s Maralumi dark chocolate bar)

Sukrin icing sugar, for dusting

Organic double or pouring cream, for serving


Instructions

Grease either 4 large or 6 small ramekin dishes.

Melt together the butter and chocolate in a bowl over a pan of hot (not boiling) water on the hob.

Whilst the chocolate/butter mixture is melting, whisk the eggs / egg yolks / honey and liquid stevia together for about 5 minutes until pale and very thick (it should hold its shape for a few seconds when a little of the mixture is flicked over the surface) - you really need an electric whisk for this. 

With a balloon whisk, whisk the tiger nut flour into the chocolate/butter mixture. 

Cool the chocolate mixture and then pour into the whisked egg mixture.

Using a metal spoon, fold gently to combine the two mixtures. 

Divide the mixture equally between the ramekins. 

Leave in the fridge for up to 24 hours before they are required.

Just before cooking, press a square of chocolate into the centre of each ramekin.

Cook for 12-15 minutes at 200℃ / 400℉ / Gas mark 6

Sprinkle with icing sugar and serve immediately.


Notes: 

These chocolate fondants are foolproof because you’re not relying on precise cooking times to ensure that the middle of the fondants are soft and runny - instead the melted chocolate squares create a yummy pool of hot chocolate at their centre. 

The mixture will carry on cooking in the ramekins, so eat immediately. 

Sukrin sweetener is produced via a natural fermentation process from the glucose naturally occurring in pears, melons and mushrooms. The powdered form of Sukrin I’ve used for dusting the chocolate fondants looks, tastes and behaves in exactly the same way as normal white icing sugar made from sugar beet/cane. And, I’m pleased to report, it has no bitter after taste. 


Carbohydrate 16g Protein 9g - per small chocolate fondant

Carbohydrate 25g Protein 14g - per large chocolate fondant


Chocolate Tiger Nut Stollen Bites

by Susan Smith in , ,


If you had a go at making Tiger Nut Horchata last week, you might be thinking that despite the tiger nut pulp leftovers (I just feel guilty for throwing it away), horchata is such a delicious, healthy drink it deserves to be a ‘keeper’. If so, today’s recipe for Chocolate Tiger Nut Stollen Bites answers the need for thrift by transforming tiger nut pulp into a superfood energy bite that’s as enticing as tiger nut milk itself.

On the other hand, if you haven’t yet tried homemade horchata, this week’s recipe might just be the means to an end…

Chocolate Tiger Nut Stollen Bites are simply yummy - chocolatey, fudgy, fruity and nutty all at the same time - but they won’t cause your blood sugar levels to spike. A really healthy option when you’re craving something sweet, these chocolate-coated balls of fibre-rich goodness are packed full of  vitamins, minerals and protein and are perfect to enjoy anytime you feel the need for an energy-boosting snack. I find them seriously addictive with my favourite morning Nespresso, so the next time I make a batch of Tiger Nut Horchata, I’ll be using up all the residual tiger nut pulp in one go and doubling up the recipe below for these irresistible, no-added sugar sweeties!

They’re also dainty and elegant enough to serve as after-dinner petits fours.

Chocolate Tiger Nut Stollen Bites (Makes 32 ‘bites’)

Ingredients

50g whole almonds

50g pecans

100g tiger nut pulp (left over from making horchata)

100g (about 6-8) Medjool dates, with stones removed

50g organic Goji berries

30g coconut butter

45g dark chocolate chips

¼ tsp sea salt

For chocolate coating (optional)

75g chocolate chips, melted

Extra Goji berries, for decoration (optional)


Instructions

Put half the almonds and pecans into a food processor and pulse together until they are coarsely chopped into small pieces (the texture should be slightly coarse with some bigger pieces, to add ‘bite’ to the final mixture). Tip the chopped nuts out into a bowl and set aside.

Add the remaining almonds and pecans to the bowl of the food processor and whizz until very finely chopped. Add the tiger nut pulp and whizz some more until everything is well combined.

Add the pitted dates to the mixture and whizz again until the mixture becomes sticky and starts to form a dough. 

Add the Goji berries and coconut butter and process again until well incorporated. Keep whizzing until you have a thick smooth paste (the texture of almond paste/marzipan).

Add the chocolate chips, sea salt and the reserved chopped nuts and pulse (minimally) several times to ensure that the chocolate and nuts are evenly distributed throughout the mix whilst still retaining their texture.

Roll the mixture into small balls between the palms of your hands (10g per ‘bite’ is just the right amount) and store in the refrigerator.

For chocolate coating, melt 75g of chocolate chips in a heatproof bowl set over a barely simmering pan of hot water (do not allow the bottom of the bowl to touch the surface of the water).

When the chocolate is melted, stir with a metal spoon until it is smooth and glossy then remove from the heat. 

Using a couple of teaspoons to help you, carefully drop the tiger nut stollen balls one at a time into the melted chocolate and turn them over and around until evenly coated. Allow any excess chocolate to drip back into the bowl before placing each coated bite onto a baking tray lined with waxed paper. Leave alone until completely set. Decorate each with a single Goji berry, if liked.

Store in an airtight container in the fridge for up to a week - though they’re highly unlikely to last that long!

Notes:

You don’t have to cover Chocolate Tiger Nut Stollen Bites in melted chocolate but I think the chocolatey-taste-hit and ‘snap’ of the cold chocolate shell surrounding a soft, fudgy centre makes for a decidedly more decadent experience.

Dark chocolate can develop a whitish-grey ‘bloom’ on its surface when kept in the fridge. Although blooming may make the chocolate look less appetising it is still perfectly safe to eat. I deliberately didn’t ask Sarah at Mirror Imaging to photograph my tiger nut stollen bites until they were four days old and, as you can see, they look fine - not as glossy as chocolate kept at room temperature but still looking good. 

I coined the name ‘Stollen’ (a traditional German Christmas cake) for these little bites because that’s what their taste and texture remind me of, though I didn’t want to wait for next Christmas to share the recipe! When the time is right, a dash of ground cinnamon added to the mix would certainly make for a distinctly Christmassy treat.

The Goji berry is a nutritionally rich, dried red fruit from Tibet, Quinghai Province that is packed full of minerals, including zinc, calcium, selenium and iron. Goji Berries contain more than 11% protein, including 18 amino acids and all 8 of the essential amino acids. They’re also very rich in beta-carotene and supply up to 500 times more vitamin C than oranges! 


Carbohydrate 7g Protein 1g - per bite


Lemon Curd Filled Chocolate Cubes With Melba Sauce

by Susan Smith in ,


Easter Sunday was such a beautiful, warm and sunny day. A reminder that summer’s on its way and it’s time to lighten up and enjoy the new season’s zingy, fresh flavours.

The menu I’d chosen for our Easter celebration lunch was Prawn Cocktail (recipe coming soon), Pea & Pistachio Soufflés, Asparagus and Hollandaise Sauce with locally grown Chantenay carrots and baby courgettes and, after much deliberation (was I in danger of going into egg and lemon overload?), a springtime lemon curd based dessert with raspberries. I mean, I love eggs and lemons and they are so quintessentially Easter-time, but savoury soufflés and an egg-based dessert? Lemon hollandaise and lemon curd? Anyway, I found a recipe for the lemon curd, so all I had to do was reduce its carb count and substitute raw organic honey for refined granulated sugar.

Not entirely fazed, I knocked up the lemon curd in the time it took my husband to make me tea and toast after a lengthy Mirror Imaging pre-wedding meeting on Saturday morning. In the early hours (which is when this food blogger’s imagination runs riot!) I’d been toying with the idea of transforming it into lemon curd ice-cream with melba sauce or lemon curd mousse. However, this first ever attempt at making homemade lemon curd was a remarkable revelation! It was so utterly delicious and tangy eaten directly from a spoon that I just couldn’t bring myself to diminish its clean, fresh lemony flavour or colour by adding anything to it. 

Still, to my mind, you can’t just serve up lemon curd and call it pudding! I’d already purchased some ready-made dark chocolate cubes several weeks ago in anticipation of creating an Easter-related ‘surprise’, but felt lemon and chocolate wasn’t an easy combination to pull off. As it turned out, none of this mattered.

Come the day, hungover from an excessive wine-drinking-session the night before and a serious lack of sleep whilst still ruminating on my dessert dilemma, I announced Easter was cancelled this year! Happily, John and Sarah ignored me and got on with the food prep regardless. By 2pm I cautiously accepted a half glass of champagne and the party was back on! By then, there was no time to backtrack and create something more elaborate for dessert, so unadulterated lemon curd spooned into chocolate cubes it was, and Easter joy of Easter joys, it was sublime!

I think that this easy, make-ahead dessert is an absolute triumph. A new go-to recipe for a special celebration lunch or dinner party, expect gasps of appreciation (even a round of applause!) when you serve this as a finale, and moreover, intense satisfaction on guest’s faces as they experience all the sensory delights this perfect little pudding offers. From the first snap! sound as you break into the dark chocolate cube with your spoon, through to the cool, smooth tangy sweetness of the lemon curd, the semi-tart raspberry melba sauce and the silky lingering back notes of good quality chocolate, it delivers everything you could possibly want from a pudding - with little or no effort.

In conclusion, sometimes the most wonderful things come together when you’re in a state of enforced ‘let-go’. Another glass of champagne anyone? 

Lemon Curd Filled Chocolate Cubes With Melba Sauce (V) (Makes enough lemon curd and melba sauce for 8)

Ingredients - for the lemon curd

3 large organic eggs

120g  raw organic ‘runny’ honey

80ml fresh lemon juice (2-3 lemons worth)

60g unsalted butter, at room temperature, cut into small pieces

1 heaped tbsp lemon zest, finely grated

Ingredients - for the melba sauce

250g British frozen raspberries, defrosted (I used Windmill Hill Fruits)

1 tbsp fresh lemon juice

8-10 drops of liquid stevia - I used 8 drops because I think the melba sauce needs to be on the right side of tart for a perfect balance of flavour

72% superior quality dark chocolate cubes, fresh raspberries and lemon balm leaves (or mint leaves) to serve


Instructions - for the lemon curd

In a stainless steel bowl, whisk together the eggs, honey and lemon juice until well blended.

Cut the butter into small pieces. 

Place the bowl over a saucepan of gently simmering water. Do not let the bottom of the bowl come into contact with the water. 

Cook for approximately 10 minutes, whisking constantly with a balloon whisk (to prevent it from curdling) until the mixture becomes thick (like soured cream or hollandaise sauce). Don’t get distracted, the mixture can quickly and suddenly turn from thin to thick! 

Remove from heat and immediately pour into a clean bowl. 

Add the butter to the mixture and whisk until it has melted, then add the grated lemon zest and give everything a good stir.

Take a sheet of plastic cling-film and immediately lay it directly onto the surface of the lemon curd to stop the air getting to it (to prevent a skin forming). Allow the mixture to cool completely. The lemon curd will continue to thicken as it cools. Keep covered and refrigerate until needed.


Instructions - for the melba sauce

Tip the defrosted raspberries into a food processor or blender with the lemon juice and blitz to a smooth puree. If the mixture seems a little too thick, add 1-3 tablespoons of cold water and blitz again until it’s the right consistency i.e. thick enough to hold together but thin enough to pour.

Pass the mixture through a fine sieve. Add 8 drops of liquid stevia to the melba sauce and stir well to combine. Taste, if you think it is too tart, add another one or two drops of stevia (less is more!), then cover and refrigerate until needed.


Instructions - to assemble the dish

Just before you’re ready to serve, spoon a generous quantity of lemon curd into each chocolate cube (1 cube per person) 

Place each one onto a flat plate and drizzle the melba sauce around. 

Stand three fresh raspberries on top of each and garnish with lemon balm.


Notes: 

You must use freshly squeezed lemon juice and freshly grated zest (preferably from organic lemons) for this recipe - not imitation bottled lemon juice or Jif squeezy lemon juice.

Store the chocolate cubes in their original wrapping at room temperature or a coolish place until you need them (not a refrigerator, unless it’s the height of summer and you don’t have air conditioning!)

The lemon curd and the melba sauce will keep covered in a refrigerator for up to a week.


Carbohydrate 17g Protein 3g - per portion (incl. melba sauce & raspberry garnish)


Celebration Chocolate Cake

by Susan Smith in


I just couldn’t let Easter pass by without including a fabulous chocolate cake recipe. It also happens to be my eldest daughter’s birthday on Good Friday, so I have the opportunity to mark both occasions with a Primal ‘tah-da’ moment that even impresses me! This delicious cake is grain, gluten, dairy and refined sugar free (although tasting it, you couldn’t possibly guess). I think it is absolutely perfect for an Easter celebration. 

Light in texture, but intensely chocolatey, it really is one of the best chocolate cakes I’ve ever eaten and certainly worthy of any (in our house that actually means every!), special occasion. The recipe has been adapted from another excellent food blog. So, all hail Adriana, Queen of Chocolate Cakes, because I think this recipe is an absolute triumph for healthy-eating chocolate lovers everywhere! 

Because it’s so good (you can never have too much of a good thing!), I’ve increased the ingredients and divided the cake mix between two loose-bottomed sandwich tins, which saves the hassle of trying to cut the finished cake in half and also the risk of it falling apart when you do! 

I’m not the world’s best cake decorator, so I’ve cheated a little (actually a lot!) by purchasing some Callebaut dark chocolate curls, some vegan Hotel Chocolat cocoa dusted eggsedible gold leaf (should have googled how to apply this as most of it stuck to my hands, not the cake!), fresh flowers (pansies, violas and wild violets are all springtime pretty and good to eat too) to create this lovely looking, healthily indulgent cake. I hope you enjoy. 

Happy Birthday Elizabeth and Happy Easter to one and all!

Celebration Chocolate Cake (V) (Serves 16)

Ingredients - for the cake

Dry:

500g (1lb 2oz) ground almonds            

70g (2½oz) coconut flour, sifted        

70g (2½oz) raw cacao powder, sifted        

125g (4½oz) raw coconut palm sugar        

3 tsp baking powder                

1½ tsp sea salt                

Wet:                    

185ml (6 fl.oz) coconut oil, melted

75g (3 tbsp) raw set honey                     

400ml (14 fl.oz) full fat coconut milk            

4 large eggs + 2 yolks, at room temperature         

3 tsp vanilla extract                                

2 large egg whites, whisked separately


Ingredients - middle layer chocolate ganache

400ml (14 fl.oz) full fat coconut milk                

50g (2 tbsp) raw set honey                

20g 4 tbsp raw organic cacao powder            

½ tsp vanilla extract                


Ingredients - chocolate frosting

180ml (9 tbsp) coconut milk (I used ½ coconut cream and ½ coconut milk) 

185g dark chocolate, chopped - I used Callebaut Finest Satongo chocolate chips to save myself the bother of chopping     


Instructions - for the cake

Pre-heat oven at 180°C / 350°F / Gas mark 4

Grease the bottom and sides of 2 x 8-inch (22.5cm) loose-bottomed sandwich tins with coconut oil and line the bottoms of each with a disc of parchment paper.

Put the coconut oil and honey in a small pan and set over a low heat until just melted. Leave to cool.

In a large bowl mix together the almond flour, coconut flour, cacao powder, raw coconut palm sugar, baking powder and salt.

In a medium-sized bowl whisk together the melted coconut oil and honey, coconut milk, eggs, and vanilla.

Using a rubber spatula, gently mix dry ingredients into wet ingredients to form a batter. Do not over mix.

In a small bowl whisk 2 egg whites to a firm snow. Using a large metal spoon, gently fold the egg whites into the cake mixture.

Pour batter into prepared tins and bake for 35 minutes or until a toothpick inserted into the centre comes out clean. If you feel you need to cook it longer, cover cake with foil to prevent burning the top and lower the heat to 165°C (325°F). Cook until toothpick comes out clean.

Let cakes cool completely in the tins before turning out.

Spread the chocolate ganache over one of the cake halves and refrigerate for 30 minutes.

Place the other half of the cake on top of the 'ganached half', then spread the chocolate frosting over the top and sides of the cake (for a smooth finish, it's easiest to pour the frosting directly onto the top of the cake - it will find it's own level and partially run down the sides without you having to work it).

Decorate the top with shaved dark chocolate, wild violets etc., if desired


Instructions - for chocolate ganache (see notes for more information)

In a medium saucepan, bring the coconut milk and honey to a light boil.

Simmer on low heat for two hours, stirring occasionally (be careful, the mixture has a tendency to bubble-up and splatter when stirred!). Do not cover the pan.

Mix in the raw cacao powder and vanilla extract and whisk together until all is combined and smooth.

Let it cool and refrigerate until the cake is ready.


Instructions - for chocolate frosting

Warm the coconut milk in a small saucepan until its hot but not boiling (you should just be able to tolerate inserting a finger into the milk i.e. without scalding yourself!)

Tip the chocolate pieces into the hot coconut milk and whisk together until the chocolate has melted and the mixture is all smooth and glossy.

Let cool for 10 minutes or so before icing the cake.

Notes:

Make the middle-layer of chocolate ganache first - it takes a long time to make, so plan ahead and have it ready before you bake the cake. You’ll know you’ve cooked it long enough when the coconut milk is reduced to about one-third of it’s original volume and it has a thicker consistency and darker colour (similar to sweetened condensed milk).

Get organised before you start to make the cake. Firstly, grease and line your sandwich tins and collect all the ingredients together (I often do this the night before).

Since the complexity of this recipe (it’s not difficult to make but you do need to stay focused!) is equivalent to a 'cook’s meditation on chocolate', I advise you to tick each ingredient off as you add them to their respective mixing bowls (the first time I baked this cake I completely forgot to add the coconut milk to the cake batter and today I threatened to do the same thing again!).

Allow the cake to cool completely before attempting to decorate. Any residual warmth melts the ganache and frosting faster than you can control it and, although the cake will still be delicious, you’ll end up with a messy chocolate cake ‘landslide’ rather than an elegantly decorated cake as befits a special occasion!

N.B. Wild violets are not to be confused with African violets. African violets with their hairy leaves make beautiful potted houseplants but if you eat them, they will make you very sick indeed!


Carbohydrate 21g Protein 13g - per serving (excluding chocolate eggs)