Feel Good Berry Smoothie

by Susan Smith in


Bio-tiful’s organic kefir is made from organic whole milk from my beloved Riverford Organic Farmers’ own dairy herd. Kefir is a two thousand year old, bio-live, smooth, tangy, cultured milk drink that’s long been revered in Russia and Eastern Europe for its health benefits because it’s full of beneficial bacteria a.k.a ‘friendly’ or ‘helpful’ bacteria (the good guys) that help displace the harmful bacteria (the bad guys) in your gut. 

For people who are less than vigilant about eating healthily, the bad guys have no problem invading your body via your bloodstream causing chronic inflammation and ultimately disease. The good guys in kefir (known as probiotics) help to protect the delicate cells lining the gut, to efficiently move food through the gut, to synthesise certain vitamins and to ferment indigestible foods. In short, they are essential for good digestive health, strengthening the immune system, improving nutrient uptake and the absorption of minerals.

In addition to organic kefir, I’ve used raw organic milk (you can use goat’s, cow’s, coconut or homemade nut milk), fresh organic blueberries and frozen organic mixed berries. I then supercharged my Feel Good Berry Smoothie with a powerful antioxidant powder to create the most delightfully cool and luscious, nutritious drink. 

The word kefir means ‘feel good’ in Turkish. Precisely so. I find this quick-to-make Feel Good Berry Smoothie the most cheerfully delicious, fruit-packed way to energise my day. 

Feel Good Berry Smoothie (makes 2 large glasses)

Ingredients

250ml Bio-tiful kefir (or natural coconut yogurt)

250ml organic raw whole milk (or other milk of choice e.g. coconut, almond, tiger nut cashew etc.)

150g organic mixed frozen berries (I used Duchy Organic Berry Mix)

125g fresh organic blueberries

2 small/medium organic bananas

2 tsp organic Berry Radical Antioxidant Powder or organic Amla Powder (Indian Gooseberry powder)

2-3 drops natural liquid steviaoptional


Instructions

Using a high-power blender, whizz all the ingredients together for about 30 seconds until smooth and creamy. 

Pour into two tall glasses and don’t wait to enjoy!


Carbohydrate 43g Protein 20g - per large glass serving


Tiger Nut Horchata

by Susan Smith in


In the heat of summer our thoughts are often wont to turn to ice cream. However, with my new found friend the tiger nut, otherwise known as chufa (pronounced Choo-fah), I’ve discovered a serious contender when making my first batch of ice-cold Tiger Nut Horchata. There can simply be nothing more refreshing, or good for you, than downing a glass of this Spanish-style refreshment on a hot day.

Tiger Nut Horchata a.k.a. tiger nut milk is a delicious creamy, milk-like drink that can be best described as ‘liquid gold’ for the health conscious. Tasting so good and loaded with resistant starch, raw tiger nut milk (and whole organic tiger nuts eaten as a snack) are a veritable powerhouse of nutrients (see my last two blog posts for more information). Suffice to say, tiger nuts are an original Paleo superfood with a ratio of carbohydrates, fats and protein so similar to human breast milk it almost beggars belief. Tiger nuts are, after all, just a brown, wrinkly vegetable tuber!

In spite of its name, tiger nut milk is both nut and dairy free, which is an absolute boon for people who are lactose intolerant or who suffer from a nut allergy. It’s also gluten-free so coeliacs needn’t go without either. You can use Tiger Nut Horchata as a milk replacement in tea, coffee, poured over our Nut & Seed Granola for breakfast, and pretty much for everything that calls for normal milk. Naturally sweet, tiger nut milk is non-allergic, safe for diabetics and, since tiger nuts do not contain inflammatory omega-6 fats, Tiger Nut Horchata makes for a much healthier alternative to dairy milk or other nut milks.

Most recipes I’ve found for Tiger Nut Horchata (Horchata de Chufa) are full of refined sugar (up to 200g of sugar per 250g of tiger nuts) but because tiger nuts are intrinsically sweet-tasting, I think it’s debatable whether tiger nut milk actually needs any added sugar at all. In the end I decided to stay true to Spanish tradition (I confess my tiger nut milk did taste a little ‘thin’ without) but I have so moderated the amount and type of sweetener in my Tiger Nut Horchata, it still faithfully follows Primal and Paleo dietary guidelines. My sweeteners of choice in this unique recipe are small amounts of raw organic honey and liquid stevia, which both make the grade (to see why, please read The Definitive Guide To Sugar on Mark’s Daily Apple). The end result is a slightly thickened, rich, creamy, sweet (but not too sweet), seriously satisfying vegetable milk that’s fit for the gods.

Using heathy sweeteners rather than refined sugar, I can well imagine Tiger Nut Horchata justifiably becoming the world’s next healthy-drink ‘craze’. And, with that thought, I drink to your good health. Salud!

Tiger Nut Horchata (makes 1000ml / 1 litre)

Ingredients

250g organic tiger nuts, covered with cold water by 5cm (2”) and left to soak overnight at room temperature

1000ml (1 litre) fresh, filtered water

40ml raw organic liquid honey (I used mild-tasting Raw Health organic acacia flower honey)

2 drops liquid stevia (*see note below for Vegan Tiger Nut Horchata) 

Organic ground cinnamon

Fresh ice cubes

Whole cinnamon stick(s), if liked


Instructions

Take your Nut Milk Bag and set it over a deep bowl. 

Drain the tiger nuts, rinse them well under cold water then drain again and tip into the blender container. Add the filtered water, the honey and 2 drops of liquid stevia, then secure the lid and blend on high speed until completely homogenised and smooth - this will take about 3-4 minutes (depending on your blender). After blending, if the mixture seems a little too hot to handle, allow it to cool down before proceeding to the next step.

Carefully pour the blended tiger nut mixture into the nut milk bag, tighten the tie at the top of the bag to hold everything inside, then using your hands firmly squeeze out all the liquid until you’re left with only dry tiger nut pulp.

Cover the bowl containing the tiger nut milk and cool completely, then transfer to a glass bottle or lidded container and store in the refrigerator for up to 4 days. 

To serve, third-fill a glass with ice (small ice cubes are best), shake or stir your chilled horchata well then pour over the ice and sprinkle a large pinch of organic ground cinnamon on top (**see note below) 

For a final flourish, add a whole cinnamon stick to each glass and use as a swizzle stick to distribute the cinnamon flavour throughout your drink.  

Notes

You’ll need a powerful blender and a strong Nut Milk Bag to ensure this simple Tiger Nut Horchata recipe is a breeze for you to make on a regular basis. You can use 2 or 3 layers of wet cheesecloth or cotton muslin to strain your tiger nut milk through but the Nut Milk Bag sold by Love Tree Products is strong, re-usable and easy to clean. it also produces a silky-smooth milk with no bits in it. I personally wouldn't want the mess, the faff or the unpredictability of making a DIY version!

*To make Tiger Nut Horchata vegan, simply leave out the raw honey and double the drops of liquid stevia (to 4) for the same level of sweetness.

It’s recommended you don’t discard the tiger nut pulp, instead dry it out in an oven and use as a substitute for desiccated coconut. Alternatively, convert into nutritious Tiger Nut Energy Balls

** I actually prefer to put my refrigerated horchata into a blender with half dozen ice cubes and whizz together for about 10 seconds to break up the ice for a super-cold drink that doesn’t smack you around the mouth with ice cubes every time you take a sip (it was Sarah that insisted I put a single ice cube in the glass for the photographs!) You can also put the horchata into the freezer for about an hour to turn it into a ‘slushy’. Which suggests to me that I should be creating a tiger-nut-milk-based recipe for ice cream, sooner rather than later!

To calculate the carbohydrate content of this recipe I’ve referenced whole tiger nuts, not tiger nut milk. Although carb grams per serving looks relatively high, there is a significant amount of tiger nut sediment that’s discarded after squeezing out the milk. Also, some of the carbohydrate content in raw tiger nuts is in the form of a unique fibre known as resistant starch, which cannot be absorbed by the body in the process of digestion. This means it passes through your system without deleterious effects on blood sugar or insulin levels. Similarly, you don’t obtain significant calories from resistant starch either.

However, resistant starch is a highly beneficial pre-biotic that feeds the friendly bacteria in your gut, which in turn provides numerous health benefits that can ultimately assist in weight loss. Your healthy gut flora actually need this ‘food’ to survive and thrive, Thus, Tiger Nut Horchata is recommended for even the most carb sensitive individual. Even if you are trying to lose weight, it’s more important to focus on eating real, nutritious food than to worry unduly about counting grams of carbohydrate or calories. The message is: ditch all grains, legumes, refined sugar and unhealthy processed seed oils and fats, and your carbohydrate and calorie intake will happily take care of itself!

Caution: Tiger nuts and tiger nut flour have very high amounts of resistant starch which, if you’re not used to, can cause discomfort and bloating when eaten in large amounts. It is therefore advised that you slowly introduce resistant starch into your diet (less than a teaspoon per day) and gradually increase your tolerance to your particular comfort level, which will hopefully be about 15-30 grams a day. 


Carbohydrate 55g Protein 5g - per 250ml serving of Tiger Nut Horchata (without ice)


Raw Chocolate Banana Milkshake

by Susan Smith in


Oh heck! I never meant to get into nutritional science but fear I have to in order to persuade you to eat your carbohydrates!

A food blogger that champions all things ‘low-carb’ and then, on the face of it, appears to do a u-turn by subsequently suggesting you eat high-carb, starchy foods might seem to have gone a bit ‘bananas’. Which is, as I shall reveal later in this post, quite literally true!

There are three increasingly popular buzz-words flying around at the moment that are relatively new as far as my understanding goes - probiotics, prebiotics and resistant starch - all three are absolutely essential for a healthy digestive system and long-term health. Here’s why…

Probiotics are types of ‘living’ friendly bacteria, like those that inhabit your gut. They’re found in cultured and fermented foods such as yogurt, buttermilk and sauerkraut. Probiotics help control the bad bacteria in your gut and allow the good bacteria to proliferate.

Prebiotics are ‘non-living’ carbohydrates that feed probiotics. They’re found in legumes (non-Primal) whole-wheat products (non-Primal) Jerusalem artichokes, chicory root, onions, cabbage, asparagus and leeks - although you’d need to eat a significant amount of these prebiotic foods in their raw state to achieve the recommended daily amount of prebiotic fibre. Not the easiest, nor the most pleasant, thing to accomplish!

Resistant starch is a prebiotic that has unique health benefits. Basically, it is the undigested part of starchy carbohydrate food that passes through the digestive tract unchanged, which is why it’s called ‘resistant starch’. It is good news for people following a low-carbohydrate diet or those trying to lose weight, because resistant starch can’t be digested and absorbed as glucose (like other carbohydrates are), instead it becomes food for bacteria. Nevertheless, it does increase a sense of fullness, which helps people eat less. It also improves insulin sensitivity, lowers blood sugar levels and improves metabolism. 

To be perfectly honest though, it’s taken me a while to get to grips with the idea that starch of any description can be good for you. Having eschewed all high-carbohydrate food for almost two years I was borderline paranoid in my resistance to resistant-starch - such is my fear of carbohydrates and the havoc they have wreaked on my body over the years. 

Sarah still has to be persuaded, though I’m hoping that this blog post might convince her that it’s not only okay, but actually advisable to eat resistant starch. There are 4 types:

RS Type 1 – is found in beans, grains, and seeds, which can’t be digested because the starch is bound-up within fibrous cell walls. 

RS Type 2 – found in raw potatoes and unripe bananas, which in their raw state are intrinsically indigestible.

RS Type 3 – found in cooked and cooled white potatoes and white rice, the cooling process (called retrogradation) changes the structure of the food so that digestible starch becomes resistant starch - that’s a green light for home-made potato salad and sushi then!

RS Type 4 – an unnatural, man-made chemically modified resistant starch (sounds unpleasant!)

I originally thought combining cooked and chilled potato (chilled = refrigerated) and green banana flour would be a clever way to get a double-whammy of resistant starch in a Primal/Paleo-friendly potato gnocchi recipe. However, I’m still in the process of working this through. Subjecting resistant starch to temperatures exceeding 130℉ degrades it. On the other hand, retrograded starch (the cooked and chilled type) is supposedly maintained if it’s subsequently re-heated - at least when re-heated gently. Whilst all the banana flour nutrients including potassium are retained during cooking, I don’t want to risk nullifying the resistant starch in my potato gnocchi so, until it’s tried and tested, the jury’s still out. If it does work - meaning my gnocchi cooks and stays intact in less than barely simmering water - I’ll be posting the recipe soon!

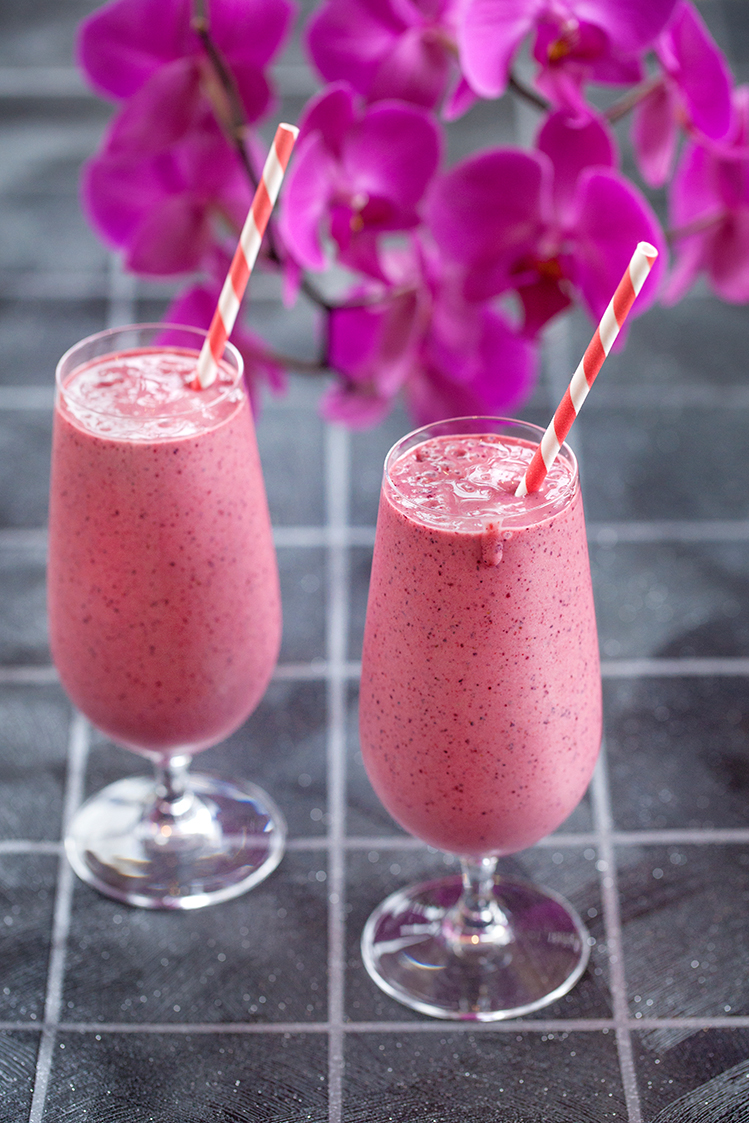
Meanwhile, supplementation is the easiest way to reliably get enough resistant starch into your diet. To this end I have developed a totally moreish Raw Chocolate Banana Milkshake - a delicious milk smoothie that contains a healthy quota of green banana resistant starch, and tastes so good that it has quickly earned its place as my preferred breakfast. Must be addictive, because it’s the thing I most look forward to before falling asleep at night! 

I have been trialling green banana flour for the past week. I started with a full tablespoon (about 10g -15g) as a supplement from Day 1. Caution: If you are suffering with any digestive issues such as gas, bloating, cramping, diarrhoea or constipation, build your tolerance slowly - start with half a teaspoon and gradually increase the amount up to the optimum (15g to 30g) over a few weeks. 

After several days, I get a sense that everything is functioning better and moving more efficiently - although I have developed one side-effect, which is rather loud, persistent tummy ‘gurgling’. I like to think that this is my hitherto half-starved friendly bacteria expressing relief at being properly fed, rather than my gut protesting!

Whatever, I intend to persist with my resistant-starch-enhanced smoothie regimen because, in a nutshell, resistant starch is a superfood for the digestive system. It ends up in the large intestine where, as far as the friendly bacteria are concerned, it's like manna from heaven. As they use the resistant starch for energy they release small carbohydrate molecules, which feed other bacteria, which in turn excrete butyrate. Ta dah!  Butyrate is where it’s at! The preferred fuel for the cells lining the colon, butyrate is a potent anti-inflammatory that encourages blood flow and helps keep the cells healthy, which in turn reduces the risk of colorectal cancer.  

Not only does resistant starch and it’s by-product butyrate promote healthy gut flora and optimise digestive health, any surplus butyrate not used by the cells in the colon is carried by the bloodstream to the liver and other parts of the body, where it has other beneficial effects including enhanced immunity, increased metabolism, weight loss, satiety, decreased inflammation and improved stress resistance. 

Sounds good to me, especially when all these health benefits are contained in an indulgent chocolately drink! Who knew that feeding your hungry microbiomes could be such fun?

Raw Chocolate & Banana Milkshake (Serves 1)

Ingredients

180ml whole milk (preferably raw), very chilled

1 under-ripe banana, peeled and cut into several pieces (about 200g unpeeled weight)

1½ tbsp raw cacao powder

1 tbsp green banana flour

1 dsp pure vanilla essence

Large handful of fresh ice cubes (about 60g)

Liquid stevia, to taste


Instructions

Put the milk, banana, cacao, banana four and vanilla essence into a blender jug. Blend until well combined - my Vitamix (*see note below) takes about 30 seconds to do this.

Add the ice cubes and blend again until smooth, cold and creamy - another 15 to 20 seconds. 

Taste, then add 2-4 drops of organic liquid stevia to sweeten. 

Pour into a tall glass and decorate with whipped cream and a sprinkling of chocolate curls, if liked.


Carbohydrate 48g Protein 12g - per glass


Notes

I am happy using up one-third to a half of my daily carbohydrate intake in one generous glass of Raw Chocolate Banana Milkshake because I’m already at what I consider to be my ideal weight (just over 7 stone). Generally, I find this milkshake is enough on its own to sustain me until I sit down to eat my main meal of the day, which I always try and do before 6pm. If I get peckish, I might snack on some cheese, a small piece of fruit or some nuts, but basically everything I eat in a day never adds up to much more than 100g of carbohydrate, which is considered low-carb (100g to150g per day). If you want to lose weight by eating very low-carb (50g-100g per day) try substituting 125g of fresh or frozen berries e.g. blueberries, raspberries or strawberries for the banana and cacao. This will reduce the grams of carbohydrates in your milkshake by about 18g. 

I use a Vitamix C-Series blending machine to make healthy drinks, smoothies, hot soups, sauces, frozen desserts and more, in a matter of minutes. If you are using a different blender or container size, you may need to make adjustments to the processing time, and/or ingredient quantities. To be honest, if I had to choose just one kitchen gadget to magically bestow on cooks everywhere, it would be this Vitamix!

For people who are lactose intolerant, vegan or who suffer from a nut allergy, I will be developing more non-dairy, nut-free, resistant starch milkshakes and smoothies shortly. Watch this space!