Caramelised Pineapple

by Susan Smith in


As much as I like the sweet-yet-tart, juicy freshness of a properly ripe pineapple, when I’m feeling down in the dumps this Caramelised Pineapple recipe lifts the spirit by transforming the pure and simple into something more like comforting confectionary with a flavour profile redolent of candy-floss. Yum! Very appealing, no matter what your age or state of mind.

Yes, I know that pineapples are full of natural sugar (fructose) and should be eaten in moderation but they’re also a good source of antioxidants, particularly vitamin C, minerals and an enzyme called Bromelain, which is a powerful anti-inflammatory, anti-cancer compound. 

In short, this wonderful, sticky, caramelised dessert is not only fast and simple to make, it’s really good for you too. For a zingy, nutritious taste of the tropics, I recommend you tuck in!

Caramelised Pineapple (V) (serves 4)

Ingredients

1 organic, fair-traded pineapple, peeled, cored and cut into thick wedges

20g organic coconut oil (or organic unsalted grass-fed butter)

2-3 tbsp organic maple syrup

To Serve

A sprinkling of organic ground cinnamon

A sprinkling of Sukrin Icing sugar

Fresh mint leaves, torn

Organic creme fraîche - optional

Ingredients primal recipe.jpg

Instructions

Melt the coconut oil (or butter) with the maple syrup in a large, heavy-based frying pan over a medium heat.

When it is hot, add the pineapple wedges to the pan and with a pair of tongs, turn to coat all the pieces evenly with the syrup.

Continue to fry the pineapple for about 4-5 minutes on each side, frequently turning them over with in the pan until they’re caramelised to a deep golden brown. 

Stack the wedges onto a warm serving platter or individual plates and dust over with a little cinnamon and Sukrin icing. Decorate with torn mint leaves scattered over. 

Serve immediately with creme fraîche, if liked


Notes

Whole pineapples should be stored at room temperature, while cut pineapple should be stored in the refrigerator. 


Carbohydrate 35g Protein 1g - per serving


Strawberry Ice Cream

by Susan Smith in


Last week I had to tell Sarah that I couldn’t make the No Churn Double Chocolate & Cherry Ice Cream for a recent supper party she was hosting, because there were no decent cherries left in the shops. Besides, as a last hurrah for English summer berries, I fancied making some no-sugar, no-dairy Strawberry Ice Cream instead. She wasn’t best pleased. The look of disappointment that flashed across her face immediately metamorphosed into disbelief. “How?”, she asked.

Sarah is always astonished when I cull ingredients that are considered intrinsic to a recipe’s success and the finished dish looks and tastes as good as the original. Nay, oftentimes better! At the heart of most yummy ice cream is a custardy concoction of sugar, cream or milk and egg yolks, but even substituting Paleo/Primal friendly ingredients like raw, organic honey or maple syrup for refined sugar, and raw organic cream or milk for industrially produced and processed dairy, doesn’t necessarily go far enough. Recent health scares within my own family have motivated me to make even more effort to support people whose bodies are already in a state of turmoil - their condition exacerbated by eating sugar or anything that turns to sugar - such as grains, potatoes, too much meat and high amounts of fructose (fruit sugar) in so-called healthy fruits.

So, undeterred by Sarah’s initial resistance to my suggestion of Strawberry Ice Cream and with more than a passing nod to Hugh Fearnley-Whittingstall’s recipe for the same in his book Light & Easy, I confidently told her it would prove to be a deliciously sophisticated dessert for her guests. I was right. I love its colour - a sort of soft, antique-pink, its creamy texture (I was almost tempted to rename it Strawberries n’ Cream Ice Cream!), and above all its intense, fresh strawberry flavour.

In theory, because both sugar and fat don’t freeze (butter does, but that’s because it contains water) you should never mess ‘willy-nilly’ with the amounts specified in ice cream recipes for either ingredient if you want to achieve a smooth, softer, less-icy texture. Also, before churning, the ice cream mixture needs to taste a bit sweeter than you think it should, because after freezing it will taste less so. Raw, runny honey à la Hugh Fearnley-Whittingstall’s version of strawberry ice cream, works well in frozen desserts - that’s until you’re trying to pare back on healthy sweeteners too. In this recipe I wanted sweetness without sugar, and creaminess without fat. The solution is alcohol. Like sugar and fat, alcohol won’t freeze so adding a tablespoon of pure, organic vodka to the ice cream mix before churning stops it from becoming too hard and makes it easier to scoop. 

As regular readers of this blog will know, my preferred all-natural, safe alternative to refined sugar in all its guises is Sukrin. Free from calories and carbohydrates, Sukrin’s sweeteners have the aroma, sweetness and flavour of regular sugars but, according to Sukrin, none of the aftertaste found in most other sweeteners. Call me supersensitive, but I do sometimes experience a lingering, cooling taste-sensation in my mouth afterwards. To minimise this, I like to use Sukrin in combination with another sweetener - usually honey or maple syrup - rather than on its own. Nevertheless, to challenge my tastebuds and to see whether I could get away without any honey, I made two batches of ice cream. The first with Sukrin:1 in combo with a little honey and the second with just Sukrin:1. It seems the freezing process not only dumbs down sweetness but also, if it existed, any aftertaste. 

Hurrah! There was no discernible difference between the two - they both tasted delicious, which means Primal Plate's Strawberry Ice Cream is good to go, even for vegans.

You should still be able to find British strawberries in the shops up until the end of September so don’t ‘snooze and lose’ like I did with Sarah’s cherries! Just make sure your strawberries are ripe and full flavoured so you can continue to enjoy a taste of summer for just a little while longer. 

Strawberry Ice Cream (Serves 6)

Ingredients

75g raw, organic cashew nuts

100ml fresh, cold filtered water

1 large (or 2 small) organic bananas (unpeeled weight approximately 200g)

85g Sukrin:1 sweetener

400g ripe strawberries, hulled and roughly chopped

Juice of ½ lemon 

1 tablespoon pure vodka (or Kirsch)


To Serve - optional

Extra strawberries, hulled and sliced

A squeeze of fresh lemon juice

Sukrin icing sugar

Instructions

Soak the cashews in cold, filtered water to cover for 6-8 hours, or overnight. Then drain.

Peel the banana and break into pieces then place in a high-powered blender with the drained cashews, Sukrin:1. and 100ml of fresh cold filtered water. 

Blitz thoroughly until the mixture forms into a thick, creamy, smooth puree. 

Add the strawberries, vodka and lemon juice and blitz again, just until smooth. 

Pour the contents of the blender into a jug, then cover and chill in a refrigerator until cold. 

Now churn the mixture in an ice cream maker, according to the manufacturer’s instructions until it’s soft-set.

Transfer the ice cream into a plastic freezer container, before smoothing off the top and pressing a piece of waxed paper (or cling film) directly onto the surface to stop ice crystals from forming. Cover with a lid and and place in the freezer until solid. 

If you don’t have an ice cream machine, pour into a plastic freeze-proof container and freeze for about an hour until the sides start to get solid. Then mash with a fork to combine the solid ice cream at the sides of the container with the still liquid centre. Straightaway, put it back into the freezer for another half-hour then take it out again and repeat the mixing and mashing. Continue doing this every half hour until the ice cream is soft-set, then let it freeze solid.

About 30 minutes before serving remove the ice cream from the freezer to soften slightly.

Serve scoops of ice cream with sliced strawberries macerated in a little sieved Sukrin icing sugar and a squeeze of lemon juice, if liked. 


Notes 

Always start scooping ice cream from the outer edge where it is softest. This stops ice crystals forming on the outer edges when it’s refrozen. Before returning to the freezer replace the waxed paper and the container lid.

N.B. If you have a sweet tooth and want to eat healthily, it’s best if you to stick with Sukrin’s all-natural sugar alternatives, 100% pure stevia, xylitol, raw honey, pure maple syrup, molasses, and coconut palm sugar.

Carbohydrate 9g Protein 3g - per serving of ice cream (without extra strawberries)


Tiramisu

by Susan Smith in , ,


Here’s a novel way to spoil your mum with anti-ageing skin care this Mother’s day - treat her to tiramisu! You are what you eat, and this skin-loving dessert is rich in Vitamin E and healthy oils that are sure to get her skin glowing from the inside!

A fantastic confection made with a light tiger nut and almond sponge cake layered with sweet-tasting macadamia nut cream and a rich coffee/chocolate flavoured ‘ganache’, this is tiramisu re-invented - without sugar, dairy or grains.  

Boasting a wealth of antioxidants, essential vitamins, minerals and healthy fats from the ‘darlings’ of the nutritionally-aware foodie brigade - avocados, coconut oil/milk, raw cacao, tree nuts, tiger nuts and a little raw, unpasteurised organic honey (because I simply couldn’t ignore the skin-enhancing benefits of honey!) - this isn’t just tiramisu, it’s superfood! An unrecognisably healthy retro dessert so choc-a-block with nutrients you won’t believe it’s not the luscious (though sadly off the carbohydrate richter-scale!), Italian classic.

Primal Plate’s ‘light as a feather’ Tiramisu is part of my stay slim and gorgeous action plan to make low-carbohydrate/high fat eating (LCHF) a way of life even when the occasion calls for some sweet-toothed indulgence. Not only is this impressive dessert relatively low in carbs, you are nourishing your skin from the inside out by eating Vitamin E packed tiger nuts, almonds, avocado and coconut oil. Vitamin E is widely used in the cosmetics industry to help slow down the ageing of the body cells, improve the elasticity of the skin and reduce skin wrinkles. 

Whilst I maintain that you should never put anything on to your skin that you’re not prepared to put in to your mouth, It’s good fun to turn this beauty maxim on its head with a deliciously decadent dessert that can help every woman channel her inner goddess. Ingenious…the perfect solution to having your cake and eating it! Happy Mother’s day girls!

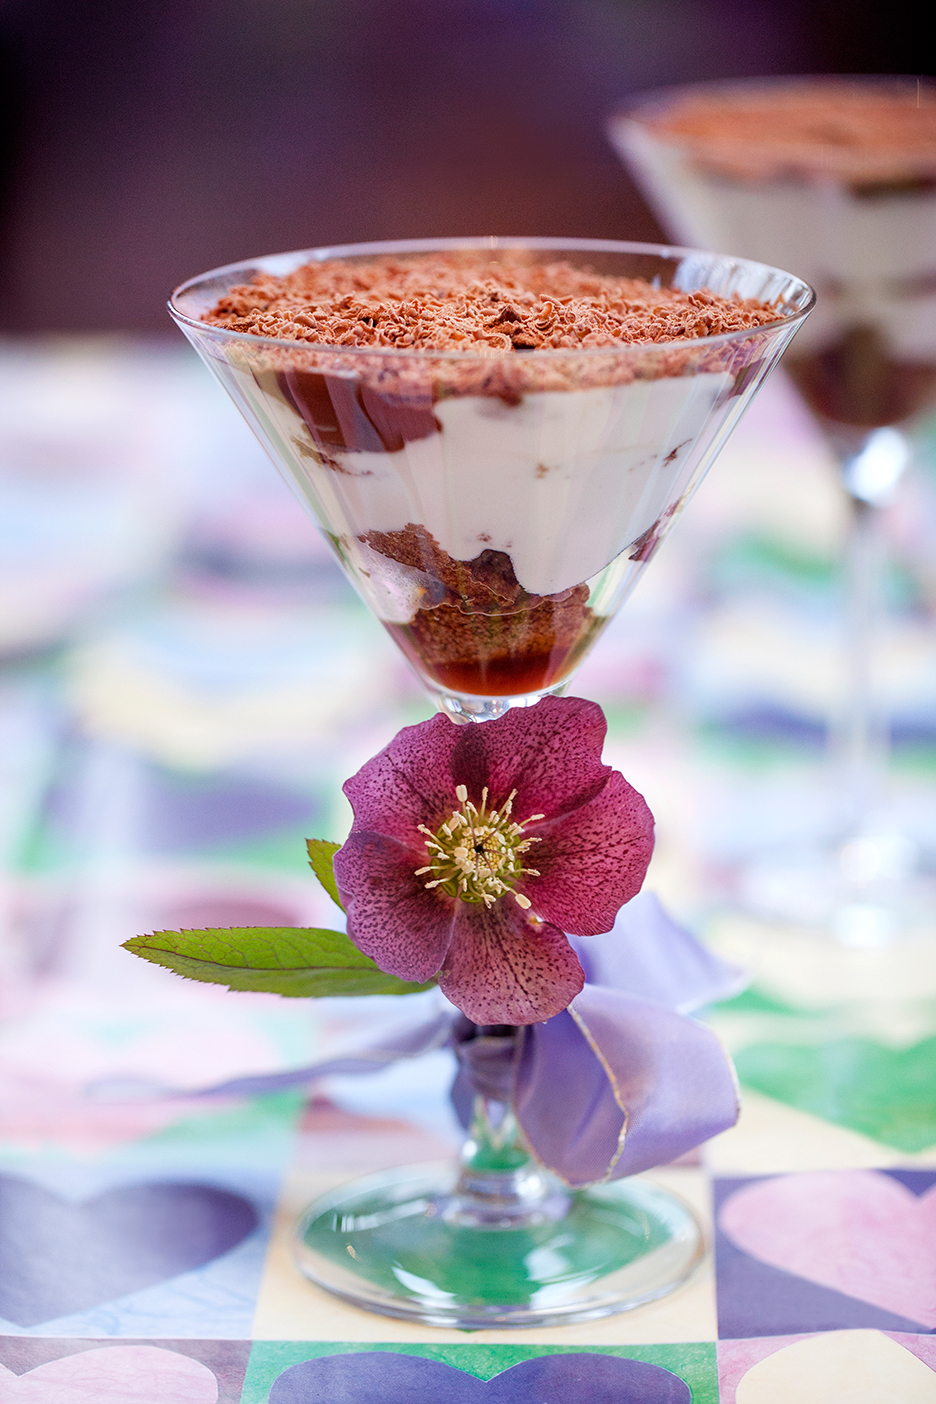
Tiramisu (makes 4-6 servings)

Ingredients - for the sponge layer            

45g unsalted butter    

60g organic tiger nut flour 

40g organic ground almonds 

1 tbsp raw cacao powder

pinch of sea salt

3 large eggs                            

75g Sukrin:1                             


Ingredients - for the nut cream layer            

125g macadamia nuts, soaked overnight in cold filtered water

250g full-fat coconut milk

20g raw organic honey

4 drops organic liquid stevia

1tsp pure vanilla extract (I use sugar-free Ndali)

25g coconut oil                


Ingredients - for the coffee/chocolate ganache layer            

2 ripe medium avocados (approx 350g unpeeled weight)

20g raw organic cacao powder

50g raw organic honey                                     

10-12 drops organic liquid stevia                 

1 tsp pure vanilla extract (I use sugar-free Ndali)                        

80ml espresso-strength coffee        


Ingredients - to assemble the tiramisu            

100ml freshly brewed expresso-strength coffee                

40 ml malt whisky                    

30g Sukrin Gold               

raw cacao powder, sifted                    

Sukrin no-sugar milk chocolate


Instructions - to make the sponge

Pre-heat the oven to 180°C / 350℉ / Gas mark 4

Melt the butter gently and leave to cool slightly. Use a little of it to grease a 23cm x 30cm (9” x 12”) swiss roll tin, then line the base and sides of the tin with a single sheet of baking parchment (cut down into the corners so that the paper lies flat against the sides of the tin).

Sift the tiger nut flour, salt and cacao powder in to a medium sized bowl. Stir in the ground almonds and set aside. 

Put the eggs and Sukrin:1 in a large heatproof bowl that will sit snugly over the top of a saucepan. Pour boiling water into the saucepan and sit the bowl on top. The hot water must not actually touch the bowl. Set the pan over a low heat so that the water is barely simmering. The steam will help dissolve the Sukrin and the mixture to thicken slightly.

Using a hand-held electric beater set on High, whisk the eggs and Sukrin sweetener together for about 6-8 minutes, or until the mixture is very pale, thick and mousse-like and has at least tripled in volume. It should hold its shape for a few seconds when it’s flicked across the surface of the rest of the mix.

Add one-quarter of the sifted flour/ground almond mixture into the egg and Sukrin mixture and very lightly and gently fold it in with a large metal spoon. Repeat 3-4 times more with the remaining flour/ground almond mixture - folding it in gently each time. When all the flour/ground almonds have been incorporated into the mix, carefully pour in the melted butter and gently fold this in too. N.B. Don’t be in a rush to do this and try not to be too heavy-handed - the idea is to retain as much air as possible inside the mix whilst at the same time bring everything uniformly together. 

Quickly pour the mixture into the tin - tilting the tin this way and that until the cake mixture has levelled itself out evenly in to all four corners of the tin - then bake in the oven for 20-25 minutes, until golden brown and firm to the touch. 

Leave to cool in the tin for a few minutes and then turn it out on to a wire rack to cool completely.

Once cooled, peel off the parchment paper and slice the cake into fingers or squares for making tiramisu or trifle.


Instructions - to make the nut cream layer

Rinse the macadamia nuts in fresh water then blitz all the ingredients together to form a smooth cream. Place in the fridge to set.


Instructions - to make the coffee & chocolate ganache layer

Blitz all the ingredients together to form a rich, smooth, chocolatey cream.


Instructions - to assemble the tiramisu

Make a fresh batch of espresso strength coffee, add the whisky and liquid stevia and pour into a shallow dish.

Cut the cold sponge into suitable sized cubes or fingers (whatever best fits your serving dish).

Layer 1: very briefly (2-3 seconds!) dip the sponge pieces into the coffee mixture until you can see that the liquid has risen about half-way up the depth of the sponge and lay the pieces one at a time as you go into the base of your serving dish(es) (I used 2.5cm / 1” squares for the base layer in 4 x 225ml martini glass)

Layer 2: Spoon over the nut cream layer and spread out evenly

Layer 3: Add a second layer of coffee-soaked sponge

Layer 4: Spoon over a second layer of nut cream and spread out evenly

Layer 5: Spoon or pipe over the coffee & chocolate ganache and spread out evenly

Cover and chill for 1-2 hours in a refrigerator. Then, when you’re ready to serve the tiramisu...

Layer 6: Sift over a fine layer of raw cacao powder

Layer 7: Use a small spoon to carefully transfer a generous, even layer of Sukrin sugar-free milk chocolate (straight off the plate it was grated on to) directly on to the top of each tiramisu - don’t try to sprinkle over the grated chocolate with your fingers as it will melt instantly!


Notes

The best diet for weight loss and maintenance is one that you can easily stick to. A low-fat/low calorie diet requires Herculean willpower because food without fat doesn’t taste good and oftentimes you still feel hungry. The joy of a low-carb/high fat diet is that you don’t count calories and the food you can eat is deliciously satisfying. Nevertheless, Primal Plate desserts and other sweet treats are delights to be enjoyed occasionally, not every day. You can achieve steady, effortless weight loss by limiting carbohydrates to between 50 grams and 100 grams per day - unless you are morbidly obese, in which case you may need to kick-start your body into burning fat by eating less than 50 grams of carbohydrate per day and avoiding tiramisu for the time-being! You can keep a tally of your carb intake at MyFitnessPal. If you then cross the line from time to time (without exceeding 150 grams of carbohydrate) a long, brisk walk should sort things out!

There is enough sponge cake in this recipe to make 6 tiramisu (or to have leftovers). The rest of the ingredients will make 4 very generous servings (it’s deliberate!). If you’re cutting carbs, have a small appetite or just more mouths to feed, simply divide the recipe between 6 smaller (150ml) serving dishes.

All the individual components of this dish can be made separately in advance. The sponge-cake will keep for up to 3 days in an airtight container, and both the nut cream and coffee/chocolate ganache will keep for several days in the refrigerator. You can also assemble the tiramisu up to and including layer 5, twenty-four hours before you want to eat it - finishing with the final flourish of raw cacao and grated chocolate just before serving. 

Although organic liquid stevia is a zero-carb, natural alternative to sugar, it can leave a slight aftertaste. To minimise this and to not miss out on the skin-enhancing benefits of honey, I’ve used a combination of stevia and honey to sweeten both the nut and coffee/chocolate creams.

I do not like overly sweet food, so this sophisticated, not-too-sweet dessert with a touch of alcohol is definitely one for the grown-ups. However, it can easily be adapted for children (or tomorrow’s breakfast!) by substituting a small/medium sliced banana (per serving) for the coffee/whisky soaked sponge and layering it with the nut and coffee/chocolate creams in the same way as described above. You may also want to add a little extra honey to the coffee and chocolate cream to make it more child-friendly. 

The cake mixture rises just enough to make it nicely spongy without being too thick. Firm yet really light in texture, it’s just made for soaking up the boozy coffee in this recipe and for making trifle generally. Once cold, it’s easily cut into neat fingers or cubes (Sarah loves to eat these plain) and is a brilliant substitute for those nasty trifle sponge fingers you can buy in the shops. 


Carbohydrate 25g Protein 11g - per serving (6 people)

Carbohydrate 36g Protein 15g - per serving (4 people)


Feeling Fruity Sweet-Hearts

by Susan Smith in ,


I know it’s Shrove Tuesday today, but with Valentine’s day in just five days time I’m playing to an audience of romantics with this stupendous, creamy, fruity dessert. That said, doesn’t everyone love cheesecake?

I am currently awash with recipe ideas, but when I was thinking out loud about what I could feature on Primal Plate’s blog to symbolise this celebrated upcoming ‘day of love’ Sarah informed me that firstly, no one in their right mind wants to cook when romance beckons and secondly, it mustn’t contain onion, garlic, spices or anything that makes you smell! Apparently, this meant my musings on Thai-inspired prawn curry was a definite no-go!

The rebel in me is now determined to cook Thai prawn curry and drink pink Champagne with my lover this Valentine’s day but, so no ‘young hearts’ be offended, I have also complied with Sarah’s brief for the perfect Valentine’s day meal (the main course will be posted on Friday). In the meantime, feast your eyes on this luscious dessert that should appeal to all lovers of good food, not just the romantically inclined.

You’ll probably need to order these heart shaped moulds straightaway if you want to surprise your Valentine with these Feeling Fruity Sweet-Hearts. My plastic cheese moulds arrived within a couple of days (whatever happened to those beautiful porcelain coeur a la crème moulds of yesteryear?), so hopefully you’ll have them in time. You then need to line them with a double layer of muslin (I obtained muslin squares from Lakeland) or a single layer of cheesecloth.

Although this sensational dessert looks like a ‘work of art’ on the plate, in accordance with Sarah’s remit, there’s no cooking involved, it takes minutes to assemble and both the ‘hearts’ and fruit coulis can be made a few hours in advance and kept refrigerated until you’re ready to serve them.

A delight to the eye and totally scrumptious to eat, I’ve deliberately put this dessert together as a generous sharing-plate for two. However, if those intimate ‘we wanna be together’ moments are likely to be hijacked by hungry longing or downright competitiveness - i.e. you or your partner has a tendency to eat more than their fair share - this recipe has enough ‘heart’ to fill two moulds! Alternatively, if you’re confident that your beloved would give you their last rolo, you can halve the cheesecake recipe and make just one - although I’d still make the full quantity of fruit coulis and have what’s left spooned over some Greek yogurt for breakfast.

Ignoring chocolate, I think Feeling Fruity Sweet-Hearts maybe one of the most ‘happy-ever-afters’ ever created!

Wishing everyone a very Happy Valentine’s, with all my love. x

Feeling Fruity Sweet-Hearts (Serves 2 + 2 people)

Ingredients - for the cheesecake hearts

200g full-fat ‘cream’ cheese (I used Longley Farm full-fat soft cheese)

200g organic, natural Greek yogurt

100ml organic double cream

2 tbsp organic raw honey

2 tsp organic lemon rind, finely grated


Ingredients - for the mango & raspberry coulis & fruit skewers

200g ready-cut fresh mango chunks (I used Waitrose own brand)

Juice of ½ lime (about 20ml)

Juice of 1 organic medium orange (about 90ml)

150g fresh raspberries 

1 heaped tbsp Sukrin icing sugar (or to taste) 

2 (or 4) strawberries, washed (with leaves intact) 

1 kiwi, peeled - 1 (or 2) slices cut from the middle of the fruit, then each slice halved 

2 (or 4) mango chunks (reserved from the above pack) 

1 (or 2) black grape(s) 

1 (or 2) mini bamboo skewers


Instructions - to make the cheesecake hearts

Line two heart shaped moulds with a double layer of muslin or a single layer of cheesecloth.

In a medium sized bowl beat the cream cheese, yogurt, honey and lemon rind together until smooth.

In a separate bowl half-whip the cream until it just begins to hold its shape, then using a metal tablespoon gently fold into the yogurt and cream cheese mixture until fully incorporated.

Divide between the two heart shaped moulds - bang them down several times on the worktop as you’re filling them to allow the mixture to settle evenly inside the moulds - then level off the tops, stand on a large flat plate, cover loosely with cling film and place in the refrigerator for 1½ hours.


Instructions - to make the mango and raspberry coulis

Place all but two (or four) of the best pieces of mango into a blender with the lime juice and half the orange juice. Blitz until completely smooth.

Scrape the mango puree into a clean bowl. The coulis should be smooth and a pouring consistency - runny enough to slowly ‘flow’ when you tilt it on the plate but not so runny that it won’t hold its shape. Cautiously add a little extra orange juice if it seems too thick. Cover and refrigerate.

Next, wash out the blender. Tip the raspberries with the rest of the orange juice and a heaped tablespoon of Sukrin icing sugar into the clean blender and blitz until amalgamated.

Pass the raspberry puree through a fine sieve into a separate bowl. Check the consistency (as above) and add a little more icing sugar if you think it is too tart. Cover and refrigerate.


Instructions - to make the fruit skewers and assemble the dish

First, prepare the fruit garnish by threading pieces of fruit onto mini bamboo skewer(s) in the following order: strawberry (leaf facing inwards), kiwi, mango, grape, mango, kiwi, strawberry (leaf facing inwards). Set aside.

Take a large flat plate and carefully pour or spoon a generous amount of the mango coulis on to one half of the plate - pick the plate up in both hands and tilt it one-way only so that it runs to the outside edge on its side of the plate.

Repeat the process with the raspberry coulis but in this case tilt the plate in both directions so that the two coulis butt right up to the edge of each other (roughly down the middle of the plate) and the raspberry coulis runs to the outside edge of the plate on its side. Do the same thing with a second plate if two couples are dining together.

Take the cheesecake heart(s) out of the refrigerator and working swiftly, carefully turn the heart(s) out into the palm of one hand, remove the muslin with your other hand and gently but swiftly place in the centre of the plate(s).

Place the fruit skewer(s) jauntily alongside (see photograph) and…

Ooh la la! Tuck in!

Notes

The origin of the word coulis is French, from couler, meaning ‘to flow’ - which should give you an idea of the consistency your fruit coulis needs to be for this dessert!

If you think it sounds too tricky tipping delicate cheesecake heart(s) directly into your hand, simply turn the hearts out onto their serving plate first and then carefully pour the coulis around them. 

If you you’re trying to lose weight you can sweeten the cheesecake cream with two tablespoons of Sukrin icing sugar instead of raw honey. This will reduce the carbohydrate grams per serving by 8.5 grams i.e. Carbohydrate 19.5g - not 28g, as shown below.


Carbohydrate 28g Protein 3g - per serving (half the sharing plate)


Poached Pears with Butterscotch Sauce and Almond Shortcakes

by Susan Smith in , ,


Pear and almond is a classy coupling, which is elevated to even greater levels of sophistication when combined with the flavours of toffee and butterscotch. Today’s recipe for Poached Pears with Butterscotch Sauce and Almond Shortcakes is the perfect make-ahead dessert for an elegant dinner party. Right on cue, it made a fantastic finale to our New Year’s Eve dinner party celebrations last night. Hello there 2016!

Pears, butterscotch, shortcake biscuits…it all sounds gloriously indulgent and a bit Fatty Arbuckle doesn’t it? However, as with all Primal Plate recipes, this dessert remains true to the healthy premise of no grains and no added sugar. The joy of eating Primal is that once you’ve reached your target weight (easily achievable it you stick to no more than 50 to 100 grams of healthy carbs each day), occasional indulgences won’t make the blindest bit of difference. No more wodgy, podgy or painful sensations from eating the wrong food, nor the post Christmas angst of feeling fat. Brilliant! The trick is to keep moving (a daily 2-3 mile walk in the fresh air should do it) and to not wander across the 150 grams of healthy carbs per day limit, which still allows you plenty of scope for sweet treats. 

Real food, sustainability and kindliness to all living creatures and the environment is my inspiration for writing this Primal Plate food blog. I hope that in 2016 more people will appreciate the benefits of a low-carb, low sugar, no grain, primarily vegetarian diet so that not only can we renew our own health and vitality but also be kind and mindful enough to allow this beautiful world in which we live the same privilege and freedom.

Wishing everyone a peaceful, healthy and Happy New Year.

Vanilla Poached Pears with Butterscotch Sauce and Almond Shortcakes (Serves 4)

Ingredients - for the poached pears

300ml filtered water

125g Sukrin:1 granulated stevia sweetener

rind of ½ organic lemon

1 dsp pure vanilla extract (I used Ndali)

4 firm, ripe pears (I used Williams)

Bay leaves, to decorate - optional


Ingredients - for the butterscotch sauce

160ml coconut cream

6 Medjool dates

25g raw cashew nut butter

1 tbsp pure vanilla extract (I used Ndali)

1 dsp brandy - optional


Ingredients - for the almond shortcakes

100g organic butter

200g organic ground almonds

60g organic tiger nut flour

50g Sukrin Gold

50g organic flaked almonds, lightly toasted            

1 tsp baking powder                

½ tsp sea salt

1 dsp pure vanilla extract (I used Ndali)


Instructions - to make poached pears

First, check the dimensions of your saucepan to make sure that it is the right size for the pears to fit snugly inside.

Bring the water, Sukrin icing sugar, lemon peel and maple syrup up to the boil then reduce the heat under the pan to a very low simmer.

Peel the pears. Leave them whole with their stalks intact, immediately placing each one into the syrup - turning it to coat - before continuing with the rest. 

Cook the pears with the pan lid on for 20 to 30 minutes or until they’re soft to the point of a skewer or sharp knife. 

Take the pan off the heat and allow the pears to cool in the syrup. When cold, store covered in a refrigerator until needed.


Instructions - to make butterscotch sauce

Remove the stones from the dates and roughly chop. Place in a high powered blender with the remaining ingredients (in the order as listed in ‘ingredients’) and process until smooth.

Serve with poached pears and almond shortcakes

Can be stored in the fridge for up to a week.


Instructions - to make almond shortcakes

Pre heat the oven to 130℃ (fan) / 150℃ / 300℉ / Gas mark 2

Melt the butter in a small saucepan over a low heat. Allow to cool for a few minutes.

Meanwhile, in a large bowl combine ground almonds, tiger nut flour, Sukrin Gold, baking soda, sea salt and flaked almonds.

Using a fork, stir in the cooled melted butter and vanilla essence to bring everything loosely together - then roll up your sleeves and with your hands squash the mixture into a ball of dough - it is a bit sticky and crumbly but don't be worried, be determined! 

Tip the dough onto a large piece of non-stick baking parchment. Place a second piece of baking parchment on top then flatten the dough out a little bit with your hands. 

Use a rolling pin to roll the dough out to about 6 to 8mm (¼ to ½ inch thick). 

Use a 7.5 cm (3 inch) plain cutter to cut out the biscuits. Once you are only left with scraps from the cutouts, bring the pieces together to create a ball, then roll it out again to the same thickness and continue cutting the biscuits out.

Place the biscuits onto a lined baking sheet, about one inch apart. Bake for 35-40 minutes until golden.

Cool on the baking tray for 5 minutes, then transfer the biscuits to a wire rack to cool completely. 

These shortcake biscuits will keep for up to a week in an airtight container.


Notes

The poached pears will keep for up to 5 days in a covered container in the refrigerator.

I love the intense toffee flavour of the Butterscotch Sauce and, when chilled, it's the perfect consistency for piping around the pears. However, if you want a simpler presentation, it can also be formed into elegant looking quenelles (oval scoops of cream formed between two dessert spoons) and served alongside the pears. Alternatively, if you're okay with diluting the butterscotch flavour, thin the sauce down with a little milk, whipping cream or even water until a pouring consistency is achieved, then spoon over or around the pears.

A list of suppliers for Sukrin sweeteners and grain-free flours can be found on Sukrin’s Home page


Carbohydrate 20g Protein 1g - per serving of butterscotch sauce

Carbohydrate 15g Protein 0g - per pear

Carbohydrate 6g Protein 4g - per shortcake biscuit